• Home
  • Posts RSS
  • Comments RSS
  • Edit
Blue Orange Green Pink Purple

featured post

Homemade Granola

Recently I tried making my own granola. It ended up being quite simple, and I recommend trying it yourself. Dakota and I both find most store-bought granolas way too sweet and full of "extra" flavors. So, my goal was to make granola that was simple, healthy and tasty.

Read More

Adventure Playground

The other day, I was talking with my mom and sister about adventure playgrounds. Specifically, the playgrounds full of scaffolding, piles of wood, old tires and rusty tools that were popular in England in the 1960s through 80s. (If you've ever seen the awesome documentary series 7 Up, they use the kids playing at an adventure playground as a framing device.) My mom, sister and I were laughing about how those playgrounds were weirdly dangerous but also extremely fun. I never really played at one, but apparently my sister really loved to use the saw at the adventure playground she went to when we briefly lived in London as children.

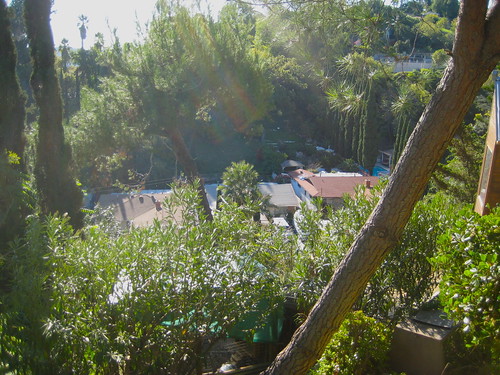
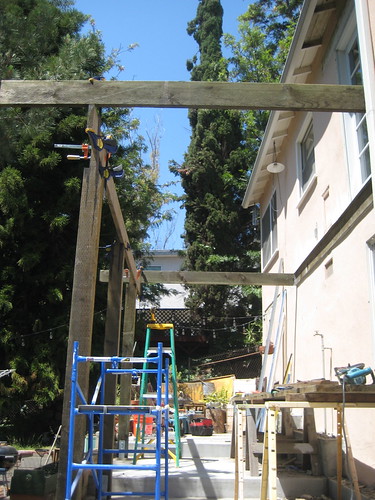
These days, most playgrounds are super-safe and rusty-tool-free, which is good, I guess. But I also think kids need to be able to scramble around and fall down and have "adventures" when they can. Happily, I think our backyard is turning out to be a private adventure playground for my son--and possibly his more rough-and-tumble friends.
playing in the yard
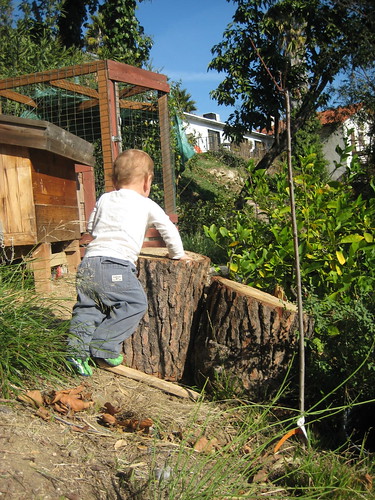
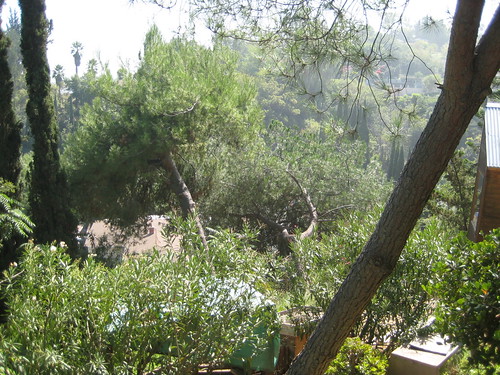
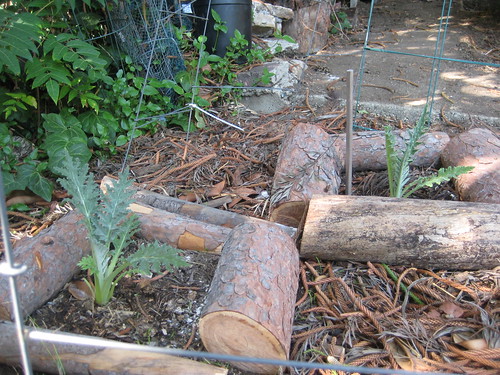
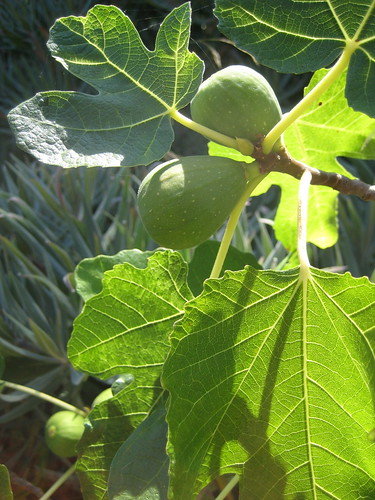
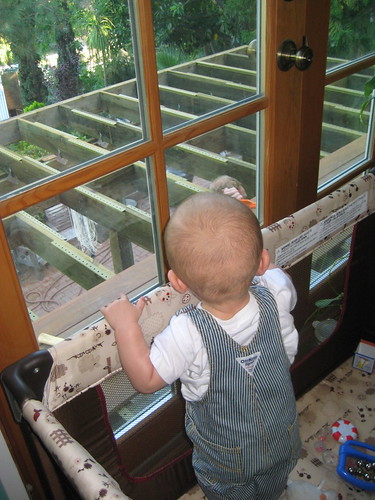
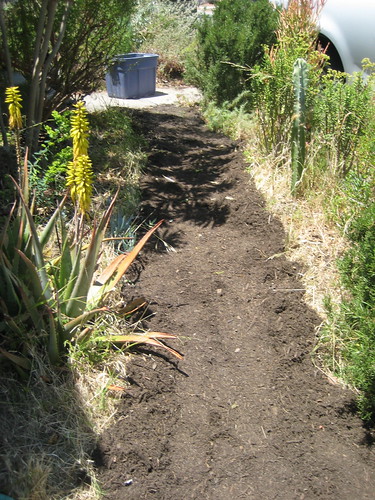
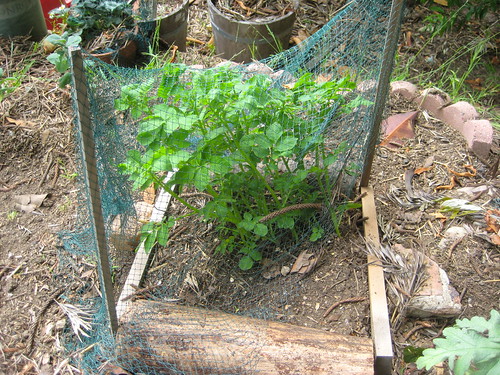
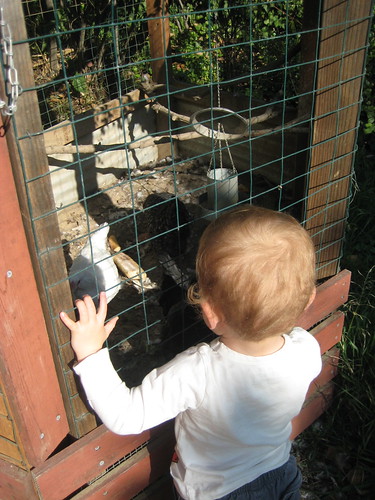
As my son gets older, he's starting to really love backyard playtime. In fact, today he ran right to the back door as soon as I suggested it. And why wouldn't he love it? There are rocks and pebbles to collect, stairs to climb, sticks to swing, buckets of dirt to dig in, plants to smell and hills to scramble up (and occasionally fall down). And, of course, chickens!
chicken watching
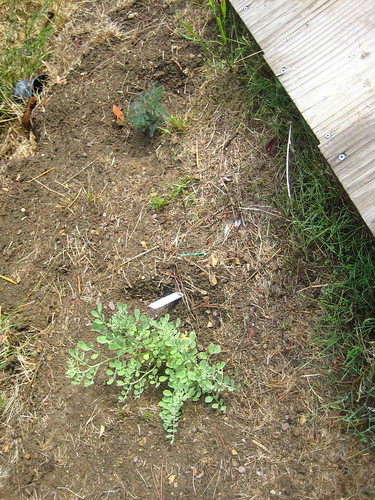
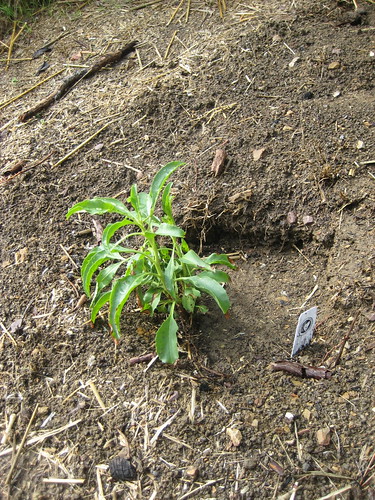
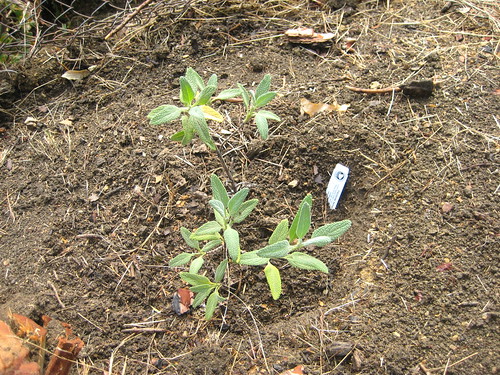
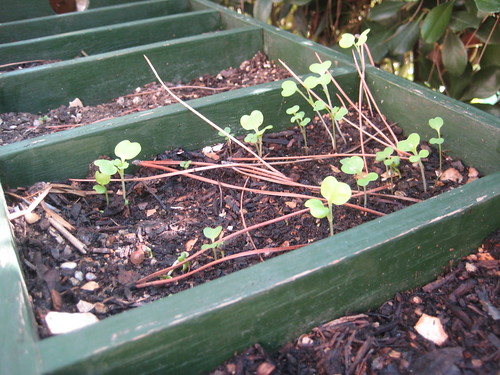
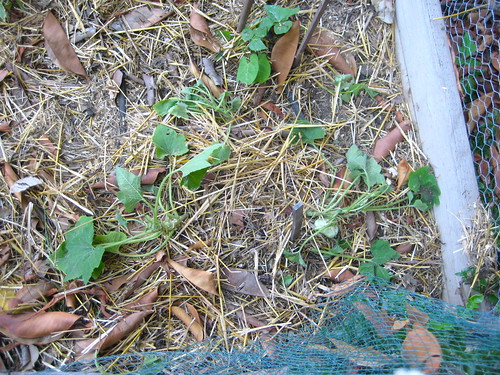
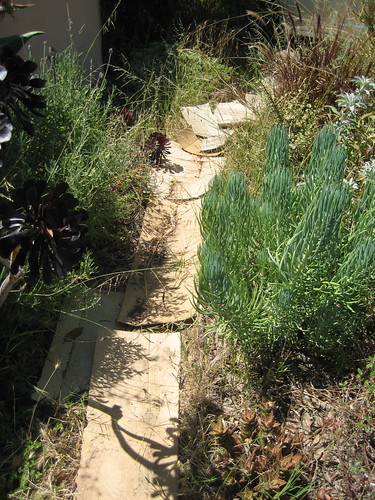
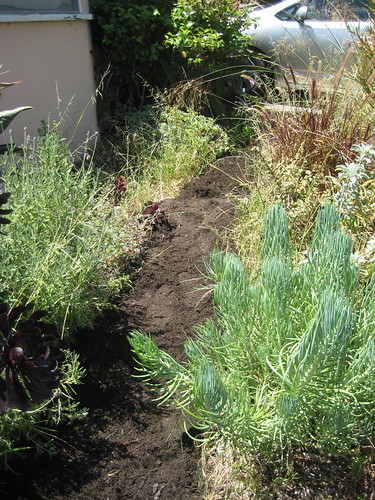
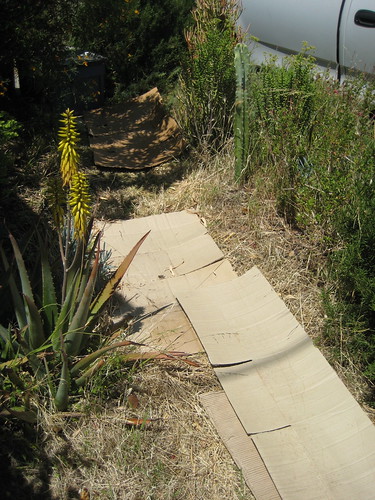
Yesterday, my son made his way around the yard while I tried to clear our some weeds so I can plant the awesome wildflower seeds my sister gave me for Christmas. It was really fun to watch him explore, and when he's just a little bit older we'll be able to spend even more time out there digging, playing and learning. I can't wait.
Read More 3 comments | Posted by Audrey |

Out with the Old Tree, In with the Sycamore

Back in October, we had to have another one of our big pine trees cut down. It was leaning down the hill in a pretty dangerous manner, and we decided we'd better remove it before it tumbled down the hill and caused a major traffic accident. (Thank goodness we did before that crazy windstorm at the end of November!) Here's the view before we took out the precariously leaning tree on the right.
before tree removal
And here's the view after. It's kind of nice to see more of the hillside across the way, but the yard feels pretty exposed now. We spend so much time back there, and I'd prefer a little more privacy--and shade.
after tree removal
To fill the hole, we decided to get a native California tree. This provided a perfect opportunity to visit the Theodore Payne Foundation. Do you know that I have never been there? I know, it's crazy. Theodore Payne is basically my dream nursery, and it's only 20 minutes or so away from my house. I have been meaning to visit for ages, but just never got around to it. So, I was pretty excited to go last month.

The nursery had a lot of great-looking native trees: oaks, pines, maples and sycamores. We went for a California Sycamore, because Dakota wanted a deciduous tree and we love the pretty white trunks and big, broad leaves. Our friends have a huge one in the back yard of their new house, and I am hopeful that this little guy will look that great someday.
new native plants
While we were there, I couldn't resist purchasing a few native plants to plant in the backyard. I went for a variety of flowering bushes that are supposed to attract lots of butterflies and birds. I planted three along the side of the stairs. On the left side I put an Otay Mountain Lotus and a Red Fairy Duster.
new native plants
And on the right, a Royal Penstemon. It likes well-drained, rocky soil and will produce showy purple flowers.
new native plants
I planted this Rocky Point Pitcher Sage near the California Sycamore. It's supposed to produce large white flowers with a "lavender blush."
new native plants
My hope is that the bushes and Sycamore will get established during the winter rainy season and really take off once Spring arrives. I can't wait to see all their flowers.
Read More 0 comments | Posted by Audrey |

Bathroom Progress

The bathroom remodel continues to progress, although I don't think it will be done by Christmas. I'm guessing the finish date will be sometime in late January. Still, much work has been done.

Dakota finished demolishing the floor and added several layers of subfloor, plus insulation. We have an open crawl space/basement below the bathroom, so quite a bit of cold air seeps in from below.
subfloor with insulation
Then, he ripped down all the bathroom walls and added denim insulation in between the studs on the exterior wall. Unlike the last time we insulated the walls, I did not have to drive down to Los Alamitos to get a roll of eco-friendly UltraTouch denim insulation. These days, you can pick some up at your local Home Depot.
insulation and walls
And, he removed the ugly metal window and installed the attractive wood one with a little transom at the top. Made by Dakota, of course.
bathroom remodel
As with everything, there are a lot of steps and small details that will make everything take more time than we'd like. Plus, all the work has to be done on weekends. But, overall, the remodel is progressing nicely. Next up, cement floor!
Read More 1 Comment | Posted by Audrey |

Spider and Her Babies

I saw this spider with her egg sac in the backyard last weekend. spider with egg sack
I hope they survived the rains.
spider with egg sack
Read More 0 comments | Posted by Audrey |

All I Want for Christmas is a New Bathroom

It's official. The bathroom remodel has begun!

For a little back story, let me just say that I really hate our current bathroom. It's a decent size, but there are many problems. My main issue is that it's got a separate shower and bathtub. Our house is very small (945 ft2), and we have barely any closet space, so to waste even a little space on a shower stall seems silly. Plus, the stall is badly vented so it gets mildewy and gross very easily. Then there's the cracked tile floor, shoddy cabinets and grubby, poorly caulked sink. Oh, and we haven't had knobs on the bathtub for about a year, which means we use vice grips instead. Classy! When you add it all up, it means that our bathroom never really looks clean, even after a good scrubbing.

We've been wanting to redo the whole thing for ages, and now that the deck is complete, Dakota is tackling the bathroom in earnest. Here's a "before"-ish picture. He's already removed the sink fixtures, drawers and cabinet doors, trim and part of the wall.

bathroom "before"-ish
The wall has actually been out for months after Dakota pulled a chunk down to see what he was up against. Here's the accursed shower stall.
bathroom "before"-ish
And the area around the toilet.
bathroom "before"-ish
The plan is...


  • New cabinets and cement counter top/sink
  • Remove the shower and make it into a hall closet
  • Tile around tub and make into shower/tub combo
  • Add radiant floor heating
  • Put in cement floors
  • New light and quiet vent fan
  • New window
  • New dual-flush toilet


We're keeping the tub and using inexpensive white hexagonal tile from Home Depot, so it shouldn't be too expensive when all is said and done (I hope).

Dakota took out the cabinets and floor yesterday. I guess the masonry underneath the tile was pretty weak and crumbly, so he took it all the way down to the subfloor.
bathroom demo

bathroom demo
The hope is to have it all completed in a little over a month. Since we only have the one bathroom, we need to have access to at least the bathtub and toilet most of the time. Hopefully that remains possible. At least one of us is in diapers and can be bathed in the sink in a pinch.

I am really excited about the prospect of a clean, well-organized bathroom and a hall closet. If it's done by Christmas, I won't need to ask Santa for a single thing.
Read More 2 comments | Posted by Audrey |

Late Planting

My winter garden went in late this year. I got distracted by other projects and chores, but managed to get some seeds in over a couple of weekends in mid-October. I decided to use seeds left over from last season, and they seem to be sprouting well so far.
In the upper bed, I planted chard, mustard greens, beets and turnips. Here they are covered by chicken wire to protect them from mischievous hens and annoying squirrels and skunks. They've grown a bit bigger, now, and I thinned them out last weekend between rain storms.

IMG_9405
The greens should grow fairly quickly, I hope, especially since I managed to work in quite a bit of compost from our bin. With the mix of kitchen scraps, chicken poop, leaves and straw, that compost should be full of nutrients.

I also planted pretty much the same mix of greens and root vegetables in the lower bed, plus peas, and some salad mixes in pots and planters.

IMG_9406
Oh, and my artichokes came back up for the Fall.

IMG_9410

Those logs are there to protect them from the previously-mentioned chickens. I really hope they work. I would so love to have some homegrown artichokes in a few months. Ramshackle Solid finally did it, so maybe I can, too.
Read More 2 comments | Posted by Audrey |

The Deck is Done, Dudes

It was a lot of hard work and heavy lifting (by Dakota), but our family now has a great-looking, comfortable deck. We've actually had it for a couple of months, but, as you may have noticed, I'm having a hard time juggling working motherhood and blogging these days. In my completely unbiased opinion, it's one of the nicest decks I've ever seen.

Here's the Ipe decking going down. It looks really great, and I'm excited that it doesn't need any stain or seal. Dakota used this installation system that means all the screws go in on the underside of the boards. So there are no nails or screws on the deck surface. As he says, it's like an interior floor.

IMG_8716
Here's the fencing clamped and ready to be screwed in. We had custom galvanized panels made with 2x2 inch wire squares. They let light and cool breezes through, but keep little ones safe.

attaching the fencing
Dakota installed a corrugated metal roof over about 2/3 of the deck to provide shade and shelter from rain. I think it looks really great, and it's kept the deck dry through some recent storms.

deck
We don't have a table out there yet, but we will soon. For the moment, we just have a couple of chairs and a lot of open space. It makes a great outdoor play area for our son.

deck
Read More 2 comments | Posted by Audrey |

Plants in a Baby's Room

As you might imagine, we have plants all over our house. I like the way they look, and some think they help with indoor air quality. So, when we were putting together my son's room, plants were part of the plan. I even got some cute vintage hanging planters off eBay But, as my son got older, I realized that, even if the plants were up high and safe from little hands, their falling leaves were not.

Like most babies, mine likes to put everything in his mouth. So, I did a little research and switched out some of the house plants in his room with less dangerous alternatives. I was happy to read that both Christmas cactus and polka dot plants both appear to be non-toxic. Both are attractive and easy to find, so I picked them up at my local nursery. (Of course, all these lists are really confusing, but I managed to find both listed on a couple of "safe" plant lists.)
hanging planter
My other idea was to pot some herbs, since, obviously, those are okay to eat. I don't have a photo, but I got a nice little thyme plant that's working out nicely. Pictured below are the polka dot plant and a little succulent that grows in a compact way that means it won't drop leaves.
new plants in the baby's room
I'm glad I was able to figure out a way to have plants in my baby's room. Growing things is such a big part of my life, and hopefully my son will feel the same way when he's older. For now, they add interest to his room decorations and he has fun helping me water them. Of course, I plan to prevent him from eating any dropped leaves or flowers, but hopefully if one sneaks past me, it won't make him sick.
Read More 0 comments | Posted by Audrey |

What Are You Growing This Winter?

September kind of snuck up on me, and I really need to get my winter seeds planted soon. In the past, I've had better success in my winter garden than in the summer. Los Angeles summers are so dry that it's hard for veggies to thrive. But winter is wetter, and greens seem to love the cool-but-not-freezing nights. Some of my favorite winter crops include turnips, arugula and, the best of all, chard. Oh how I love tasty, hearty and easy-to-grow chard.

Here's what I'm definitely growing this season:
- Arugula 
- Beets
- Chard
- Spinach
- Leaf lettuce

And I'm considering:
- Cabbage
- Kale
- Turnips
- Parsnips
- Snap Peas

What are you all planning to grow? Am I missing anything you particularly love in your winter garden?

I've tried broccoli and brussels sprouts in the past, but they are always viciously attacked by aphids before they really produce any flowers. If anyone has an awesome aphid prevention technique, maybe I can try them again. Fresh broccoli is pretty delicious.

Read More 3 comments | Posted by Audrey |

The Hose Technique

In the past, I have posted about my troubles rounding up chickens. If your hens don't want to go back in their coop after a session of free ranging, it can be pretty damn hard to convince them to do so. Chickens are fast and they can be surprisingly sneaky.
It's almost always a bad idea to chase an uncooperative hen, particularly for me, since my backyard is on a hillside. I'm more likely to fall on my butt than I am to actually nab one of my hens. But I don't want to have to keep the girls cooped up because they can't be trusted to return to the safety of their fenced-in run when I need to go to work. Luckily, I have come up with a new technique to herd them that I wanted to share.

hose technique

All you need to execute my newly discovered Hose Technique (patent pending) is a good, long outdoor house and a spray nozzle. With these tools, you too can herd your hens right back into their run in a manner of minutes. Here's how it works:

Stand in a location that allows you to see your chickens and their run. Then, start spraying short bursts of water behind them. This will startle them a bit, but it won't hurt them, even if you accidentally hit them in the butt with a little water. Basically, the water will annoy them, so they'll run in the other direction. Using their desire to avoid getting wet, you can herd the hens with water the way a dog would herd sheep. It takes a little practice, but it works really well for me, because I can spray a stream of water much more quickly than I can run back and forth shooing my hens.

In fact, now that I've used Hose Technique a couple of times, my hens start to head back towards their run as soon as the first spray hits nearby. They know that as soon as they get in the run, that weird water will stop showing up.

I know some folks may not enjoy startling their pet chickens, and this technique is not for everyone. But for me, if it's a choice between very rarely letting my girls free range and using the Hose Technique, the hose wins.
Read More 6 comments | Posted by Audrey |

Figs

Figs!
I have exactly seven figs growing on my little fig tree this year. They looking pretty good and my tree is having its happiest and healthiest year yet. So, I'm hoping to taste some fresh figs in another month or so.

I'm considering tying some shiny ribbon to the tree or using some other anti-bird technique to protect those seven fruits. But I don't think ribbon is going to keep squirrels away, and I suspect they're the biggest threat to my figgy dreams. Any suggestion?
Read More 2 comments | Posted by Audrey |

Cloth Diaper Washing

I've been cloth diapering my son for a little over a year now, so I thought this might be a good time to share  my diaper-washing method, in case other prospective parents stumble across this blog. First, let me say that, despite what you might have heard, cloth diapering is not difficult or expensive. Whenever I tell people my son wears cloth, they say, "Wow." Honestly, they shouldn't be impressed. Now, if I was doing EC, then they should say, "Wow," because that takes some serious commitment. But cloth diapering is no big deal.

Anyway, enough proselytizing. As I mentioned in a previous post, my son wears cloth pre-folds with waterproof covers. It seems like everyone has their own washing method, but here's what's kept my son's diapers clean and sturdy for the past year:

Note: I have a front-loading, high-efficiency washer.

Regular wash
1) Put dirty diapers, flannel wipes, covers and diaper pail liner into washer and run a "rinse/spin" cycle on COLD, no detergent. This is basically just to rinse off the, ahem, debris and keep stains from setting.
2) Add roughly 2 Tbl Sp of Planet 2x Ultra Laundry Detergent* and 1/2 cup of vinegar to the fabric softener section. Run the "heavy duty" cycle on HOT.
3) OPTIONAL: If the diapers are particularly dirty or stinky, I sometimes run an additional "quick wash" cycle on HOT with just Borax
4) Remove from washer. Hang cloth pre-folds and wipes on the clothesline, preferably in the bright sun. Hang the covers and diaper pail liner on an indoor line or drying rack, because the sun can degrade the plastic.
5) OPTIONAL: After the pre-folds are dry, put them in the drier for 10 mins just to soften them up a bit.

Stink removal
- For stinky pre-folds, I usually fill up a big bucket with cold water and about 2 cups of Biokleen Bac-Out, and soak the pre-folds in this mixture overnight.
- For stinky covers, Thirsties recommends that you run a wash with a small amount of chlorine-free bleach powder, like OXO-Brite. This method has worked for me.

And that's it! Honestly, if you use pre-folds, you can purchase enough so you only have to wash diapers every 3 days or so. Dakota and I both have full-time jobs, and don't find diaper-washing to be a major time suck.

And now for a baby photo, just because. This is my son watching his dad build the deck.

IMG_8706

* Planet is one of the recommended detergents on this cloth diaper detergent chart, and it's both cheap and wildly available.
Read More 2 comments | Posted by Audrey |

Jerk Chickens

chicken carnage
I know I tend to be kind of a chicken proselytizer, always playing up the benefits of chicken-keeping and how easy it is to have hens as pets. Well, there is a darker side to backyard chickens, which I will share with you now... Chickens are jerks.

Okay, much of the time chickens are perfectly nice, and maybe even funny or interesting. But, sometimes, they can be real a**holes, like when they break through fencing boundaries and dig up a bunch of your garden even though they have the whole yard to run around and scratch in and all you're asking is that they stay out of this one space!

Yes, the dirty little secret about backyard chickens is that they can be very destructive to your plants and vegetables. Last week, my hens somehow managed to break into the only two fenced-in areas of the yard and destroy several carefully-tended squash plants. Considering how minimal my garden is this year and how late I started growing things, this was a crushing loss.

When it happened, I was pretty furious. I mean, honestly, they have a HUGE amount of space for three hens. They have weed patches, dirt patches and lots of bushes and trees to hide under. But that wasn't enough for those girls. Oh no! They had to break into my garden.

I guess the moral of this story is that chickens are very curious. When they see a nice green plant surrounded by straw, they really want to get at it. So, build your fences well and watch those chickens closely, or you may find yourself in your backyard one evening shouting swear words at three clueless hens. (This may or may not have happened to me.)
Read More 5 comments | Posted by Audrey |

Here Comes the Deck

rebuilding the deck
Summer is here, and Dakota decided we were not going to go another month without our deck. Our house is small and we don't have central air conditioning, so it makes life so much better to have that extra outdoor space. The French doors in our kitchen/dining room open onto the deck, and when it was warm enough, we'd eat meals out there. I'm looking forward to doing that again, especially now that our son will be joining us.

Three weekends ago, Dakota got the structural part of the deck all built. Impressively, he did it all by himself, aided only by scaffolding and clamps. That dude is tough. The structure is made of treated lumber, but the actual deck itself will be built using Ipe.
rebuilding the deck
Ipe is a tropical hardwood that is so hard and dense that it's both rot and bug resistant. It also won't need to be sealed or painted. So, that means less work to install and maintain. Of course, it's also more expensive that traditional deck woods like cedar, but since our deck is fairly small, we think it's worth it. This Ipe is FSC certified, so it's supposed to be sustainably harvested. There's some argument on the Internet as to whether this is really possible when you're talking about wood cut down in the Amazon basin. Like many products marketed as sustainable, it's difficult for the consumer to know what to believe.

Dakota got a lot of the Ipe decking down last weekend, and should finish up this weekend.
IMG_8713
The wood starts out red, but will eventually fade to a grayish color, much like the unsealed cedar on the chicken coop.

After the deck is down, we're adding galvanized wire "fence" panels between the railing posts to keep all dogs and babies from falling. The hope is to eventually grow vines on panels for privacy and prettiness. There will also be a slanted roof over part of the deck, where we'll put a small dining table for the previously-mentioned outdoor dining.
IMG_8730
I can't wait to enjoy cool summer evenings as a family.
Read More 1 Comment | Posted by Audrey |

Coffee Tree

Coffee Tree
We're big coffee drinkers in our family, and, lately, Dakota has been interested in collecting various interesting coffee-making apparatus. So, for Fathers' Day, my son and I got Dakota the ultimate coffee connoisseur's gift: his very own coffee tree.

We picked up a nice-looking 1-gallon coffee tree at Mimosa Nursery in East LA. I read about this nursery several years ago on another Los Angeles gardening blog, and have always wanted to go there. Mimosa is the place to get interesting and exotic fruit trees in Los Angeles.

After a multi-freeway journey, my son and I arrived at Mimosa and were immediately helped by the very friendly owner. (I think he was the owner.) He even showed us over to a bigger coffee tree and gave us some of the red berries to take home and dry. We didn't stay long, but the large lot was covered with all kinds of interesting fruit trees--Jujube, Jack Fruit, Guava--and I definitely plan to go back soon and get something else soon.

The plan for this little coffee tree is to plant it into a larger pot for a while before putting it in the ground somewhere sunny. From what I can tell, a full grown coffee tree can produce a couple of pounds of beans a year. So, we'll be producing some very trendy small-batch, artisanal coffee here on our little urban farm. You can't get more gourmet than that!
Read More 3 comments | Posted by Audrey |

Tater Tots

Last month, I took some potatoes from our produce delivery service that sprouted in the pantry and planted them in my garden. I put very little effort into my potato patch, since it was more of a small experiment than a real effort to grow potatoes. Plus, I had a rather spectacular failure with potato growing a couple of years ago.

Well, a couple of weeks ago, I noticed the stalks had died back on all the potato plants, so I decided to go ahead and dig them up. My expectations were low, so I was happy to find a small cluster of tiny yellow potatoes buried under the dirt. I guess I ended up with around 3/4 of a pound. A small crop, but I was happy to have been successful.
potato crop
I roasted my little crop of tiny taters with olive oil, salt and pepper. They were very tasty! Was it the freshness or the sense of accomplishment? Who can say?

I think next year I might try to grow some more potatoes in a deeper hole. One thing I learned is, in Los Angeles, it's best to grow potatoes in the spring. I think last time the weather was too hot and dry when I started my crop, which made the stalks droopy, which caused me to over-water and rot my seed potatoes. That's my theory anyway.
Read More 1 Comment | Posted by Audrey |

Milk Cartons in the Blue Bin

Good news! Los Angeles residents can now recycle milk and juice cartons in our blue bins. According to a post on Mayor Villaraigosa's website yesterday:
Starting now, you can recycle cartons such as milk, juice, cream and egg substitutes as well as juice boxes, soup, broth, soy milk, and wine cartons. We are now the largest city in the state with a carton recycling program, solidifying our position as the number one recycling city in the nation.
We consume a lot of juice and milk at our house, and I always feel bad throwing those waxy cartons in the trash. Now I don't have to.

Speaking of Los Angeles recycling... I was perusing the Los Angeles Times website the other morning, and came across this excellent feature in the home section. It's called "Can I Recycle?" So far, they've covered plastic wrappers, mesh citrus bags, bottle caps, Tyvek and a few more. Check it out if you live in LA County, as various cities in the area are covered.
Read More 4 comments | Posted by Audrey |

Fresh Picked Strawberry

fresh strawberry
I picked this beautiful, bright-red strawberry from one of my potted plants last week. It was delicious.

I think next spring I'm going to try to grow a whole patch. I suspect my son will really enjoy picking and eating them right from the garden.
Read More 3 comments | Posted by Audrey |

City Mulch and Cardboard

Now that the native and low-water-use plants in front of our house are well established, I almost never need to water or tend to them. A couple of times a year, I prune some of the bushier plants back, and when it gets really hot and dry in the summer, I might give them an occasional deep soak. But, that's pretty much it. Despite my neglect, the plants are healthy and hearty and flower on a regular basis. It's great. I highly recommend xeriscaping your yard.

The only unfortunate side effect of this lack of attention is that the paths get pretty messy and weedy. Last spring, the weed situation got particularly bad (perhaps because our new neighbors let their yard turn into giant patch of dandelions and foxtails). I really didn't want to spend hours pulling up all those weeds, so I decided to go an easier route with cardboard and mulch.
path mulching

path mulching
Last week, Dakota stopped by a lot downtown that offers free mulch, courtesy of the The Los Angeles Bureau of Sanitation. They give away mulch and compost at several sites around the city. You can find a location near you here. Dakota filled up a few plastic bins worth, the perfect amount to cover our two small paths.

The mulch itself is very decomposed. It smells more like compost than pine trees, although the scent has faded now that it's been on the paths for a week. While the chunkier, bark-filled mulch might look and smell a bit better, this stuff worked out fine (and did I mention it was free?). I suspect the city lets it decompose more to kill all the weed seeds that are likely mixed in with the tree trimmings.
path mulching

path mulching
Before spreading the mulch, I lay down some pieces of cardboard to provide an additional weed barrier. I didn't cover everything perfectly, but, as you know, I'm in a lazy gardening phase. I honestly think the combination of random pieces of cardboard and a thick layer of city mulch should work pretty well for a while. I guess we'll find out this coming spring.
Read More 2 comments | Posted by Audrey |

Kitchen Coverage

finished kitchen
Long-time readers of this blog know that our kitchen remodeling project was an epic undertaking. Dakota took everything down to the bare bones and then slowly and carefully rebuilt the entire space. It took a looooooong time, mostly because Dakota was building the kitchen on nights and weekends, but the project was completed several months ago. If you're wondering, it functions beautifully and looks amazing.
finished kitchen
In fact, there's recently been some really great coverage of our kitchen that I wanted to share.

A brand-new online design magazine called Collected did a feature on Dakota's business. They had a photo shoot at our house and got some really great-looking images of the kitchen. Then, the blog you have been here sometime did a small write up and shared some kitchen photos as well. Click the links for the articles and images. (The photos in this post are by me.) 
IMG_8232
You can also see some nice, professional shots of the kitchen--as well as lots of his other work--on Dakota's recently revamped website: todosomething.com

I'm happy that all Dakota's hard work (and the work of his business partner, Chad) is being recognized. Hopefully the attention will lead to more opportunities for him to make other people's kitchen dreams come true. Here at home, the next big project is a new deck. Yippie!
finished kitchen
Click here, here and here for some "before" photos.
Read More 3 comments | Posted by Audrey |

The Lazy Potato Grower

IMG_8215
For some reason, the potatoes we get in our produce delivery box sprout a lot more quickly than the ones we get at the store. I'm guessing it has to do with their freshness and variety. The ones above started growing little stalks after a few days--or at least that's how it seemed.

Rather than chuck them in the compost bin, I decided to plant these taters and see what happened. I had a rather spectacular failure trying to grow potatoes in bags, so this time I just dug a deepish hole in the upper garden bed and buried them, with room to add more dirt and compost as they grew.

To my delight, they shot right up! What's nice about potatoes is that the stalks grow extremely quickly. I planted the sprouted potatoes in late March, and by mid-April they were in need of some more serious mounding. So, I built a little wood barrier around the plants and buried them a bit more. If I had more time, I'd build it even higher. But I think one level will have to do for this year.
potatoes
Since I haven't grown potatoes successfully before, I did a little check last weekend to see if the plants were actually producing new tubers. I dug up two stalks on the edge of this patch, and, happily, found some teeny tiny baby potatoes growing deep down in the soil. So, I may actually get some homegrown potatoes this year, if I can keep curious chickens and evil skunks away.

I think they key in Southern California is to plant potatoes in the late Spring. Once summer really begins, the plants have difficulty in our dry heat. At least that's my experience.
Read More 1 Comment | Posted by Audrey |
Newer Posts Older Posts Home

GREEN FRIEDA

  • About
      This blog is about a variety of things I'm interested in, including gardening, backyard chickens, crafts, DIY home improvement and resource efficiency. My hope is that it's both informative and fun to read. I hope you like it. If you want to email me, click here.
  • Labels

    • animals (8)
    • baby (7)
    • bathroom (4)
    • cactus (1)
    • canning (1)
    • charities (3)
    • chickens (79)
    • compost (1)
    • crafts (9)
    • energy (8)
    • environment (24)
    • food (61)
    • gardening (137)
    • gifts (7)
    • good girls (10)
    • holiday (6)
    • home improvement (27)
    • insects (2)
    • kids (4)
    • kitchen (16)
    • native plants (16)
    • orchard (6)
    • pests (14)
    • politics (6)
    • reuse (16)
    • tips (10)
    • tree (1)
    • waste (2)
    • water (9)
    • wedding (2)

    Blog Archive

    • ►  2014 (5)
      • ►  June (2)
      • ►  May (1)
      • ►  April (2)
    • ►  2013 (20)
      • ►  November (3)
      • ►  June (6)
      • ►  March (5)
      • ►  February (3)
      • ►  January (3)
    • ►  2012 (13)
      • ►  September (1)
      • ►  August (2)
      • ►  July (2)
      • ►  May (1)
      • ►  April (2)
      • ►  February (1)
      • ►  January (4)
    • ▼  2011 (33)
      • ▼  December (3)
        • Adventure Playground
        • Out with the Old Tree, In with the Sycamore
        • Bathroom Progress
      • ►  November (5)
        • Spider and Her Babies
        • All I Want for Christmas is a New Bathroom
        • Late Planting
        • The Deck is Done, Dudes
        • Plants in a Baby's Room
      • ►  September (1)
        • What Are You Growing This Winter?
      • ►  August (3)
        • The Hose Technique
        • Figs
        • Cloth Diaper Washing
      • ►  June (7)
        • Jerk Chickens
        • Here Comes the Deck
        • Coffee Tree
        • Tater Tots
        • Milk Cartons in the Blue Bin
        • Fresh Picked Strawberry
        • City Mulch and Cardboard
      • ►  May (2)
        • Kitchen Coverage
        • The Lazy Potato Grower
      • ►  April (4)
      • ►  March (1)
      • ►  February (4)
      • ►  January (3)
    • ►  2010 (34)
      • ►  November (3)
      • ►  October (2)
      • ►  September (4)
      • ►  August (5)
      • ►  July (3)
      • ►  June (3)
      • ►  May (1)
      • ►  April (6)
      • ►  March (5)
      • ►  January (2)
    • ►  2009 (94)
      • ►  December (6)
      • ►  November (8)
      • ►  October (6)
      • ►  September (6)
      • ►  August (9)
      • ►  July (13)
      • ►  June (12)
      • ►  May (12)
      • ►  April (3)
      • ►  March (8)
      • ►  February (6)
      • ►  January (5)
    • ►  2008 (54)
      • ►  December (4)
      • ►  November (3)
      • ►  October (3)
      • ►  September (3)
      • ►  August (7)
      • ►  July (6)
      • ►  June (9)
      • ►  May (2)
      • ►  April (2)
      • ►  March (4)
      • ►  February (7)
      • ►  January (4)
    • ►  2007 (16)
      • ►  December (3)
      • ►  November (1)
      • ►  October (3)
      • ►  August (3)
      • ►  May (2)
      • ►  April (2)
      • ►  February (1)
      • ►  January (1)
    • ►  2006 (28)
      • ►  November (1)
      • ►  October (3)
      • ►  August (3)
      • ►  July (1)
      • ►  June (4)
      • ►  May (5)
      • ►  April (1)
      • ►  March (5)
      • ►  February (2)
      • ►  January (3)
    • ►  2005 (10)
      • ►  December (1)
      • ►  November (1)
      • ►  October (2)
      • ►  September (1)
      • ►  July (1)
      • ►  June (4)

    Related Blogs

    • Homegrown Evolution
      Framed
      3 years ago
    • DigginFood
      How to gain popularity through buying Twitter followers
      8 years ago
    • The Tangled Nest
      The First Egg: Light, Life, and Gratitude
      9 years ago
    • Monkey Lobster
      Summer Slide Show
      10 years ago
    • Rambling LA
      LOSING YOUR LAWN
      11 years ago
    • Rancho Garbanzo
      3 1/2 years later - Our Wedding Photobook
      11 years ago
    • Urban Chickens
      Infographic time: the chicken coop checklist
      12 years ago
    • Ramshackle Solid
      Hoop and Pole
      12 years ago
    • Our Yellow House
      Still Knitting
      12 years ago
    Show 5 Show All
    Follow GreenFrieda on Twitter

    Links

    • Backyard Chickens
    • Tree People
    • Seed Savers Exchange
    • L.A. Works
    • to do something
    • Mohair Gravy

    Followers

  • Search


    • Home
    • Posts RSS
    • Comments RSS
    • Edit

    © Copyright Green Frieda. All rights reserved.
    Designed by FTL Wordpress Themes | Bloggerized by FalconHive.com
    brought to you by Smashing Magazine

    Back to Top