• Home
  • Posts RSS
  • Comments RSS
  • Edit
Blue Orange Green Pink Purple

featured post

Homemade Granola

Recently I tried making my own granola. It ended up being quite simple, and I recommend trying it yourself. Dakota and I both find most store-bought granolas way too sweet and full of "extra" flavors. So, my goal was to make granola that was simple, healthy and tasty.

Read More
Showing posts with label tips. Show all posts

The Hose Technique

In the past, I have posted about my troubles rounding up chickens. If your hens don't want to go back in their coop after a session of free ranging, it can be pretty damn hard to convince them to do so. Chickens are fast and they can be surprisingly sneaky.
It's almost always a bad idea to chase an uncooperative hen, particularly for me, since my backyard is on a hillside. I'm more likely to fall on my butt than I am to actually nab one of my hens. But I don't want to have to keep the girls cooped up because they can't be trusted to return to the safety of their fenced-in run when I need to go to work. Luckily, I have come up with a new technique to herd them that I wanted to share.

hose technique

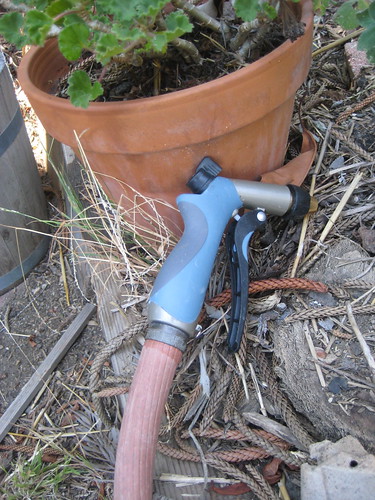
All you need to execute my newly discovered Hose Technique (patent pending) is a good, long outdoor house and a spray nozzle. With these tools, you too can herd your hens right back into their run in a manner of minutes. Here's how it works:

Stand in a location that allows you to see your chickens and their run. Then, start spraying short bursts of water behind them. This will startle them a bit, but it won't hurt them, even if you accidentally hit them in the butt with a little water. Basically, the water will annoy them, so they'll run in the other direction. Using their desire to avoid getting wet, you can herd the hens with water the way a dog would herd sheep. It takes a little practice, but it works really well for me, because I can spray a stream of water much more quickly than I can run back and forth shooing my hens.

In fact, now that I've used Hose Technique a couple of times, my hens start to head back towards their run as soon as the first spray hits nearby. They know that as soon as they get in the run, that weird water will stop showing up.

I know some folks may not enjoy startling their pet chickens, and this technique is not for everyone. But for me, if it's a choice between very rarely letting my girls free range and using the Hose Technique, the hose wins.
Read More 6 comments | Posted by Audrey |

Coop Cleaning Tools

IMG_7602
I've written a lot in the past about the fun of owning chickens: the fresh eggs, the entertainment factor, and the comfort of knowing your eggs come from well-cared-for hens. All these things are great, but there is some drudgery involved in owning chickens. Specifically, you've got to clean that coop.

I clean our chicken coop once a week. Now the we have five chickens, it could probably use a twice-weekly cleaning, but, well, we have full-time jobs and a baby, so... that's not going to happen. Every Sunday, I give the coop a thorough scrubbing, which involves removing and cleaning the slatted floors, changing the straw and washing and refilling the waterers.

The key to easy coop cleaning is to have a couple of simple tools to help you efficiently remove all the chicken poop and gather up the soiled bedding. Most of the tools I use to clean my coop come from the hardware store. They include:
  • Sprayer hose: You need a good, hard stream to spray the poop off any of your detachable coop parts (perches, removable floor, food and water containers)
  • Metal dust pan: This is great for scooping up dirty straw and shavings (and dumping them on your compost pile)
  • A cheap metal wall scraper: This tool is extremely handy for scraping off dried-on poop and gathering up shavings hidden in a corner
  • An old metal barbecue brush: If you really need to scrub a dirty perch or coop floor clean, these can work great. Just make sure you mark it so no one accidentally uses it on your grill.
Once I've removed the poop and dirt from the various coop parts, I set them to dry in the sun for extra stain and odor removal. Of course, I'm lucky to live in Southern California, where it's sunny and dry more often than not.

Depending on the type of run you have, you'll probably also need a shovel or heavy garden rake to turn the dirt floor. You might also want to clean your water containers with vinegar every once in a while to get rid of any gunk that might have built up.

But really, that's it. The whole coop-cleaning process takes me about 20 or 30 minutes of active time, with an interval while I wait for the removable floor to dry. And if it's rainy, I just skip the spray-off step and scrape as much poop as possible off using my wall scraper.
Read More 2 comments | Posted by Audrey |

Random Chicken Wisdom, Part 1

sisters

Every once-in-a-while, someone contacts me through this blog looking for advice about chickens. Since I am always happy to lure more people into the life of backyard chicken-keeping, I usually set up a little meeting with my new blog friends (if they're local), and proceed to lay all my chicken knowledge on them. Hopefully, they find it helpful.

A couple of months ago, while preparing to meet with my new chicken-friend Noah, I started thinking about my top chicken tips. What have a learned in my two years of chicken ownership that would be worth sharing with others? After mulling it over for a while, I came up with the following random assortment of tips, all pulled from personal experience. I hope any of you who are contemplating chicken ownership find this advice useful.

Peggy in a corner

Be careful where you purchase your chicks or chickens.

Unfortunately, I learned the hard way that it really matters where you get your chickens. My first two hens, Jackie and Lisa, died of Marek's disease, which I suspect they caught due to the less-than-sanitary conditions at the feed store where I bought them. I lost another pullet, Becky, to respiratory disease because of similarly shady sanitation at a different feed store. These losses were very sad, but you can avoid my mistakes by making sure you get your chickens from a clean feed store or directly from a hatchery.

At the feed store, make sure the day-old chicks are kept separate from other animals in a clean, well-ventilated brooder. Examine the chicks or hens carefully before you buy them. Look for signs of disease--listlessness, funny smell--and overall cleanliness. Ideally, get your chicks from a place that only sells chicks. Just-hatched chicks are usually disease-free; they catch diseases from the older fowl around them.

Start with at least 3 hens.

Hens need friends, so you should definitely get at least two chickens, but three is safer. That way, if you lose a chicken to disease or predators, you won't end up with one lonely hen. You can always get a replacement chicken, but hens that are raised together from the beginning tend to get along better. Plus, three hens are really no more trouble that two. In fact, odds are you'll be lusting for more chickens by the time your first batch gets to laying age--if not sooner.

IMG_1838.JPG

Plan for predators.

When it comes to predators, chickens are, um, sitting ducks. They don't really have any way of protecting themselves, so it's your job to keep them safe. The best way to do this is to build a very secure coop and run, considering all the possible predators that might come after your girls or their eggs. In most urban/suburban environments, these include: raccoons, skunks, rats, dogs and snakes. We also have foxes and coyotes in our neighborhood, although I've never seen them in the yard. Still, I'd rather be safe than wake up to a bloody chicken crime scene.

Here are some coop-building tips that have kept our chickens safe from predators for several years:


  • Elevate your coop to keep predators and pests from burrowing underneath and/or making their homes below your chickens
  • Bury wire or metal at least 6" deep around the edge of your run to keep predators from digging under the walls
  • Put a protective barrier--metal, wood or hardware cloth--up to chicken-height around the base of your run. This will keep raccoons from reaching in and grabbing your hens (it happens)
  • Lock your doors and windows. Some animals are crafty enough to open coop doors that are simply closed and not latched
  • Chicken wire is too wimpy. Use a heavy-gauge wire fencing that can stand up to clawing, jumping or biting
If you follow these rules and build a secure coop and run, you'll save yourself a lot of worry. Our run is such a fortress that we don't even have to close the coop door at night, or wake up early to open it in the morning. We can even leave our chickens for the weekend without hiring a sitter.

Never chase a chicken!

As I learned during the Great Chicken Escape of 2008, chasing a chicken is usually a bad call. They may be small, but most hens are both quick and wily. If you try to chase a chicken down, you will likely end up out of breath, frustrated and yelling swear words your hen. So, if you need to get your hen to go back into her run, I highly recommend using trickery or bribes.

One of my best tricks involves pretending to find something extremely exciting in the dirt or straw. Basically, I scratch around in the soil with my hands and act all excited. Chickens are pretty curious--and greedy--so they'll probably come running to see what you've found. The scratching in the dirt trick works pretty well on my hens, and as you get to know your girls, you can discover what peaks their interest and use it against them later.

To bribe your chickens, food is the obvious choice. This can range from a handful of weeds to a special treat like meal worms or their favorite fruit. It really depends on your chickens' taste and how much they want to stay outside. Sometimes, you can even trick your hens with a fake bribe by shaking their feeder or bringing out the scoop you use to refill their feed. Chickens aren't as dumb as you might think, though, so don't use the fake out too often or they'll stop trusting you.

Peggy in the corner

Well, I think that's all the chicken wisdom I can dispense for today. I have a few more thoughts that I'll share in a second post soon. For now, I hope you find this information useful and that perhaps it starts you on the road to getting some hens of your own. It is baby chick season after all!
Read More 3 comments | Posted by Audrey |

House Plant Sitter

After spending most of the year at home, we finally took a vacation earlier this month. Dakota, Nigel and I loaded up the car and drove up to Portland to see family and friends. We were gone for over a week.

Since Nigel came along, we only needed someone to come over every other day to check on the chickens and grab the mail. A chicken-sitter was surprisingly easy to find. I guess the fresh eggs are totally worth it.

To keep my indoor plants alive without creating additional work for the chicken-sitter, I decided to try something I saw on the Craft Magazine blog a while ago. It's a simple house plant wicking system involving a bowl of water and some strips of cotton. (Full instructions at the link.) The whole thing took about 10 minutes to set up.

Here are my plants the day we left on our trip.

And here they are 9 days later, when we arrived home.

The houseplants look just as green and healthy, if not more so, than they did when we left. The strips of cotton--in this case cut from an old undershirt--wicked the water out of the bowl and kept the plants' soil evenly moist.

The large bowl seems to have just lasted the 9 days in a relatively cool house. I am guessing that in the summer the water might go a little more quickly. Still, I recommend this method for the next time you go on vacation. It's much nicer than coming home to dead or dried-out plants.
Read More 0 comments | Posted by Audrey |

There Will Be Bugs, Part 2

As I mentioned in the first half of Tip #4, in an organic garden, bugs are inevitable. Here are a few more I've encountered in my Los Angeles garden.

isopods on compost

Pillbug (aka Isopod)

Pillbugs, also called sow bugs or isopods, are actually crustaceans, not insects. I find them all over the place in my yard, but they particularly like my compost pile. This makes sense, because isopods' food of choice is decaying plant matter. Isopods play a key role in any organic garden by breaking down leaves and other plant matter into the soil, enriching it with all that healthy organic content. Occasionally, pillbugs will eat small seedlings or plant roots, but I've never really had much of a problem with that. The U.C. Davis website recommends watering in the morning so your soil dries by night to help control the population. To keep my pillbug population down, I pour my compost on the ground and let the chickens snack on the bugs for a few minutes before spreading it in the garden. (You have to watch the chickens closely, though, or they'll scratch the compost around and fling it all over the yard.)
Verdict: Mostly friend
Telltale signs: Little grey, shell-wearing wandering around the soil surface
How to get rid of them: Manage soil dampness, let your chickens eat them, or, you know, just let them be.

Aphid

I probably hate aphids more than any other garden pest. They are sneaky and small and extremely difficult to eliminate. Plus, it takes forever to wash them off of greens when you're trying to make dinner. I have lost many a broccoli, kale or brussels sprout plant to aphids and their evil sap-sucking. These tiny green or grey bugs latch onto the bottoms of leaves and suck out all their juices. Leaves with infestations turn white or yellow and eventually die. Aphids multiply quickly, so if you notice them on a plant, it's best to get rid of them right away.
Verdict: Foe
Telltale signs: Yellow or white withering leaves, small groups of grey or green bugs on the underside of leaves.
How to get rid of them: Ants "farm" aphids, so one way to keep them from ever appearing is to keep ants out of your garden. You can try sprinkling dioatomaceous earth or boric acid around plants to kill the ants. When aphids appear, try spraying your plants with an organic soap spray. I've had limited success with this method. The best method is to encourage beneficial insects like ladybugs and praying mantis, which both eat aphids. I don't have many ladybugs in my garden, but when they do show up, they really do a great job of gobbling up aphids. I also suggest pull any plants where the aphid infestation gets really bad.

More garden insect resources:
U.C. Davis "How to Manage Pests"
Northwest Coalition for Alternatives to Pesticides
Read More 0 comments | Posted by Audrey |

Tip #4: There Will Be Bugs

If you're growing a garden, one thing you can count on is that there will be bugs. If you're growing fruits and vegetables organically, there will be LOTS of bugs. Some will be friendly, many will be annoying and a few might be worth killing. Of course, the insects in any garden vary by region, crop and landscape. Here are a few I have encountered, and some lessons I've learned while trying to deal with them.

big ol' green caterpillar
Tomato Hornworm

These chubby green caterpillars are are pretty common in summer gardens, from what I can tell. I have certainly had them every year I've grown tomatoes. In their behavior, they act very much like the main character in a book my dad used to read me, The Very Hungry Caterpillar. That is to say, they eat and eat and eat everything in their path. Primarily, they go after the leaves of my tomato plants. But, they will also take a nice big bite out of an unripe fruit, which is pretty frustrating. And speaking of frustrating, tomato hornworms are the exact same color green as a tomato plant, so they can be difficult to find.
Verdict: Foe
Telltale signs: Large chunks of leaves missing, entire stems stripped of leaves, bites out of fruit
How to get rid of them: The best way for a small gardener is to find and pick off tomato hornworms by hand. They are kind of gross to touch when they get big and squishy, as in the image above, so wear gloves if you need to. As I mentioned, tomato hornworms tend to blend in, but you can sometimes find them by following their poop. Tomato hornworm droppings can looks like tiny black bits of dirt on a leaf or, if the caterpillar is really big, large green bits. I usually spend a couple of minutes in the morning looking over my tomato plants, scanning for bites out of leaves and then turning those leaves over to look for caterpillars. When you find one, pick it off with your hands and feed it to your chickens. (If you don't have chickens, you can drown them in a bucket of soapy water.)

Spider Mite

I have had a couple of infestations of spider mites on my eggplants. The mites themselves are tiny red bugs, and they make fine webs over and between the leaves of plants. Eventually, the leaves with the webbing die. While they're not as immediately destructive as other garden pests, they're not very good for a vegetable crop, so it's best to get rid of them when they appear.
Verdict: Foe
Telltale signs: Fine webbing over leaves, tiny red dots on leaves (those are the mites)
How to get rid of them: Some people use soap sprays, but I have found that the best way to get rid of spider mites is to just blast them with water using a hose sprayer. Every night for a week or so, blast both the top and underside of leaves with a strong spray of water. This knocks off the mites and also creates humidity, which spider mites hate. It takes about a week, but usually I can get rid of spider mites with this method.

white fly spirals on underside of leaves

Giant Whitefly

Giant whiteflies make a fluffy, white "beard" on the underside of leaves, eventually destroying them and weakening the plant. (I once had a hibiscus in my front yard that was completely infested with whiteflies, and eventually I had to take it out.) Despite their name, giant whiteflies are pretty small. They look like tiny, white bugs fluttering around your plant. This year, I found a few giant whitefly egg spirals on the bottom of my pepper leaves (see above). Thus far, they haven't taken hold on any of my plants, so I am not too worried. But I am keeping an eye on my peppers and checking the underside of leaves often for more spirals.
Verdict: Foe
Telltale signs: Small, white spirals on the underside of leaves, or, later, a white, hairy substance on underside of leaves.
How to get rid of them: Remove leaves with spirals. If whiteflies infest your plant, try a soap spray. This is supposed to work fairly well, although I haven't tried it yet.

This post is getting rather long, so I think I will break it into two parts, and write about the rest of the bugs in my garden in another post. I hope the above information has been helpful. Stay tuned for Part 2 of this Tip, coming soon.

Previous Tips from a Trial and Error Gardner:
Tip #1: Start Your Seeds Early
Tip #2: Mulch Like You Mean It
Tip #3: Location Matters


Read More 8 comments | Posted by Audrey |

Tip #3: Location Matters

Like many people, I have limited space for my vegetable garden. The combination of large, shady trees and a steep slope means I don't have many sunny spots in my backyard to put seeds in the ground. So, for me, carefully planning a garden layout is key.

Through a combination of trial-and-error and research, I've learned that you can't skimp on sunshine when it comes to certain crops. In particular, summer squash needs an extremely sunny spot. Last year, I planted in a location that got a bit too much afternoon shade and didn't get a single zucchini. (How embarrassing! I mean, zucchini is supposedly the easiest vegetable to grow.)

This year, I've got my squash, green beans and corn in my sunniest plot, just above the cactus patch. These crops should grow well together, since corn and beans grow up and squash grows out. That's the idea, anyway. So far, all three crops doing well, and I'm thinking this year's squash crop will be less humiliating.

bean poles and squash hills

I've found that other summer veggies, like peppers and carrots, can handle a bit more shade--although not too much. So, I've got those guys growing in slightly shadier spots. I'm lucky in that Southern California summer days are long and hot, so almost any spot is sunny for a couple of hours. Still, when planning your garden, I recommend you take into account various crops sunlight needs as much as you can.

A good reference for figuring out where to plant your veggies is Burpee's The Complete Vegetable & Herb Gardener. It's a giant reference manual that gives good advice on where to plant almost every vegetable in your garden, alongside detailed information on fertilizer needs and other important tips. Despite my trail-and-error tendencies, I have found this book to be extremely helpful.

To be honest, though, everyone's garden is different. I think you have to keep testing different crops in different areas until you find the right spot and configuration for ideal production*. Tree trimming regularly would also probably help.

And, obviously, container gardening helps solve some of my space and sunlight issues. I'm growing tomatoes almost exclusively in containers this year. This will save me space, and allow me to move my plants to sunnier--or shadier--spots on the patio as needed.

tomatoes, peppers and strawberries

* Once I find the right spot for my in-ground veggies, I'll have to confront the whole issue of crop rotation--which is daunting considering my limited space. Perhaps since I'm growing small crops mixed together, it won't be too bad to grow the same crop in a very similar location the following year. We'll see...


Read More 2 comments | Posted by Audrey |

Tip #2: Mulch Like You Mean It

Time for another in my series of Tips from a Trial and Error Gardner. This time, I'm talking mulch.

eggplant seeding

In the last couple of years, I've learned that mulch is essential in my vegetable garden--especially when gardening in containers and most especially in the summer. The dry, hot summers of Southern California will dry out dirt quickly, and mulch can help keep the soil evenly moist and your plants healthy. Mulching also means you don't have to water your plants as heavily or as often.

Summer plants like tomatoes and eggplants don't respond well to fluctuations in soil moisture level. When the soil goes through a cycle of getting wet and drying out completely, your veggies can get blossom end rot. This has happened to me before, and, let me assure you, it's frustrating. Basically, a brownish or grayish spot appears on the end of a fruit as it grows, ruining it. Mulching can help prevent blossom end rot by holding water in the soil when it might otherwise evaporate. I've managed to stop blossom end rot in my vegetables by mulching around the base of my tomatoes and eggplants. This year, I'm doing the same with my squash, which are also known to suffer from blossom end rot.

In terms of what type of mulch to use, there are many options: bark, garden plastic or, my current favorite, hay. They all work fairly well. The nice thing about hay is that I can just turn it into the soil at the end of the season and it should break down quickly. (Plus, I use it as bedding in my chicken coop first.)

That's it for my thoughts on mulching. I have a couple more gardening tips in mind, and I plan to role them out in the next few weeks. Hopefully, at least one reader will find them helpful.

Previously: Tip #1
Read More 8 comments | Posted by Audrey |

Tips from a Trial and Error Gardner

Here in Los Angeles, it's almost summer garden time. Hurrah! I believe this will be my fourth year gardening in my current yard. As you might guess, I've become quite a gardening expert over the years. Actually, that's not true. You would be guessing incorrectly. Sorry. BUT, I have learned a few things, and I've decided to share those few things on this blog. Hopefully one or two readers will find them helpful.

Tip #1: Start your seeds early!

IMG_0317.JPG

Every year, I start my seeds earlier than I did the year before. And, every year, I realize that I should have started them even earlier. I think in Southern California it's particularly hard to get your timing right because all the seed packets say, "plant after the last frost." Um, what if you don't have frost, ever? I think my new rule of thumb will be: Plant when you don't have to wear socks to bed anymore. I guess this only works if you live in a house with very minimal heating capabilities, like ours, but perhaps you can find an analogous temperature test for yourself. (Perhaps, plant when you can walk your dog in the morning without getting painfully cold fingers.)

It's especially helpful to start the seeds for fruiting plants--tomatoes, peppers, eggplants--early. This is because, not only does the plant have to grow, but then it has to bloom, make fruit and the fruit has to ripen before you can eat it. This process can take a while, and if you want to be able to get several harvests from your plant before it dies, you gotta get things moving in early Spring.

I planted some tomato, pepper and eggplant seeds in small pots last weekend. And I will probably plant a few more rounds of seeds in the upcoming weeks. For seed-starting, I prefer using the 3 or 4 inch pots you get from the nursery when you buy a small cactus or flower. If you use smaller pots, they dry out more quickly, and you have to transplant really tiny plants into bigger pots at some point. Really tiny plants are really easy to kill.

So, that's tip #1. Look for more tips in the coming weeks. I think I have at least 2 or 3 more pieces of gardening wisdom in me. Definitely 2.
Read More 1 Comment | Posted by Audrey |

Chicken Tips

A commenter recently asked about some LA chicken-keeping basics, so I thought I'd post the information here, so everyone can read it. From what I can tell, and this is what I'm going with, this is the official LA County ordinance about keeping chickens in your yard:

I found this paragraph on page 19 of the Los Angeles Animal Services Permit Book, which can be downloaded as a PDF here.

I think you might also be required to license your chickens, but I've had a hard time finding out if that's really the case. And, honestly, unless you live in a neighborhood with no real crime, no feral cats and no stray dogs, I seriously doubt you will ever be asked for your chicken license. I have satisfied myself with sticking to the distance rules, cleaning the coop so it doesn't stink and having only hens, no roosters. My neighbors know about my chickens, but only because I've told them. Three hens don't really cause much trouble.

The other question I got was where to get chickens in Los Angeles. There are actually quite a few places. Just call around to feed stores in your area between February and August, and you'll probably find someone selling chicks.

I have purchased chickens from three places in the LA area, although I'd probably only recommend Agoura Feed in Agoura Hills. As a general rule, I suggest you get your chickens as babies--preferably only a couple of days old--from a place that seems clean and that keeps the chicks away from older fowl. Ideally, you'd get them from a place that has only baby chicks. That just seems safest, disease-wise, to me. You can also order from My Pet Chicken, which ships small quantities of chicks and guarantees that they will arrive alive.

Try to get the chicks vaccinated for Marek's, if you can. It might save some heartache later. I'd also say a minimum of 3 chickens is ideal. You'll probably end up with extra eggs in the fridge, but just give them to friends. My feeling is that, if you have 3, if something happens and you lose one, you're not in a bind with one lonely chicken.

Hope that helps!
Read More 2 comments | Posted by Audrey |
Older Posts Home

GREEN FRIEDA

  • About
      This blog is about a variety of things I'm interested in, including gardening, backyard chickens, crafts, DIY home improvement and resource efficiency. My hope is that it's both informative and fun to read. I hope you like it. If you want to email me, click here.
  • Labels

    • animals (8)
    • baby (7)
    • bathroom (4)
    • cactus (1)
    • canning (1)
    • charities (3)
    • chickens (79)
    • compost (1)
    • crafts (9)
    • energy (8)
    • environment (24)
    • food (61)
    • gardening (137)
    • gifts (7)
    • good girls (10)
    • holiday (6)
    • home improvement (27)
    • insects (2)
    • kids (4)
    • kitchen (16)
    • native plants (16)
    • orchard (6)
    • pests (14)
    • politics (6)
    • reuse (16)
    • tips (10)
    • tree (1)
    • waste (2)
    • water (9)
    • wedding (2)

    Blog Archive

    • ▼  2014 (5)
      • ▼  June (2)
        • Chicken Landscaping
        • Poor Baldy
      • ►  May (1)
      • ►  April (2)
    • ►  2013 (20)
      • ►  November (3)
      • ►  June (6)
      • ►  March (5)
      • ►  February (3)
      • ►  January (3)
    • ►  2012 (13)
      • ►  September (1)
      • ►  August (2)
      • ►  July (2)
      • ►  May (1)
      • ►  April (2)
      • ►  February (1)
      • ►  January (4)
    • ►  2011 (33)
      • ►  December (3)
      • ►  November (5)
      • ►  September (1)
      • ►  August (3)
      • ►  June (7)
      • ►  May (2)
      • ►  April (4)
      • ►  March (1)
      • ►  February (4)
      • ►  January (3)
    • ►  2010 (34)
      • ►  November (3)
      • ►  October (2)
      • ►  September (4)
      • ►  August (5)
      • ►  July (3)
      • ►  June (3)
      • ►  May (1)
      • ►  April (6)
      • ►  March (5)
      • ►  January (2)
    • ►  2009 (94)
      • ►  December (6)
      • ►  November (8)
      • ►  October (6)
      • ►  September (6)
      • ►  August (9)
      • ►  July (13)
      • ►  June (12)
      • ►  May (12)
      • ►  April (3)
      • ►  March (8)
      • ►  February (6)
      • ►  January (5)
    • ►  2008 (54)
      • ►  December (4)
      • ►  November (3)
      • ►  October (3)
      • ►  September (3)
      • ►  August (7)
      • ►  July (6)
      • ►  June (9)
      • ►  May (2)
      • ►  April (2)
      • ►  March (4)
      • ►  February (7)
      • ►  January (4)
    • ►  2007 (16)
      • ►  December (3)
      • ►  November (1)
      • ►  October (3)
      • ►  August (3)
      • ►  May (2)
      • ►  April (2)
      • ►  February (1)
      • ►  January (1)
    • ►  2006 (28)
      • ►  November (1)
      • ►  October (3)
      • ►  August (3)
      • ►  July (1)
      • ►  June (4)
      • ►  May (5)
      • ►  April (1)
      • ►  March (5)
      • ►  February (2)
      • ►  January (3)
    • ►  2005 (10)
      • ►  December (1)
      • ►  November (1)
      • ►  October (2)
      • ►  September (1)
      • ►  July (1)
      • ►  June (4)

    Related Blogs

    • Homegrown Evolution
      Framed
      3 years ago
    • DigginFood
      How to gain popularity through buying Twitter followers
      8 years ago
    • The Tangled Nest
      The First Egg: Light, Life, and Gratitude
      9 years ago
    • Monkey Lobster
      Summer Slide Show
      10 years ago
    • Rambling LA
      LOSING YOUR LAWN
      11 years ago
    • Rancho Garbanzo
      3 1/2 years later - Our Wedding Photobook
      11 years ago
    • Urban Chickens
      Infographic time: the chicken coop checklist
      12 years ago
    • Ramshackle Solid
      Hoop and Pole
      12 years ago
    • Our Yellow House
      Still Knitting
      12 years ago
    Show 5 Show All
    Follow GreenFrieda on Twitter

    Links

    • Backyard Chickens
    • Tree People
    • Seed Savers Exchange
    • L.A. Works
    • to do something
    • Mohair Gravy

    Followers

  • Search


    • Home
    • Posts RSS
    • Comments RSS
    • Edit

    © Copyright Green Frieda. All rights reserved.
    Designed by FTL Wordpress Themes | Bloggerized by FalconHive.com
    brought to you by Smashing Magazine

    Back to Top