• Home
  • Posts RSS
  • Comments RSS
  • Edit
Blue Orange Green Pink Purple

featured post

Homemade Granola

Recently I tried making my own granola. It ended up being quite simple, and I recommend trying it yourself. Dakota and I both find most store-bought granolas way too sweet and full of "extra" flavors. So, my goal was to make granola that was simple, healthy and tasty.

Read More
Showing posts with label kitchen. Show all posts

Kitchen Coverage

finished kitchen
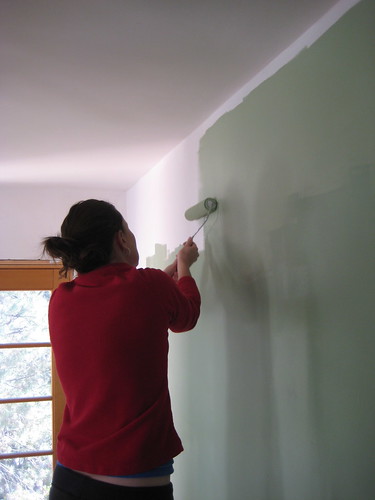
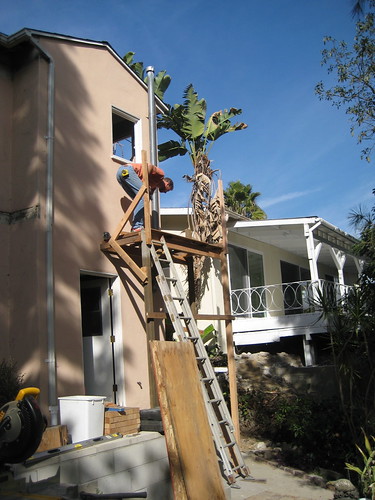
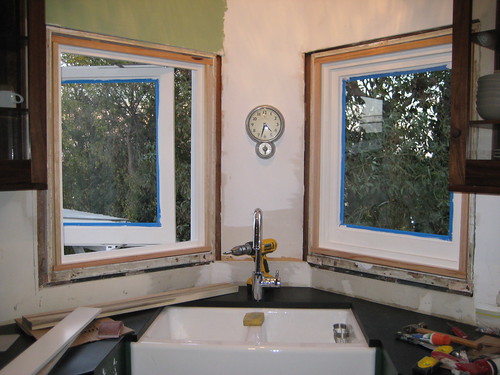
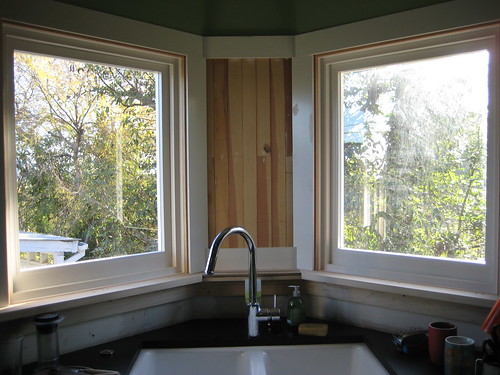
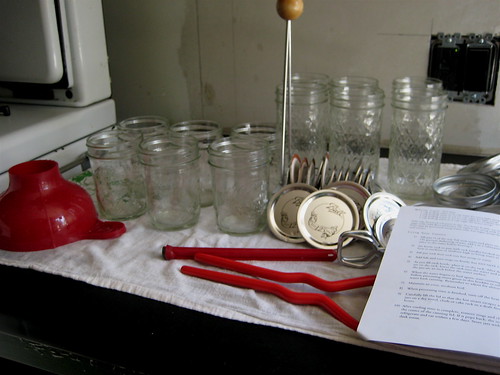
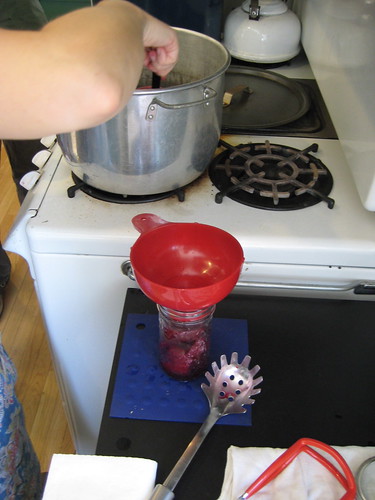
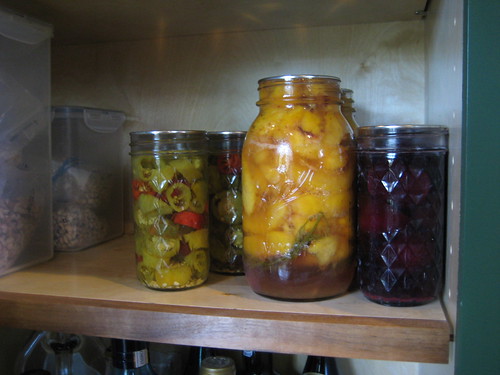
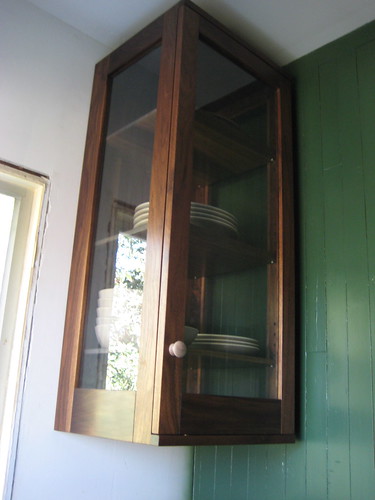
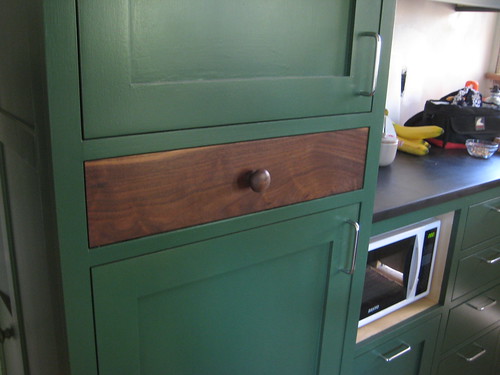
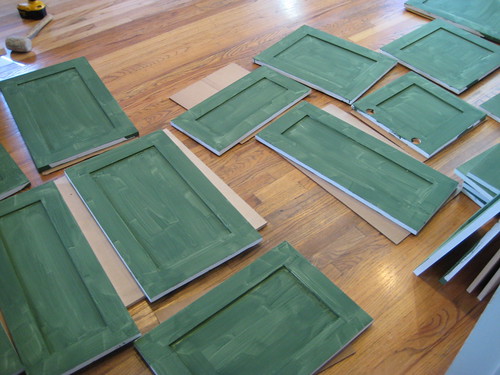
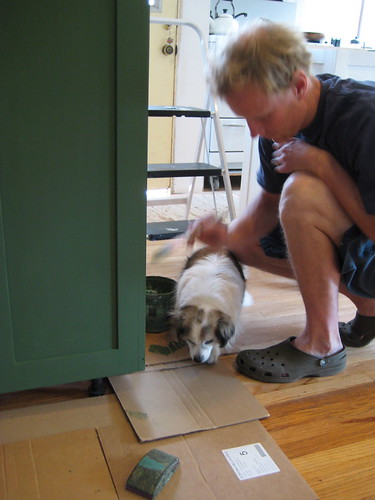
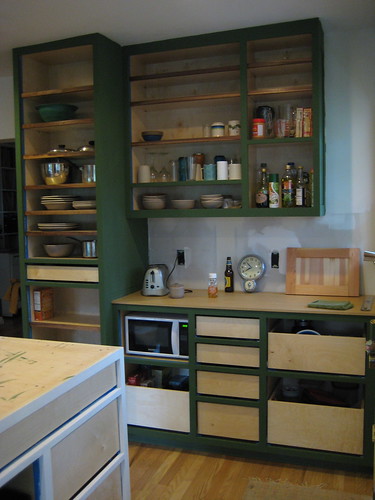
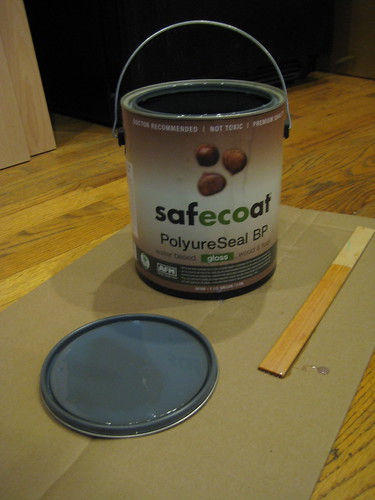
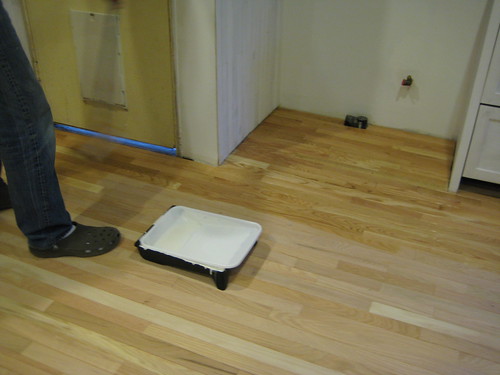
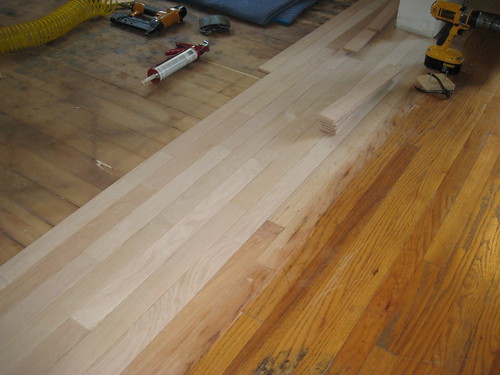
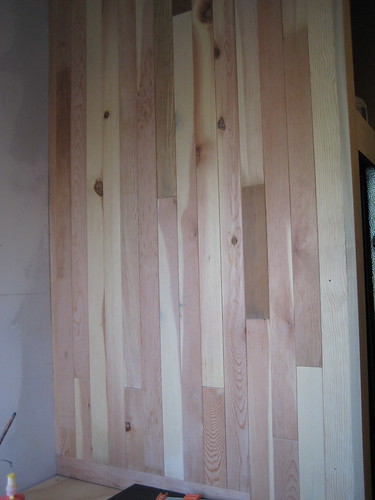
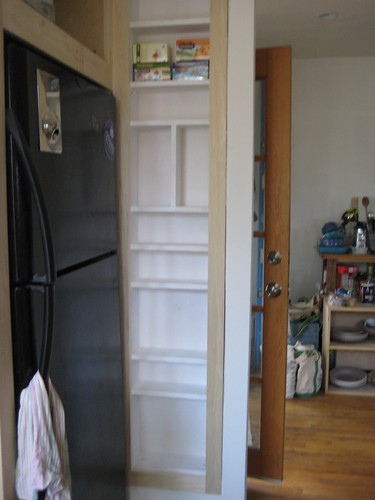
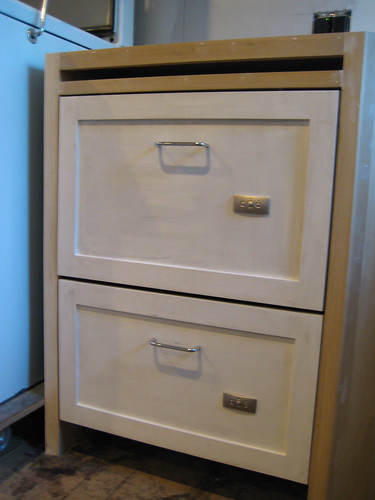
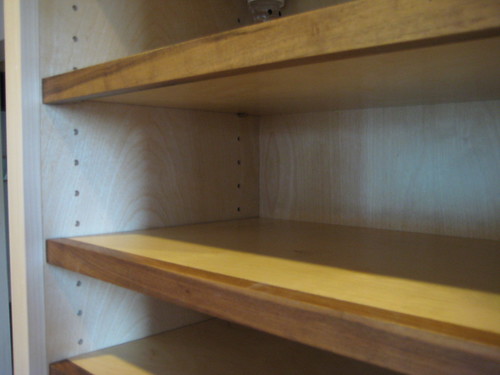
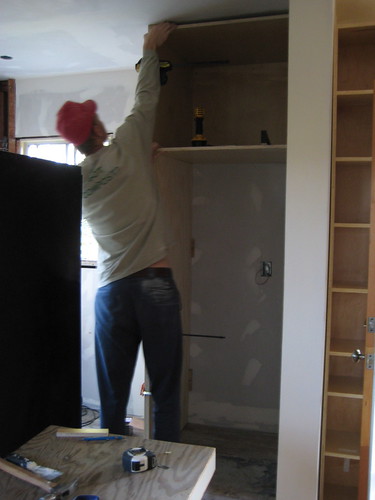
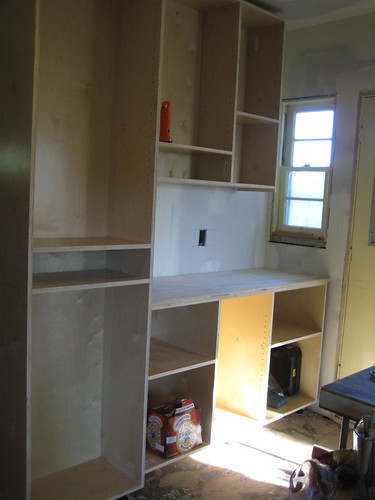
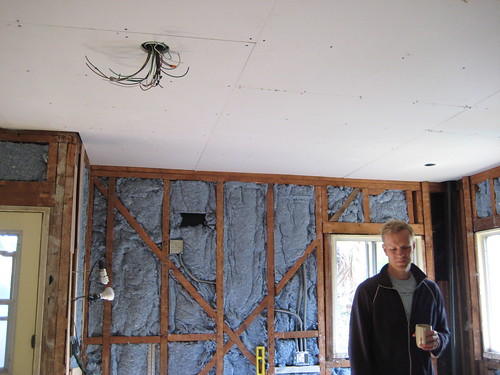
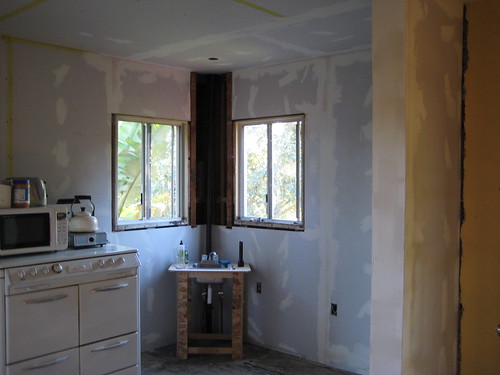
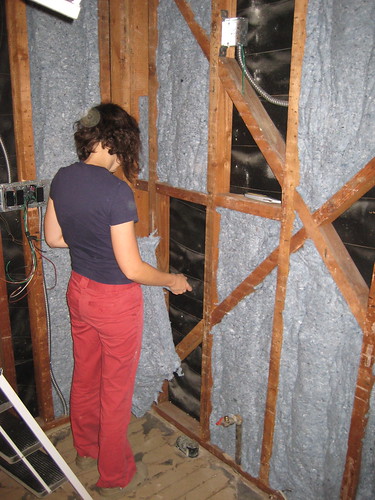
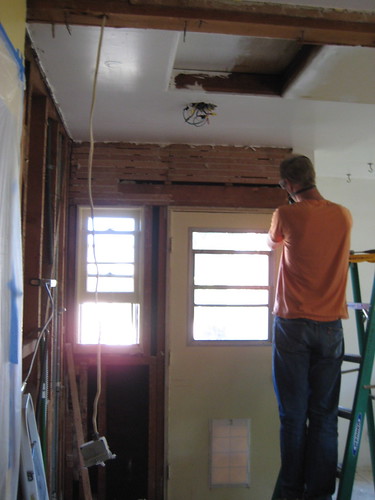
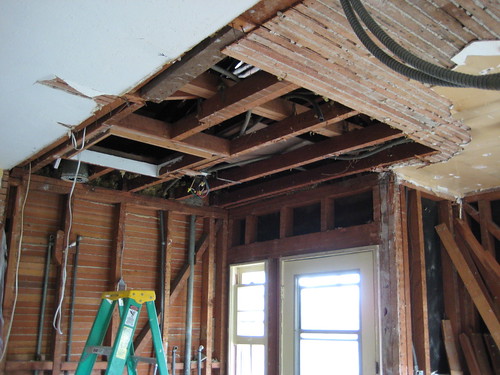
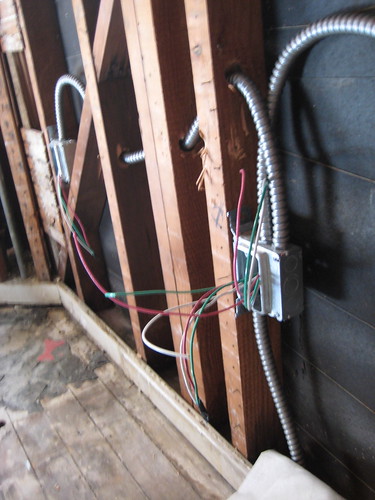
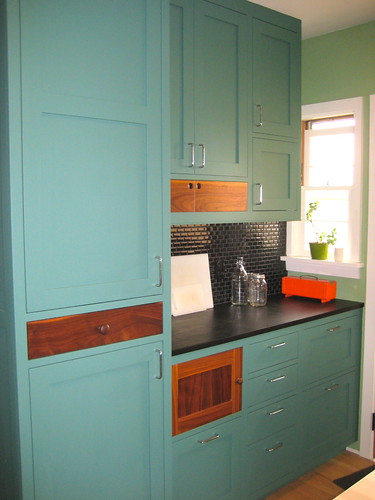
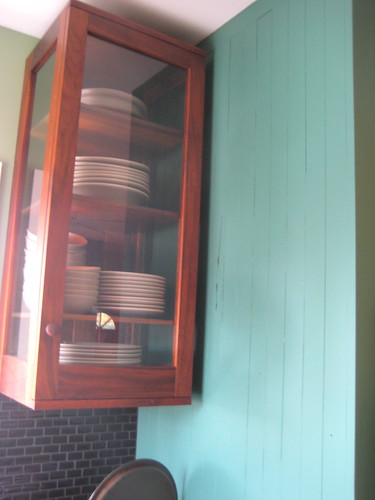
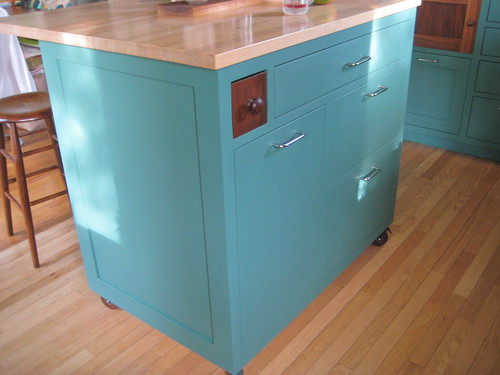
Long-time readers of this blog know that our kitchen remodeling project was an epic undertaking. Dakota took everything down to the bare bones and then slowly and carefully rebuilt the entire space. It took a looooooong time, mostly because Dakota was building the kitchen on nights and weekends, but the project was completed several months ago. If you're wondering, it functions beautifully and looks amazing.
finished kitchen
In fact, there's recently been some really great coverage of our kitchen that I wanted to share.

A brand-new online design magazine called Collected did a feature on Dakota's business. They had a photo shoot at our house and got some really great-looking images of the kitchen. Then, the blog you have been here sometime did a small write up and shared some kitchen photos as well. Click the links for the articles and images. (The photos in this post are by me.) 
IMG_8232
You can also see some nice, professional shots of the kitchen--as well as lots of his other work--on Dakota's recently revamped website: todosomething.com

I'm happy that all Dakota's hard work (and the work of his business partner, Chad) is being recognized. Hopefully the attention will lead to more opportunities for him to make other people's kitchen dreams come true. Here at home, the next big project is a new deck. Yippie!
finished kitchen
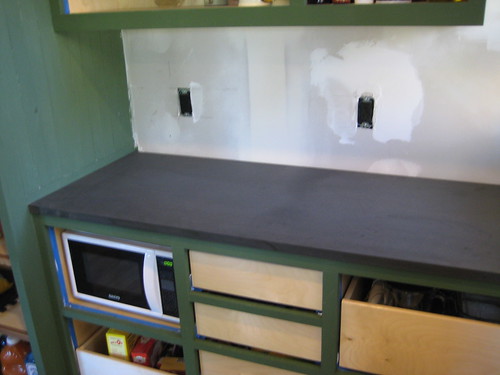
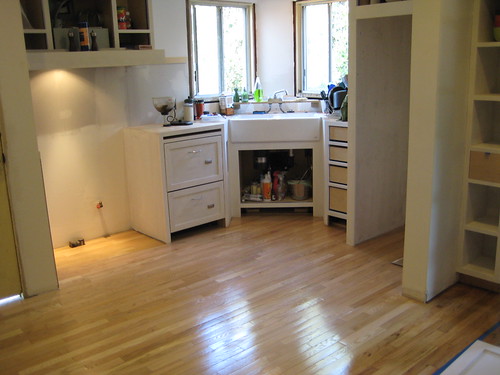
Click here, here and here for some "before" photos.
Read More 3 comments | Posted by Audrey |

Walls & Windows

We've made some more progress on the kitchen lately, and I really mean "we" this time, since I was able to help paint the walls.

painting the kitchen walls

Dakota, who knows way more about paint than I do, thought we should use Benjamin Moore Natura Paint. It's a zero VOC paint, so it basically has no scent, and is presumably better for your indoor air quality. Benjamin Moore has a lot of great color choices, and we finally decided on "Seedling," which is a light green. The idea was to paint the walls a lighter, but very similar, color green to the cabinets. Dakota got this idea from an architect he really admires who did a gray-on-gray kitchen. While the idea of an all-gray kitchen didn't sound so good to me, the green on green looks really nice.


no-VOC wall paint

The Natura Paint went on very smoothly, and I was able to get two coats on the walls before Christmas. Dakota then added a simple, white trim around the French doors and along the base of the walls. The overall effect is really nice and bright, and having the walls painted makes the kitchen seem so much closer to completion.

Another exciting kitchen improvement was the removal of the ugly, aluminum windows over the sink and the installation of new wood windows. For this endeavor, Dakota built a scaffolding on the back corner of the house.

installing windows

There was a lot of discussion over what type of windows we should install, and whether we should buy them or Dakota should make them. As you may know, windows are extremely expensive. So, we ended up going with the significantly cheaper Dakota-made variety. Let me assure you, though, they do not look cheap. Dakota decided on a simple casement style, which I think was a great idea because the single pane allows us to fully admire the view. The view from the sink, which looks Northeast towards the San Rafael and San Gabriel Mountains, may actually be the best view in our house.

windows installed

We also spent some time discussing whether we should use regular glass or double-glazed with a layer of argon/krypton gas in between. This second variety, also known as insulated windows, are more expensive but also more energy-efficient because they prevent heat gain in the summer and heat loss in the winter. Initially, we thought the insulated windows would be a good idea for our "green" remodel, but after thinking it over, we realized that the benefits in our kitchen would be pretty minimal. We don't have central heat or air, and since we already insulated the kitchen walls and the attic, we're in pretty good shape when it comes to heat gain and loss. So, we went with plain old glass.

adding the trim and sills

To help with energy efficiency, Dakota added a small awning over one of the windows, which will shade it during the summer and also keep rain off the sill. It's invisible from inside, but did a good job keeping the window relatively dry in our most recent rain storm.

There is still work to be done on the kitchen, although, at this point, it's mostly details. Dakota is adding more trim, touching up some paint, refurbishing a small window and finishing up the new door. Then we just have to get the tile installed, and we'll be done! Hopefully all that work can take place in the next couple of months.
Read More 3 comments | Posted by Audrey |

First Time Pickling: Peaches, Peppers & Beets

Last weekend, I finally got a chance to do something I've wanted to try for ages: home canning. Canning seems like the perfect marriage of all my favorite hobbies: gardening, cooking and making gifts for people. Dakota got me a bunch of canning supplies for my 31st birthday, and, a year later, I finally got a chance to try them out.

The first step was shopping for supplies, which was more difficult that I expected. I picked up some cases of Ball canning jars at Orchard Supply Hardware. They had several sizes in stock, although not the pint jars called for in most of my recipies. I just decided to make do with the three sizes available. OSH also sells cheese cloth, which you'll need to make a spice bag. The spices I needed were more difficult to track down. I went to three different stores, including Whole Foods, looking for pre-mixed pickling spice--or the all the spices that go into pickling spice mix--and finally found it at a Jon's market in Glendale. (LA Cooking Tip: If you're looking for an unusual ingredient, try a grocery store that in or near an Armenian neighborhood. This Jon's had three different spice sections: typical American, Middle Eastern and Latino. And the Super King in Glassell Park has all kinds of interesting fruit syrups to use as marinades.) For the fruits and veggies, I woke up early and hit the Pasadena Farmer's Market. That place is great, although they didn't have any "dill heads," so I had to go with baby dill.

canning supplies

Once all the supplies were assembled, my friend Merete and I began the pickling process. This is when I learned that prep work is the most time consuming and labor intensive part of canning. We chose three things to pickle: beets, peaches and peppers. All the recipies--and canning guidelines--came from my Ball Complete Book of Home Preserving. The beets needed to be pre-cooked and skins removed, the peppers needed to be chopped, and the peaches needed to be peeled, sliced and soaked in a solution of water and lemon juice to preserve their color.

Merete peels & slices

Luckily, I had a friend to help me. Canning is definitely more fun--and less exhausting--with two people. I don't think I would have been able to pickle beets, peppers and peaches in the same day without Merete's help.

bowl of peppers

By the way, I recommend keeping that lemon water you soak your fruit in. It lives a second life as a refreshing and delicious beverage. This was Merete's idea. Not only is she an excellent kitchen companion, but she comes up with brilliant new beverage concepts like peach water.

sliced peaches and peach water

Once the prep work was complete, we started canning. First up were the pickled beats, and we learned a valuable lesson after we ran out of pickling juice half-way through filling the jars. We followed the recipie to the letter, so at first we were confused. Then we realized that we hadn't cut our beets small enough. If we'd sliced them smaller, they would have taken up more space in the jar and needed less pickling juice. Oh well, we still got four jars out of it. And for our very first canning project, I think that was a fairly minor error.

jar of beets

Next came the Dilly Peach Pickles. I cannot wait to try these when they're ready. Some people may turn up their noses at pickled fruit, but I think it sounds amazing. Plus, the peaches and dill look so pretty in their big jars. Merete and I sliced the peaches into sixths to avoid the pickling juice issue we had with the beets.

peaches in jars

I'm skipping over the details of actual canning, because I think that's best explained by an expert, or the authors of Ball Home Preserving. I found the directions in that book very clear and helpful, and the recipies were interesting without being overly complicated.

I can comment on the tools I think are most necessary, though. They include: a jar grabber, a lid lifter (a plastic stick with a magnet on the end so you don't touch the sterilized lid), a funnel, a good ladel, a slotted metal spoon, a metal rack to set your jars on while they boil and a giant canning pot. These all appear to be essential to the canning process, in my admittedly limited experience.

After following all the canning and boiling water processing directions, we ended up with seven jars of pickled peppers, three jars of pickled peaches and four jars of pickled beats. It took us all day to can everything, but this was our first time. Happily, after the required 24-hour cooling off period, I checked the the lids and each and every one seems to have sealed properly. I really like the way they look in my new pantry.

jars stored in pantry

Overall, I found home canning to be interesting, fun and satisfying. It's kind of like doing a science project that you can eat. Having a friend with me definitely made it more enjoyable. Hopefully I can have more friends over for canning parties in the future. For my birthday this year, I received The Joy of Pickling!


Read More 1 Comment | Posted by Audrey |

Walnut Cabinets & Details

walnut & glass dish cabinet

There have been some nice additions to the kitchen lately, including two walnut and glass cabinets. Dakota brought them home a couple of weeks ago, and they're now installed on either side of the sink. I think they look beautiful. One of the cabinets will hold our Heath plates and bowls, and the other will hold prettier glassware, including a cool vintage set my sister found for me at a thrift store.

I like how these cabinets are both decorative and functional. They sit near the sink and dishwasher, so it will be easy to put clean dishes away. And the glass fronts allow guests to find a glass or plate without having to open every cabinet door.

Walnut is used as an accent throughout the kitchen. There's a walnut shelf above the stove, and a few little walnut drawer faces around the kitchen. The one below is on the pantry drawer which separates the upper and lower shelved areas. It holds tea. I think the rich, dark color of the walnut looks great with our green cabinets. Like most things in the kitchen, the accents were Dakota's idea. He's a pretty great designer in my unbiased opinion.

pantry drawer with walnut face

On another note, I am so happy to finally have a pantry. Considering that we used to keep all our pasta and canned goods on a open, messy shelf below a tabletop, it's a relief to have everything organized and safe from bugs.

More kitchen improvements will happen soon. I think we'll be getting paint this weekend, since we've decided not to use Milk Paint on the walls. (More on that in another post.)
Read More 1 Comment | Posted by Audrey |

Countertops Sweet Countertops

This month has been a productive and exciting one in our ongoing kitchen project. The most exciting improvement, so far, has been the addition of much-needed countertops.

A couple of weeks ago, Dakota brought home the lovely, hand-made butcher block top pictured below. It's smooth and square and perfectly sealed, and I love it. Plus, the butcher block is a re-use, so the materials cost nothing. Dakota cut and glued together strips from a hard maple tool* left over from a custom table he made for a designer client.

butcher block island top

The butcher block top sits on our kitchen island. It sticks out farther on one side, so that we can pull up a stool and eat, or just hang out in the kitchen while someone else is cooking.

Last weekend, Dakota cut the Richlite counter tops that we're using in the rest of the kitchen. Richlite is a sustainable building material that looks and works in a way similar to slate. Here's the description from the company website:


Richlite® is primarily paper treated with phenolic resin and baked to create a solid sheet. During the production cycle the layers of paper are gradually crossed-linked with each other to create solid, durable sheets... Richlite® paper comes from pulp that is derived from trees, which is produced from paper purchased from FSC-Certified sources and/or recycled paper.


In addition, if you're concerned about such things, Richlite doesn't off-gas and they create no hazardous waste during the production process. It comes in a variety of nice colors, it's scratch and stain resistant, and you can put hot pots on Richlite without damaging it. In the shot below, the countertop hasn't been sealed yet. In it's final form, it will be a bit shinier.

richlite around sink

Dakota took great care in cutting our one sheet of Richlite because, besides being green, it's kind of expensive. Although, I believe it's pretty comparable, price-wise, with many other common countertop materials. My parents actually gave me this particular sheet of black Richlite for my 30th birthday. Great gift, huh?

richlite countertop

Tomorrow, the painted cabinets are getting a layer of sealant. Once that's done, we'll be able to attach the countertops permanently. I am pretty psyched to have them installed. It's been okay working with cutting boards on top of raw plywood cabinet tops, but having the real surfaces will make cooking so much nicer. And, our green kitchen will be that much closer to completion.

* A "tool" in this context is a sort of mold around which a metal table top was spun and bent.
Read More 3 comments | Posted by Audrey |

Painting with Milk Paint

doors drying

Last weekend, we started painting the kitchen cabinets. As I mentioned before, we're using SafePaint, which is a variety of milk paint made by The Old Fashioned Milk Paint Company. Milk Paint is formulated from three, non-toxic ingredients: milk protein, lime and natural pigments. Regular milk paint tends to give a thinner, streakier finish, which would work in a room with a more "old fashioned" style. But since ours is a more modern kitchen (with Shaker influences), we went with SafePaint, which goes on thicker for more even coverage.

Milk paint can be a bit tricky, as we learned, because it comes as a powder that you mix with water. Our first batch was a little lumpy, possibly because we didn't use the right utensils to stir it. To smooth out the lumps, Dakota added more water. This didn't change the color at all, but the paint went on a little thin, as you can see on the cabinet doors above. Happily, that was just the first of two coats--after a coat of Dunn-Edwards Eco-Shield Primer--so it didn't matter too much.

He's Nigel helping Dakota paint the pantry.

Nigel helps

Eventually, we found that mixing the paint using a whisk works well. The second batch of paint was thicker, had fewer blobs and went on in a more uniform manner. In addition, we found that SafePaint goes on much better with a brush than with a foam roller. I don't mind using a brush on the cabinets, but painting the walls or ceiling that way will be rough. So, I think we're going to try a different roller--perhaps a fluffier one--on the walls and see how that goes.

SafePaint has absolutely no odor, and drips wipe up easily with a wet rag. And I suspect that if your overly-curious dog should happen to accidentally lick some of it up, he'd be fine. So far, despite the minor lumpiness issue, we're pretty happy with the product.

After two coats, I think the cabinets look really great. As Dakota pointed out, we picked a very "masculine" green--like something you'd see on the wall of a British pub. (The color itself is called Lexington Green, which fits.) I am having a hard time imagining how things will look once the cabinet doors are on and everything else is installed and painted. But right now, the painted cabinets go nicely with the oak floors, so that's a good start.

one side painted
Read More 2 comments | Posted by Audrey |

Eco-Friendly Floor Finishing

Last weekend was all about putting finish on the new wood floor. At this moment, it's bright, shiny and clean... and almost done.

Four coats of finish were smoothed on over the course of the weekend, and I believe there are two coats left to apply. (Dakota decided to do extra coats since the kitchen is such a high-traffic area.) We ended up going with AFM Safecoat PolyureSeal BP, which I purchased at Architectural Coatings + Design Center in Tarzana. I found them to be very helpful and accommodating in terms of the finishes and amounts I needed.

After doing some online research, I decided that AFM Safecoat was the right choice for us. It's a water-based clear finish with very low VOC. It's also LEED qualified and contains no formaldehyde. I got a gallon of gloss and a quart of satin. Safecoat isn't cheap; the gallon ran me about $100 and the quart was about $30, but I think it's worth it to have a less toxic floor.

eco-friendly floor finish

According to the directions, for a satin finish, you apply several coats of gloss first, followed by the satin. Here's an image of the first coat going down, after a thorough floor sanding by Dakota.

finishing the floor (1st coat)

The smell from the Safecoat PolyureSeal BP was fairly strong, but dissipated after about an hour. I've never refinished a floor before, so I can't really speak to how the odor compares to other polyurethane finishes. I do appreciate that the odor doesn't linger after the finish dries.

So far, the new floor looks great. The finish is shiny and smooth, and the transition between the old floor and new floor is noticeable but not distracting. Predictably, I now want to refinish the floors in the whole house. But I think for now we'll have to focus on the kitchen. (One project at a time!)

wood floor with several coats of finish
Read More 6 comments | Posted by Audrey |

We Have a Floor!

new flooring

Check that out! That is new flooring going down in the kitchen. New, beautiful, oak flooring--although, part of it isn't "new" at all. More on that later.

Dakota started laying the floor last weekend, after spending the previous weekend sanding down the subfloor. He rented a big belt sander from the hardware store, and spent a day scraping and sanding the subfloor until it was smooth, clean and ready for the next step. Here's Nigel enjoying the sanded subfloor.

Nigel shows off the sanded subfloor

Last weekend, the real floor started going down. It's red oak, to match the floors in the rest of our house. Most of the flooring was actually made from the old oak cabinet doors that were in our previous kitchen. Dakota had this brainstorm a while back, and I got really excited about it because reusing the old doors is both money-saving and environmentally friendly.

Cutting and milling down the cabinet doors and then adding a tongue and groove was quite an elaborate and labor-intensive process. (It's possible Dakota regretted his brilliant idea once he actually put it into action.) But, the result is really lovely. Dakota was able to make enough floorboards to cover most of the area, but we did have to purchase some new boards to complete the floor.

He's hoping to get all the floor down before next weekend, when my parents come to visit. One thing we still need to do is decide on an eco-friendly floor finish. I'm current searching the web for a low-VOC and as non-toxic as possible polyurethane finish. Suggestions are welcome.
Read More 2 comments | Posted by Audrey |

Kitchen Details, Big and Small

There's been a lot of activity in the kitchen since my last post about the remodel. Dakota has been working very hard on the sink, cabinets, dishwasher and some very cool details.

Here's the sink corner in progress. We acquired this beautiful sink from Dakota's dad, who got it in some kind of flood sale in Iowa. It's big, deep and I love the apron front. Dakota put in all new copper plumbing and installed the garbage disposal in this special way he learned from his dad. It's working out wonderfully.

plumbing hooked up

As a design element, Dakota made beadboard out of the old Douglas fir cabinet cases. He milled down the wood, cut it and added a tongue and groove. The beadboard covers the divider between the refrigerator and cabinets, and one side of the pantry on the other side of the kitchen. Eventually, it'll be painted green like the cabinets. I think it's a really smart reuse of wood from the old kitchen.

fridge divider wall covered in beadboard

On the other side of the fridge is this awesome detail, a spice cabinet. It's a shallow cabinet built into the wall that will hold all our spice, vinegar and oil bottles. Dakota has big plans for this little nook, but I don't want to ruin the surprise.

spice rack

Also installed is our Fisher & Paykel double drawer dishwasher. Dakota made the custom fronts and added simple chrome pulls, which will eventually go on all the drawers and cabinet doors. So, this is kind of a preview of what the rest of the cabinets will look like (minus the green paint). The dishwasher is working well so far, although we had some problems with the drawers closing initially. I think we've worked it out, though.

IMG_3635.JPG

Just a couple of nights ago, Dakota brought home the shelves he made for the pantry and upper cabinets. The main part of the shelf is birch with a front edge of walnut. It's a small detail that will only be noticeable when the cabinet doors are open. It'll also match some other walnut details in the kitchen that are still to come.

IMG_3642.JPG

Things are really coming along on the remodel. In a few weeks, the floor will probably be installed. That should make a big difference in how "done" it looks. I'll be sure to post about it.
Read More 4 comments | Posted by Audrey |

Slow But (Somewhat) Steady

It's been a while since I updated on our ongoing kitchen remodel, but things have been steadily moving along. As with most of our projects, the work has been slow-going, since we have to do everything on the weekend. Happily, the kitchen has been usable for most of the time.

After all the drywall went up, Dakota started to install the cabinet cases. After he designed the cases, he them cut by one of his subcontractors, who has a CNC machine. The wood is pre-finished birch, FSC certified and formaldehyde free. FSC certification guarantees that the wood you're using is from a sustainably-managed forest, and not clearcut from a rainforest. It's a must for a green remodel. (You can read more about forest certification here.) The wood looks very pretty, although Dakota has had a few issues with minor warping.

Here he is installing a large storage cabinet that will go over the refrigerator.

installing cabinet boxes

Happily, I was able to help Dakota out a little by priming the walls a couple of weeks ago. Since we're using eco-friendly Milk Paint on the walls and cabinets, we figured we should get some eco-friendly primer as well. The product we chose is Dunn-Edwards Eco-Shield. It's low-VOC, and you can really tell. It didn't smell at all. Plus, the primer went on easily and seemed to coat the walls well.

primer

As the cabinet boxes go in, I'm getting more and more excited about the design of the final kitchen. Dakota has really planned things out beautifully, with lots of cool little details that will make our kitchen unlike any other. I feel very lucky to have such a talented carpenter and designer doing my kitchen remodel. I clearly married the right guy.

IMG_3418.JPG
Read More 2 comments | Posted by Audrey |

Drywall Developments

So when I last wrote about the kitchen remodeling project, we had just installed the insulation. Happily, a good amount of progress has been made since then. Over Thanksgiving weekend, Dakota made a big push, and I am proud to report that our kitchen now has walls and a ceiling.

Friday was ceiling day.

ceiling!

Followed on Saturday with walls, and Sunday with taping and mudding.

IMG_3130.JPG

This past weekend involved more mudding, a good amount of sanding and a layer of smooth coat to make everything look nice.

While we're quite a ways off from actually having a fully-functioning kitchen, it definitely feels nice to have the bare bones of the room in place.
Read More 1 Comment | Posted by Audrey |

Insulation Installation

Nothing says "party" on a Saturday night like installing denim insulation, and that's exactly what Dakota and I did last weekend. Jealous? Thought so. Actually, it was kind of fun (in a way) and made us feel like some actual progress was being made on our slow and steady kitchen remodel.

As I mentioned in a previous post, I was able to find a local supplier of UltraTouch Natural Cotton Fiber Insulation in the Los Angeles area. So, last Saturday night, we ripped open the roll of insulation and laid it out on the floor to fluff up. It comes in long strips and basically looks like a long rectangle of dryer lint.

Here's Nigel demonstrating how safe and non-toxic UltraTouch is.

Nigel models the insulation

The UltraTouch website uses babies and small children to make this same point, but I think Nigel should become their new spokesmodel. I mean, look how excited he is to be resting on layers of earth-friendly insulation.

Nigel also decided to help us install the insulation. Here he is weighing down a piece while Dakota cuts it to fit between some studs.

Nigel helps install insulation

I had read that denim insulation can be difficult to cut, but we just used an old saw and a box cutter and did fine. I guess our edges weren't particularly smooth, but since the insulation will be hidden inside the walls, I'm not too worried about it. Overall, installing the UltraTouch was pretty darn easy. It took us about an hour and was so foolproof that I was able to help.

installing

Up to now, the kitchen work has either involved heavy demolition skills or woodworking skills, both of which I lack. But I think we may be heading into a stage in which I might actually be able to do more than lend moral support and research skills. I'm glad, because Dakota has been working exceptionally hard.

Here's one kitchen wall, nicely insulated.

insulation in the walls

Since the kitchen is on a back, unshaded corner of the house, it really gets blasted by the sun in the summer. The addition of the insulation, plus ceiling fans and energy-efficient windows will hopefully make a big difference when the weather gets hot again.
Read More 4 comments | Posted by Audrey |

Kitchen Exposed

There's been a good amount of progress on the kitchen remodel in the last couple of weekends, so I thought I'd do a little update. Dakota has been working very hard, ripping out the old stuff so we can put new stuff in. First, he pulled down the plaster walls in the old kitchen.

pulling down the wall

In addition to clearing out the kitchen walls down to the studs, he also removed all the cabinets, tile countertops and backsplashes.

bye bye cabinets

Next to go was the kitchen ceiling, which was actually a layer of drywall over a layer of plaster. Removing the kitchen ceiling was necessary because we plan to join the old dining room ceiling to the new kitchen ceiling. Also, Dakota hates shoddy work and sometimes prefers to just re-do it from scratch rather than patch it.

ripping out ceiling

Tearing down the walls and ceiling was a messy, difficult job. In addition to all the plaster dust, there was the added nastiness of the old fiberglass attic insulation. Dakota spent a lot of time wearing his dust mask. But, after many weekends of hard, hard work, the tear down was complete. Now our kitchen has an open ceiling, all the way up to the roof.

open to the rafters

It looks kind of cool, but we'll be putting up a new drywall ceiling and filling the attic in with cellulose insulation soon. With our lack of central heat or air, we need all the insulation we can get. In fact, we'll be insulating the kitchen walls, too.

Since our goal has been to do a "green remodel," we really wanted to use recycled denim insulation in the walls, because it's both Earth-friendly and non-toxic. The main manufacturer of denim insulation is Bonded Logic. They sell it under the band name Ultra Touch. This insulation is made from cotton and denim scraps that have been treated with a boron-based fire retardant. It's LEED certified and so safe you can let your baby play on it, or at least that's how the Bonded Logic folks like to advertise it, with lots of photos of babies and small children hugging the insulation.

At first, we had a hard time finding a distributor in Southern California that didn't sell it with a massive mark-up. ("Green home centers" have a tendency to do this with a lot of their materials.) Happily, I managed to track down the insulation at Ganahl Lumber in Los Alamitos. Not only is Ganahl only a 30-min drive away, it also has the lowest price I'd seen for the Ultra Touch. So, I swooped down last weekend and picked up a 106 ft2 package, which is just the right amount to insulate the exterior walls of the kitchen. It just barely fit in my car.

back from insulation pickup

Now that the walls and ceiling are out, Dakota's been ripping up the layers and layers of old floor. At the same time, we're having the wiring put in by our very nice neighbor, who's also an electrician. I'm so excited to have outlets in places where outlets should be, and to have switches that make sense.

future electrical

In fact, I'm excited about so many things, and we're almost to the part where the old stuff is finally gone and the new stuff starts to arrive. It's been an only mildly inconvenient project so far. We've even been able to cook and access our fridge for most of the time. The only one who's really unhappy about all the loud noises and dirty floors is Nigel. He's had to resort to hiding under the desk in the back room. Poor guy.

hiding from the loud noises
Read More 2 comments | Posted by Audrey |
Older Posts Home

GREEN FRIEDA

  • About
      This blog is about a variety of things I'm interested in, including gardening, backyard chickens, crafts, DIY home improvement and resource efficiency. My hope is that it's both informative and fun to read. I hope you like it. If you want to email me, click here.
  • Labels

    • animals (8)
    • baby (7)
    • bathroom (4)
    • cactus (1)
    • canning (1)
    • charities (3)
    • chickens (79)
    • compost (1)
    • crafts (9)
    • energy (8)
    • environment (24)
    • food (61)
    • gardening (137)
    • gifts (7)
    • good girls (10)
    • holiday (6)
    • home improvement (27)
    • insects (2)
    • kids (4)
    • kitchen (16)
    • native plants (16)
    • orchard (6)
    • pests (14)
    • politics (6)
    • reuse (16)
    • tips (10)
    • tree (1)
    • waste (2)
    • water (9)
    • wedding (2)

    Blog Archive

    • ▼  2014 (5)
      • ▼  June (2)
        • Chicken Landscaping
        • Poor Baldy
      • ►  May (1)
      • ►  April (2)
    • ►  2013 (20)
      • ►  November (3)
      • ►  June (6)
      • ►  March (5)
      • ►  February (3)
      • ►  January (3)
    • ►  2012 (13)
      • ►  September (1)
      • ►  August (2)
      • ►  July (2)
      • ►  May (1)
      • ►  April (2)
      • ►  February (1)
      • ►  January (4)
    • ►  2011 (33)
      • ►  December (3)
      • ►  November (5)
      • ►  September (1)
      • ►  August (3)
      • ►  June (7)
      • ►  May (2)
      • ►  April (4)
      • ►  March (1)
      • ►  February (4)
      • ►  January (3)
    • ►  2010 (34)
      • ►  November (3)
      • ►  October (2)
      • ►  September (4)
      • ►  August (5)
      • ►  July (3)
      • ►  June (3)
      • ►  May (1)
      • ►  April (6)
      • ►  March (5)
      • ►  January (2)
    • ►  2009 (94)
      • ►  December (6)
      • ►  November (8)
      • ►  October (6)
      • ►  September (6)
      • ►  August (9)
      • ►  July (13)
      • ►  June (12)
      • ►  May (12)
      • ►  April (3)
      • ►  March (8)
      • ►  February (6)
      • ►  January (5)
    • ►  2008 (54)
      • ►  December (4)
      • ►  November (3)
      • ►  October (3)
      • ►  September (3)
      • ►  August (7)
      • ►  July (6)
      • ►  June (9)
      • ►  May (2)
      • ►  April (2)
      • ►  March (4)
      • ►  February (7)
      • ►  January (4)
    • ►  2007 (16)
      • ►  December (3)
      • ►  November (1)
      • ►  October (3)
      • ►  August (3)
      • ►  May (2)
      • ►  April (2)
      • ►  February (1)
      • ►  January (1)
    • ►  2006 (28)
      • ►  November (1)
      • ►  October (3)
      • ►  August (3)
      • ►  July (1)
      • ►  June (4)
      • ►  May (5)
      • ►  April (1)
      • ►  March (5)
      • ►  February (2)
      • ►  January (3)
    • ►  2005 (10)
      • ►  December (1)
      • ►  November (1)
      • ►  October (2)
      • ►  September (1)
      • ►  July (1)
      • ►  June (4)

    Related Blogs

    • Homegrown Evolution
      Framed
      3 years ago
    • DigginFood
      How to gain popularity through buying Twitter followers
      8 years ago
    • The Tangled Nest
      The First Egg: Light, Life, and Gratitude
      9 years ago
    • Monkey Lobster
      Summer Slide Show
      10 years ago
    • Rambling LA
      LOSING YOUR LAWN
      11 years ago
    • Rancho Garbanzo
      3 1/2 years later - Our Wedding Photobook
      11 years ago
    • Urban Chickens
      Infographic time: the chicken coop checklist
      12 years ago
    • Ramshackle Solid
      Hoop and Pole
      12 years ago
    • Our Yellow House
      Still Knitting
      12 years ago
    Show 5 Show All
    Follow GreenFrieda on Twitter

    Links

    • Backyard Chickens
    • Tree People
    • Seed Savers Exchange
    • L.A. Works
    • to do something
    • Mohair Gravy

    Followers

  • Search


    • Home
    • Posts RSS
    • Comments RSS
    • Edit

    © Copyright Green Frieda. All rights reserved.
    Designed by FTL Wordpress Themes | Bloggerized by FalconHive.com
    brought to you by Smashing Magazine

    Back to Top