• Home
  • Posts RSS
  • Comments RSS
  • Edit
Blue Orange Green Pink Purple

featured post

Homemade Granola

Recently I tried making my own granola. It ended up being quite simple, and I recommend trying it yourself. Dakota and I both find most store-bought granolas way too sweet and full of "extra" flavors. So, my goal was to make granola that was simple, healthy and tasty.

Read More
Showing posts with label gardening. Show all posts

Chicken Landscaping

Back in November, I wrote a post about the new chicken pen: a fenced-in space at the bottom corner of our hillside that we gave over to the hens. It continues to be a great space for them to wander around, peck in the dirt, take dust baths and dig like crazy with their long claws. In fact, they have been such aggressive scratchers and diggers that they completely eliminated all the weeds and ground cover previously growing in that section of the backyard. The only things that survived were some bigger bushes and one little pine tree we planted many years ago.
Chicken Zone
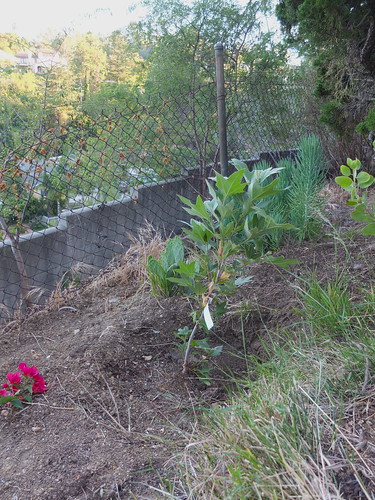
This poses a bit of a problem because, as I mentioned, our backyard is on a hill. Plus, it I'm not in love with the idea of 1/6 of my yard being a giant dirt patch. So, we planted some bushes over the last several months.

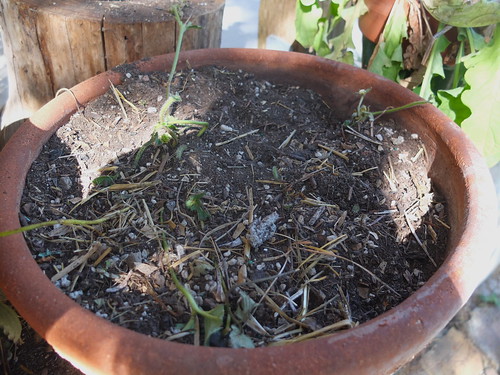
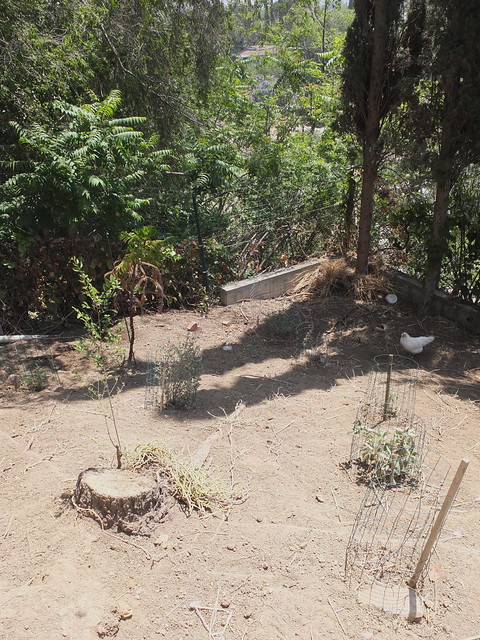
The key to their survival is that they must be enclosed in a circle of fencing. If not, they are immediately defoliated, dug up and destroyed by the hens. In fact, we went away for a couple of days several months ago, and while we were gone the fencing circles around some small rosemary plants were knocked off. When we got back, there was no sign of those bushes--not even a stick or a root ball.

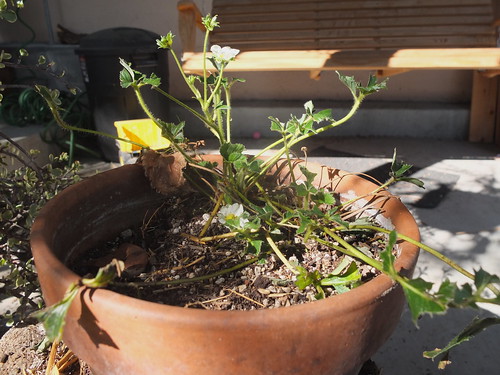
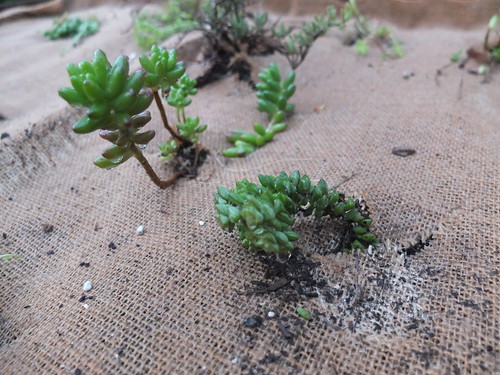
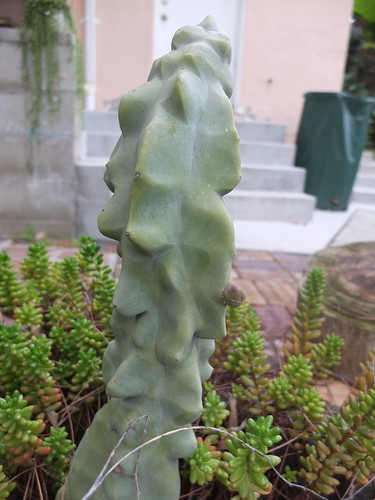
We also noticed that some plants are tastier to chickens than others. They don't seem interested in eating sage leaves. That's good news, because there are many lovely varieties of sage, and most require very little water to thrive. So, they are a perfect choice for our chicken landscape.

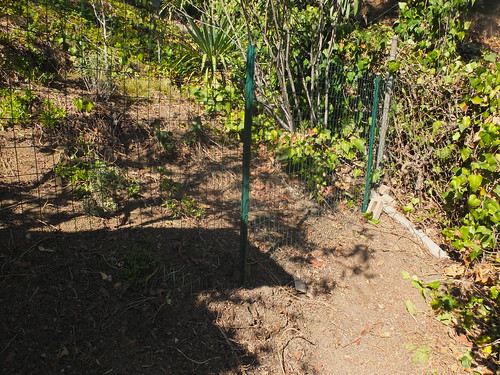
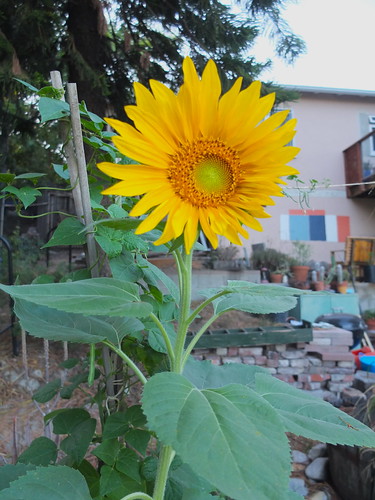
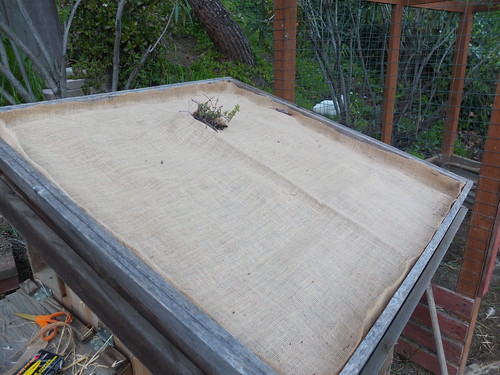
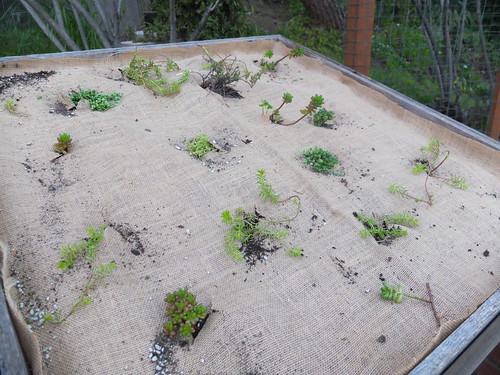
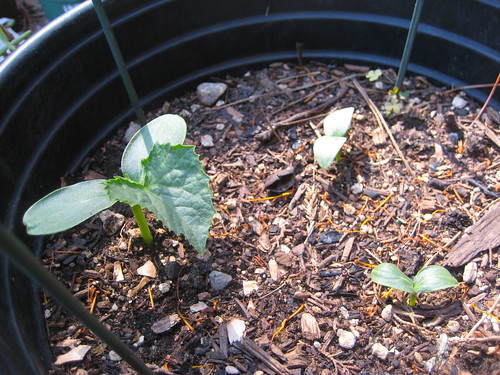
At the moment, the whole area looks pretty scrubby. Most low-water-use plants start off pretty slowly, and we're at the start of summer, so it should look that way for a while. But, I expect in another year they'll bush out and fill in the space.
Chicken Zone
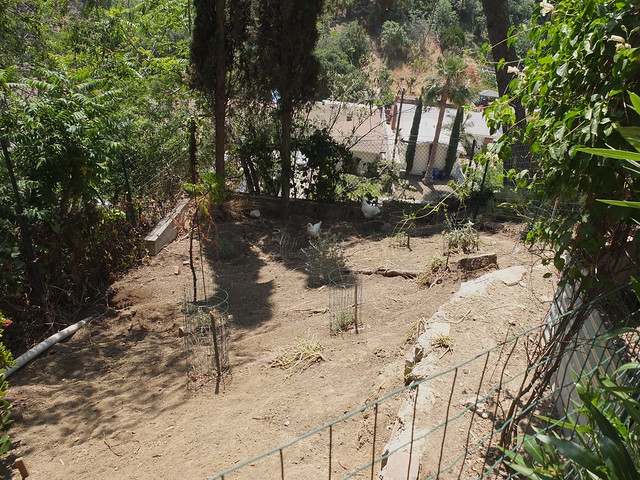
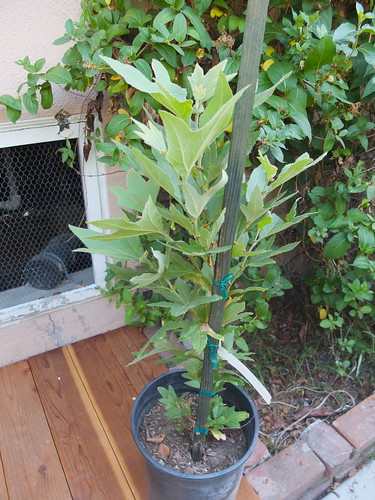
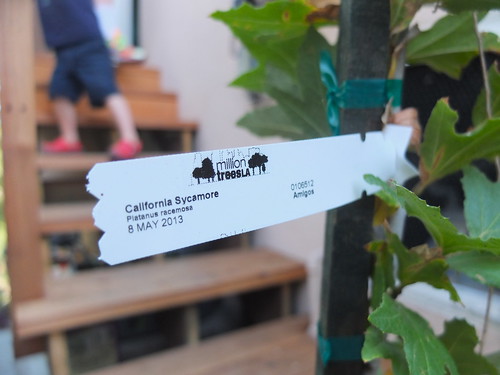
This coming Fall I also want to plant a small tree, maybe a Crepe Myrtle, to add a little extra attraction and some additional shade to the space. Just because it's a chicken free range zone doesn't mean it can't be kind of pretty.

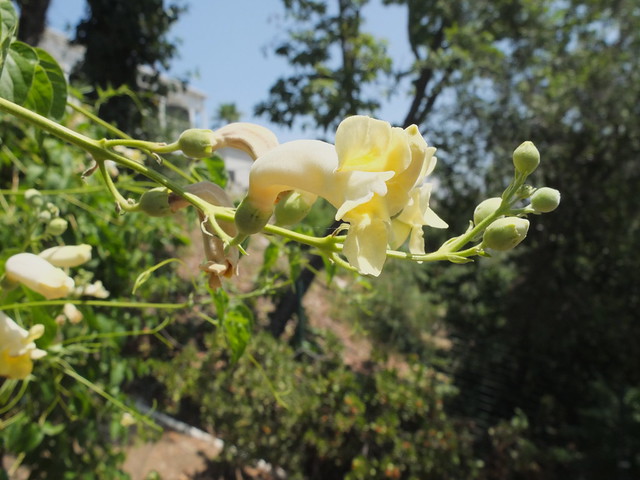
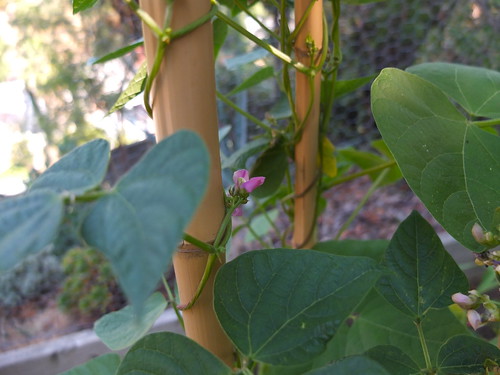
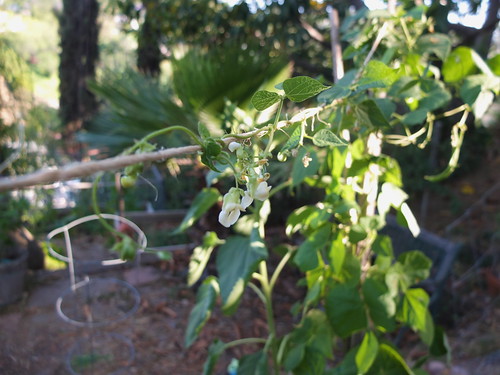
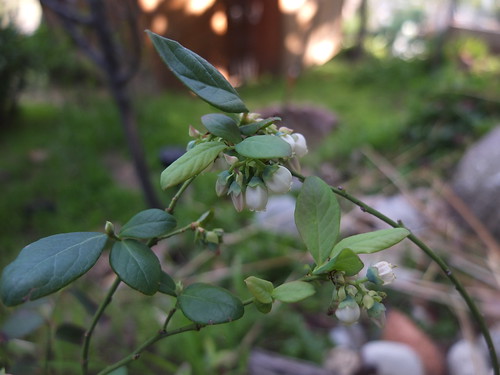
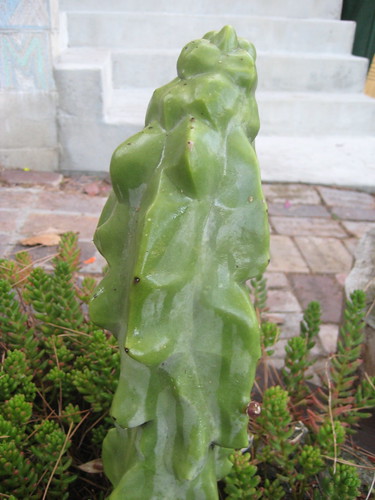
In positive chicken landscaping news, the Vanilla Trumpet Vine I planted a few years ago on one side of the run has really filled in. It's covering a good part of two sides of the run and bloomed really nicely last month. So, that worked out well.
Vanilla Trumpet Vine 
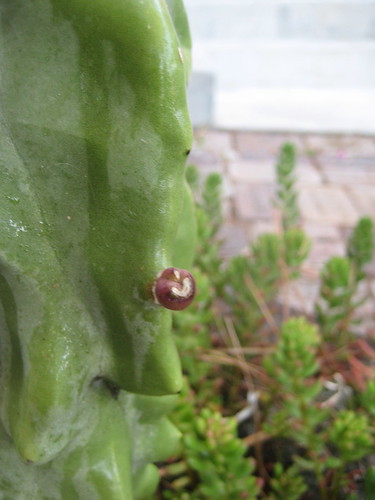
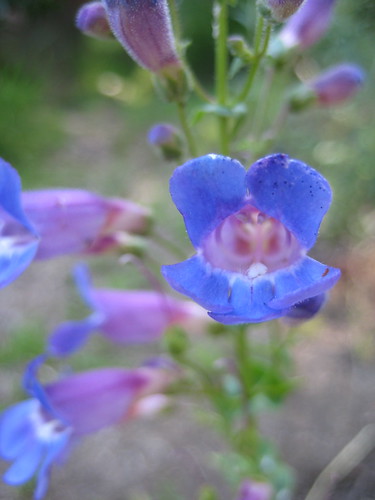
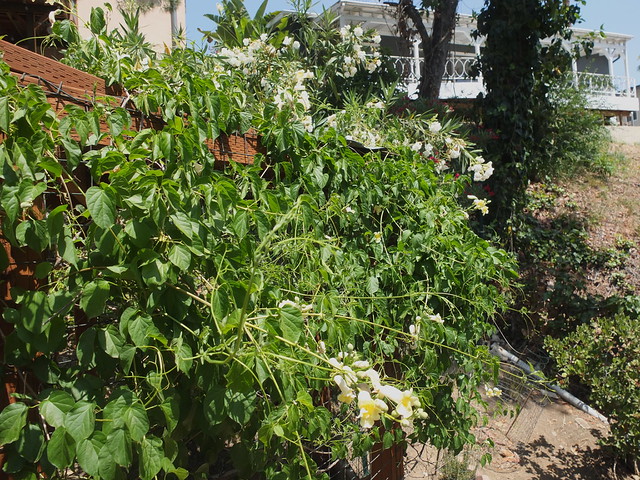
When I originally got it five years ago, I thought the vine would have purple flowers for some reason. It turns out they are kind of a creamy white--vanilla-colored, I guess, which makes sense. They smell good, too.Vanilla Trumpet Vine
Read More 0 comments | Posted by Audrey |

My Chicken Pen Solves All My Chicken Problems

As I mentioned a few weeks ago, my younger hen Linda was getting brutally bullied by some of my older girls. My temporary solution was to let Linda, and often her buddy Doris, out to free range every day, leaving the other three girls in the run. This let Linda's head wound heal, but it resulted in some collateral damage.

This is what happens when chickens get free access to your strawberry plants.
chicken destruction

chicken destruction
So, yea, it was pretty clear that if I wanted to have any kind of garden--container or otherwise--we needed to find some way to keep the hens away from the plants.

Initially, I was thinking of some series of wire mesh cages to go over my containers. That seemed rather complicated and elaborate. Plus, I have garden beds and containers all over the yard. I'd have to make the whole place a crazy fortress in order to keep the hens away from all my different fruits and vegetables. Clearly, the easiest and smartest solution would be to fence in the chickens. I'm not sure why I didn't think of that sooner, like three years ago.

Luckily, our chicken coop is situated in a part of the yard that's free of garden beds and largely unlandscaped. Even more luckily, I have a husband who is good at building things. Thus, our new chicken pen was created in only 2 short days.
new chicken pen
Dakota used the same nice heavy gauge wire fence that he used in the run, and some green metal fence posts, to build a spacious enclosure in the bottom left corner of the backyard. Here's the fence that starts at the left side of the run and extends to the fence we share with our neighbors. I planted a few rosemary bushes just below this section to help hold up the hillside, and I'm going to plant some lavender on the uphill side this weekend.

After the fence was complete, he built a nice gate out of wood right near the door to the run. We kept the coop itself outside the fence, so we can still easily get to the nesting box, and I can re-plant the green roof (for the third time) without the worry that the chickens will destroy it immediately.
completed chicken pen
The new pen setup is working really nicely. We go downstairs every morning and open the door to the run, and all the girls head out into their free range area to dig and frolic to their hearts content. All our fruit trees and most of our plants are on the non-chicken side of the fence, so they are now safe from chicken claws and beaks. The hens all seem really happy with their new contained freedom, and Linda's head is completely healed.

I feel good knowing our hens have lots of space and fun stuff to do while we're away from the house. After all, the whole reason we got chickens was to get eggs from happy, healthy, free range chickens.
Read More 0 comments | Posted by Audrey |

Hey, I Got Worms!

worm bin
As longtime readers of this blog and my family members know*, I enjoy getting exceptionally dorky garden-related gifts. So, for my birthday this year, my parents got me a Worm Factory worm bin and 1,000 Red Wigglers. I was thrilled!

Both items arrived on the same evening, and my son and I had a great time prepping the bin for our new worm friends. It was a slightly more elaborate process than I expected, but, luckily, we had some dry leaves and composted dirt close at hand to add to the coconut coir and shredded newspaper that came with the bin.

I got a 3-tier bin, and so far we're still on Bin #1. The worms seem happy, and I've been casually giving them small handfuls chopped vegetable trimmings, coffee grounds and dry leaves for the last couple of weeks. It's hard to tell how well things are functioning, but the worms are active and growing bigger, so that seems like a good sign.
worm bin
One nice thing about the Worm Factory is that is has all the important info printed on the lid. I think I'm doing a decent job with temperature and moisture control, but, since I'm a newbie, it's tough to be sure. I plan to shred up some junk mail today to add to the bin for the "fiber" part of the process. I also occasionally have little spouts growing out of the compost. I'm unsure if that's just an expected occurrence from adding plant matter to moist soil, or if it's an indicator or too much or too little moisture. Does anyone know?

My son is very interested in the whole worm composting process, which is an added bonus. He likes to show his friends the bin and tell them the worms are "making compost." And he's very excited to add the worm castings to our plants when the time comes. I'm happy to be able to share all my nerdy gardening interests with him. By the time he's old enough to have his own garden, he'll should be a total expert.

* These groups have significant overlap.
Read More 1 Comment | Posted by Audrey |

Second Try Sycamore

California Sycamore
Two weekends ago, I finally accepted defeat and admitted that the California Sycamore I hoped might stage a miraculous comeback was actually gone for good. Despite careful attention, the two year old tree seemed to be dead as a doornail.

My disappointment at this failure was soothed a little by the fact that we scored a new Sycamore for free at the annual Department of Sanitation Open House. Thanks Million Trees LA! (If you're wondering why we were attending an open house for the Department of Sanitation, I will remind you that I have a 3-year-old boy who loves garbage trucks.)
California Sycamore
This time around, I am determined that the tree will survive. When we dug up the old one, I saw the roots had not spread very far. This is probably due to the terrible, hard, rocky soil in that part of the backyard. We dug a pretty big hole to plant the last Sycamore, but clearly it wasn't big enough.

This time around, we dug an extra extra large hole for the new tree and mixed some grow mulch into the soil. I also tried to build up a good berm on the downhill side to keep water from draining away before it can soak in. I also need to stake it a little straighter once I get my hands on some good, sturdy stakes.
new tree planted
Summer is not the greatest time to plant a new tree, but I couldn't pass up the free tree and I figure it usually doesn't get really blistering hot until August. I plan to water it deeply once a week-ish at first, and see how that goes. Fingers crossed that this one makes it.
Read More 0 comments | Posted by Audrey |

Giant Sun Flowering

Grew this beauty in the upper garden bed. sunflower about to bloom
The bloom is pretty striking.
giant sunflower
I hope to let it go to seed, dry it out and then feed the seeds to the chickens. This time, I will shake them off the sunflower head first. We don't want another freak out.
Read More 1 Comment | Posted by Audrey |

Summer Favorite: Pole Beans

Kentucky Wonder Beans
One of the fondest memories I have of gardening with my dad when I was a kid is picking and eating green beans right off the vine. The smell and taste of fresh-picked pole beans is one of my favorite sensations of summer.

This year, I've been happy to have several towers of beans thriving around my garden. Regular readers of this blog (aka my parents) know that my big summer garden plans don't always pan out. But, this year, I have had some success--and, of course, several failures. My pole beans are my biggest triumph so far.

I have one tower growing in the upper bed, and three more down below in the lower raised bed. All are currently covered in leafy vines and starting to create pods. I am growing pole beans, because I like the winding vines and they save space. The varieties I picked this year, Kentucky Wonder and Cherokee Trail, are from Seed Savers.
Scarlet Runner Bean
The Cherokee Trail beans have black seeds and dark pink flowers. They haven't made pods yet, so I can't speak to their taste, but here's the interesting description from the Seed Savers site:

(Phaseolus vulgaris) (aka Cherokee Black) Given to SSE in 1977 by the late Dr. John Wyche, SSE member from Hugo, Oklahoma. Dr. Wyche’s Cherokee ancestors carried this bean over the Trail of Tears, the infamous winter death march from the Smoky Mountains to Oklahoma (1838-1839), leaving a trail of 4,000 graves. Green 6" pods with purple overlay, shiny jet-black seeds. Good for snap beans and dry beans. Pole habit, snap or dry, 85 days.
I love their descriptions of heirloom varieties. They really add an extra layer of historical interest--and drama--to regular old vegetable gardening. Plus, it makes you feel like you're helping carry on a tradition just by planting them.

The beans we're currently eating are the Kentucky Wonders from the upper bed, which I planted first. My upper bed hasn't done so well lately. It's exposed to chicken interference and skunk destruction, and I worry the soil is a little tired. But the pole beans don't mind--perhaps because they grow upward and away from those pesky animals. When they reached the top of their pole tower, I attached a string, and have been training the vines that way.
green beans
I really like how that looks, maybe because it gives an impression of overflowing abundance. Or maybe it's because the delicate bean flowers are more exposed.

So, it looks like we'll be enjoying fresh beans for at least another month, maybe longer. My son is not a huge fan yet, but he's had some bites and plans to have more. I'll make him a pole bean lover by summer's end, I'm sure.
Read More 0 comments | Posted by Audrey |

Hey look, blueberries!

blueberries
So, it seems like I may get blueberries after all! Even though the two bushes that were supposed to be cross-pollinating each other didn't bloom at exactly the same time, there are still little berries forming on the earlier-blooming bush, a variety of southern highbush called "Misty."

I'm a bit confused, as I was assured by both the Internet and the guy at the nursery that cross pollination was necessary to get fruit. I guess the berries might not make it all the way to maturity, but they seem pretty real right now so I think that's unlikely. I'm really looking forward to picking and eating them in a couple more weeks.

The other bush, a variety called "Jubilee," has just started blooming, so the jury is still out on whether it will produce fruit. But I'm feeling lucky
strawberry
I've also got a pretty good strawberry crop coming to maturity in various containers around the yard. My son loves picking and eating fruit and veggies straight from the plant, and I don't blame him. It's pretty fun to grow your own food, especially since fresh picked is so much tastier than grocery store fruit.
strawberry

Read More 0 comments | Posted by Audrey |

Dead or Dormant?

I've been playing a little game with myself for the past several months. It's called "Dead or Dormant" and it centers around the California Sycamore tree we planted in November 2011. We got the tree, a native of this area, to replace a giant pine tree that was felled by bark beetles. Dakota, having grown up in the Midwest where they have seasons, wanted to get a tree that would drop its leaves in the winter. So, we decided on a Sycamore, with it's pretty white bark, big broad leaves and deciduous nature.

This is how that tree looked in November of 2011.
new native plants
Here it is almost exactly a year ago, in March 2012.
sycamore
And this is how it looks now.
sycamore stick
Hmmmmm. Something seems... different, doesn't it? You're probably wondering why I don't have a wide shot of the tree for you. That's because it's hard to get the camera to focus on a leafless stick. At the moment, there is not a single leaf growing on the whole tree. I'm finding that fact very distressing.

But I have not lost hope. The bark is still pretty and white, and there are those little bud-like things coming off the "branches." I feel like those buds might make some leaves any day now. Right? Right? Someone with knowledge of Sycamore tree growth should comment and reassure me, if you can do so in good faith.

I will say that I have given this tree intermittent waterings--not too many but not too few--over the last year. The trees and shrubs all around it are quite happy and healthy, and I have not let too much dirt collect around the base of the Sycamore's trunk. It should be fine. But I am getting worried.

I guess all I can really do is wait and watch. Wait and worry.

Dead or dormant?

Deciduous trees are stressful.
Read More 2 comments | Posted by Audrey |

Chicken Coop Green Roof: Second Attempt

When Dakota first built our coop back in 2008, one of the many cool features was its green roof. After doing his research, he built a multi-layered system to make sure the roof had good drainage and the right soil mix. You can read that original post and see photos here. It was a really cool idea, but, unfortunately, the original green roof pictured below did not survive.
sedums and such
I blame a combination of squirrels, blazing sun and infrequent watering. You know, the usual.

Recently, I have really wanted to re-plant the coop's green roof. It's still a great idea, and the drainage system still works. All I really needed was a way to keep the plants from drying out in the summer and keep the squirrels from digging up their roots. My solution was simple and obvious: burlap.
re-planting the green roof
I had some burlap left over from my son's birthday party decorations. So, I added additional soil into the green roof "bed" and then stretched the burlap across. Then, I used a heavy-duty staple gun to secure the burlap around the edges of the roof.

There was one plant still alive in the old roof, so I cut a little "x" in the burlap to let it through. Then I cut a bunch of additional slits all over the burlap to add more plants.
re-planting the green roof
I pressed the burlap back around the base of each plant for maximum protection and water-retention. The plants I chose this time are a variety of succulents--some taken from cuttings of existing plants and some purchased by Dakota. Several are aggressive spreaders, and my hope is that this new burlap mulch idea will allow the plants to grow and fill in the spaces in between. It should. Burlap is pretty permeable.
re-planting the green roof
So, here's the newly re-planted green roof. I'll let you know how things progress this time. I promise to water more frequently this time around.
Read More 0 comments | Posted by Audrey |

Blueberry blossoms

blueberry blossoms
One of my blueberry bushes has already started to put out an impressive number of flowers. They are quite pretty and delicate-looking, and they seem to be holding up well despite wild swings in temperature.

This is great to see except for the fact that the other bush hasn't even started growing spring leaves yet. Blueberry blossoms need to be cross-pollinated by a bush of a different variety in order to set fruit.

So... bummer. These flowers are just ornamental for now. I am hoping the other bush will have a burst of growth very soon, so that the two bushes will actually flower at the same time. It would be so fun to pick fresh blueberries this Spring. I just need that lazy second bush to cooperate.
Read More 1 Comment | Posted by Audrey |

Cactus Pimple Update

I'm sure you've all been lying awake at night wondering what has happened with the cactus pimple I posted about over the summer. I apologize for not keeping everyone up-to-date on the gripping saga of my special cactus' pubescent event.

Well, I was right. It does seem to be a new appendage, which is exciting. But, it is growing very very slowly. Here it is as of last month.
cactus with tiny arm
As you can see, the bump has grown very slightly, and turned green with hints of purple. But it's far from the little cactus "arm" I expected by now.

I guess I should have known this would be slow-going. In the whole time I've owned it--about 7 years--it has only grown 5 inches. So, I guess I will have to be patient. Hopefully, when the weather warms up, it'll have a little spurt. I'll let you know.
Read More 0 comments | Posted by Audrey |

Fungus Among Us

The recent wet weather, particularly the longer damp period in December, seems to have created a perfect growing environment for a variety of mushrooms and fungi in our back yard. The specimens in the garden are both beautiful and diverse. I don't think I've ever seen this variety at our house before.
fungus
We've sadly lost a couple of trees to bark beetle in the last couple of years, so there are numerous large stumps and logs that make a perfect fungus habitat.
fungus on a stump
I myself am no botanist, so I have no idea what any of these are. But, it's fun to wander around the garden and come across little shelves and piles and ripples of fungus.
fungus
Anybody know of a good website that identifies common mushrooms and fungi?
mushroom emerging
Read More 0 comments | Posted by Audrey |

One Okra at a Time

Despite my aforementioned laziness, this summer's container garden has been quite successful so far. I started harvesting a few weeks ago, and we've had a pretty steady supply of tomatoes ever since. I bought one of those mixed seed packs of different cherry tomato varieties, and ended up with only one red variety. The rest are yellow pear or golden cherries. Luckily, my son loves yellow tomatoes most of all.
cherry tomatoes
I ended up with two containers of cucumbers--two plants per container--and both containers have been producing fruit fairly regularly. These are the Spacemaster variety, so they are supposed to grow well in smaller spaces. The fruit is pretty tasty, although the skin is very bitter so they are best eaten peeled.
spacemaster cucumber
And, best news of all, I grew some okra from seed! I actually have two okra plants growing and producing spears at the moment. I'm still only getting one okra at a time, but that's progress, right? Sort of.
okra!
I did notice some spindly-looking okra plants in the demonstration vegetable garden at the Natural History Museum recently. So, maybe okra plants never get that busy, at least in home gardens. I am keeping both plants in full sun and fertilizing every couple of weeks, so I am hopeful that they'll continue to produce. I might even beat my previous record of four okra in a season.
Read More 0 comments | Posted by Audrey |

Cactus Puberty

She's going to be so mad at me for posting this but... my favorite cactus just got her first pimple! They grow up so fast, don't they?
cactus with "pimple"
Here's a close-up of the blemish, which is positioned a few inches up on the cactus' back side.
cactus pimple
Of course, I think it's really a bud for a side growth. So, my special cactus may have a new "arm" very soon.

This is especially exciting because this is probably my fanciest and most treasured cactus. I can't remember what it's called, but this cactus is originally from Mexico and is now sadly extinct in the wild. It grows in a pillar and has this very cool, wavy-looking exterior--almost as if it's melting in the heat. My parents bought it for me a California Cactus Center many years ago to celebrate a promotion at work. It now sits in a place of honor in one of the cactus planters Dakota built into our patio.

I am delighted that my "Celebration Cactus" is doing well enough to grow another limb. Perhaps, if it gets big enough, I can take a cutting and grow a new fancy melting cactus to keep this one company. Or, even better, I can grow another one to give as a gift.

For now, I will have to be patient. The pimple is quite small, and I don't want to make the cactus too self-conscious.
Read More 2 comments | Posted by Audrey |

Small Potato (Harvest)

IMG_1013
Guess what? I actually managed to grow some potatoes in those bags. Not very many potatoes, but the above potatoes were grown and harvested last month. So, I am not a complete potato bag failure this time around.

And I still have a second bag waiting to be dug up. I suspect there will be even more tubers in that one. The stalks in bag #2 lasted longer and just wilted last week. I think the key is afternoon shade and infrequent watering.
Read More 2 comments | Posted by Audrey |

Summer Containers

I'm thinking it may be another lazy summer, gardening-wise. I have cleared the upper bed and planted some watermelon seeds--more on that later--but the lower bed remains a tangle of bug-destroyed winter greens and weeds. I just can't get up the energy, or find the time, to deal with it.

On the bright side, I managed to start my tomato seeds pretty early, so my son and I were able to spend last Saturday transplanting small plants into large containers. Container gardening much easier to manage than in-ground gardening if you simultaneously need to watch a curious 2-year-old. My son could wander around, filling small pots with soil, digging in containers with a shovel and playing in a water bucket I set up for him, while I filled 5-gallon pots with a mix of compost and garden soil.

I managed to get five tomatoes transferred to large containers. All will produce cherry-sized fruit of various colors, which my son will be happy to devour in a month or two.
tomato seedings transplanted
I have quite a few more tomato seedlings still growing in small pots. I might plant them in the ground somewhere, or maybe I will give them as gifts to friends and neighbors. I'll probably end up with enough to do both.

I also planted some Spacemaster Cucumber seeds in a large container a few weeks ago. They took a little while to germinate, probably due to the colder-than-usual April weather. But recently they have sprouted, and I am hoping to get them to climb up a tomato cage and bear some crisp fruit this summer.
cucumbers in container
Because I am a glutton for punishment, I also planted some okra seeds in pots at the same time I planted the tomatoes. Despite a compost-rich soil mix and dutiful seed-scratching, not a single seed sprouted. I recently re-planted some of the pots. Maybe the warmed weather will help this time. Or maybe I am doomed to never successfully grow okra. How tragic for a gardener from Texas.
Read More 0 comments | Posted by Audrey |

In Bloom

The late spring rains have brought some nice blossoms to the garden this April. Including...

The Royal Penstemon I got this winter from the nursery at the Theodore Payne Foundation. Royal Penstemon
The blossoms on the Royal Penstemon are really lovely, and butterflies and other pollinators seem really into them. I saw a butterfly just hanging out inside one of the blooms the other day, drinking in the awesomeness. I guess that's the benefit of planting natives.

Also currently blooming are one small lupine and a few pink Cosmos from the wildflower seed mix my sister gave me for Christmas. More Cosmos, scattered throughout the backyard, are on the way.
wildflowers
Plus these, whose name I can't currently remember.
wildflowers
Speaking of my sister, she has an amazing wildflower display in front of her house in San Antonio. Mine is pretty pitiful in comparison, but I'm still happy to see some pretty spots of color around the backyard.

The front yard is really bushy and overgrown, but in bloom as well, which is great. I am planning to prune it back soon and recover the paths with some wood chips we got from friends a couple of weeks ago. There are bees everywhere, to the point where I'm concerned about my son accidentally grabbing one when he picks lavender blossoms. But still, it's nice to see so many happy bees.
Read More 1 Comment | Posted by Audrey |

Growing Bags of Potatoes

Despite some past failures, I have recently decided that I really enjoy growing potatoes. I don't even have to buy seed. I just accidentally leave potatoes from my produce delivery box in the pantry for too long, and I've got some starters almost ready to plant.

Last year, I grew potatoes in the ground, but this year I decided to use the potato bags again. I think I have it figured out this time. I planted earlier--in March--and I'm keeping them bags out of direct sun and being careful not to over-water. I think my last potato bag disaster was due to hot summer temperatures combined with overzealous watering (due to the hot temperatures). So far, things seem to be going well.

Here is the first bag I planted back on March 18, sitting next to my two blueberry bushes.
blueberries and potato bag
And here it is today, April 28. Potatoes grow so quickly!
potato sack
Today I filled in dirt and compost around the stalks until it was almost to the top of the bag. Now, I just have to wait and try not to get to crazy with the watering. If I'm good, I should have some potatoes by June. What could be easier than that? (I hope I'm not jinxing myself by saying that.)
Read More 3 comments | Posted by Audrey |
Older Posts Home

GREEN FRIEDA

  • About
      This blog is about a variety of things I'm interested in, including gardening, backyard chickens, crafts, DIY home improvement and resource efficiency. My hope is that it's both informative and fun to read. I hope you like it. If you want to email me, click here.
  • Labels

    • animals (8)
    • baby (7)
    • bathroom (4)
    • cactus (1)
    • canning (1)
    • charities (3)
    • chickens (79)
    • compost (1)
    • crafts (9)
    • energy (8)
    • environment (24)
    • food (61)
    • gardening (137)
    • gifts (7)
    • good girls (10)
    • holiday (6)
    • home improvement (27)
    • insects (2)
    • kids (4)
    • kitchen (16)
    • native plants (16)
    • orchard (6)
    • pests (14)
    • politics (6)
    • reuse (16)
    • tips (10)
    • tree (1)
    • waste (2)
    • water (9)
    • wedding (2)

    Blog Archive

    • ▼  2014 (5)
      • ▼  June (2)
        • Chicken Landscaping
        • Poor Baldy
      • ►  May (1)
      • ►  April (2)
    • ►  2013 (20)
      • ►  November (3)
      • ►  June (6)
      • ►  March (5)
      • ►  February (3)
      • ►  January (3)
    • ►  2012 (13)
      • ►  September (1)
      • ►  August (2)
      • ►  July (2)
      • ►  May (1)
      • ►  April (2)
      • ►  February (1)
      • ►  January (4)
    • ►  2011 (33)
      • ►  December (3)
      • ►  November (5)
      • ►  September (1)
      • ►  August (3)
      • ►  June (7)
      • ►  May (2)
      • ►  April (4)
      • ►  March (1)
      • ►  February (4)
      • ►  January (3)
    • ►  2010 (34)
      • ►  November (3)
      • ►  October (2)
      • ►  September (4)
      • ►  August (5)
      • ►  July (3)
      • ►  June (3)
      • ►  May (1)
      • ►  April (6)
      • ►  March (5)
      • ►  January (2)
    • ►  2009 (94)
      • ►  December (6)
      • ►  November (8)
      • ►  October (6)
      • ►  September (6)
      • ►  August (9)
      • ►  July (13)
      • ►  June (12)
      • ►  May (12)
      • ►  April (3)
      • ►  March (8)
      • ►  February (6)
      • ►  January (5)
    • ►  2008 (54)
      • ►  December (4)
      • ►  November (3)
      • ►  October (3)
      • ►  September (3)
      • ►  August (7)
      • ►  July (6)
      • ►  June (9)
      • ►  May (2)
      • ►  April (2)
      • ►  March (4)
      • ►  February (7)
      • ►  January (4)
    • ►  2007 (16)
      • ►  December (3)
      • ►  November (1)
      • ►  October (3)
      • ►  August (3)
      • ►  May (2)
      • ►  April (2)
      • ►  February (1)
      • ►  January (1)
    • ►  2006 (28)
      • ►  November (1)
      • ►  October (3)
      • ►  August (3)
      • ►  July (1)
      • ►  June (4)
      • ►  May (5)
      • ►  April (1)
      • ►  March (5)
      • ►  February (2)
      • ►  January (3)
    • ►  2005 (10)
      • ►  December (1)
      • ►  November (1)
      • ►  October (2)
      • ►  September (1)
      • ►  July (1)
      • ►  June (4)

    Related Blogs

    • Homegrown Evolution
      Framed
      3 years ago
    • DigginFood
      How to gain popularity through buying Twitter followers
      8 years ago
    • The Tangled Nest
      The First Egg: Light, Life, and Gratitude
      9 years ago
    • Monkey Lobster
      Summer Slide Show
      10 years ago
    • Rambling LA
      LOSING YOUR LAWN
      11 years ago
    • Rancho Garbanzo
      3 1/2 years later - Our Wedding Photobook
      11 years ago
    • Urban Chickens
      Infographic time: the chicken coop checklist
      12 years ago
    • Ramshackle Solid
      Hoop and Pole
      12 years ago
    • Our Yellow House
      Still Knitting
      12 years ago
    Show 5 Show All
    Follow GreenFrieda on Twitter

    Links

    • Backyard Chickens
    • Tree People
    • Seed Savers Exchange
    • L.A. Works
    • to do something
    • Mohair Gravy

    Followers

  • Search


    • Home
    • Posts RSS
    • Comments RSS
    • Edit

    © Copyright Green Frieda. All rights reserved.
    Designed by FTL Wordpress Themes | Bloggerized by FalconHive.com
    brought to you by Smashing Magazine

    Back to Top