• Home
  • Posts RSS
  • Comments RSS
  • Edit
Blue Orange Green Pink Purple

featured post

Homemade Granola

Recently I tried making my own granola. It ended up being quite simple, and I recommend trying it yourself. Dakota and I both find most store-bought granolas way too sweet and full of "extra" flavors. So, my goal was to make granola that was simple, healthy and tasty.

Read More

What's in the Summer Garden

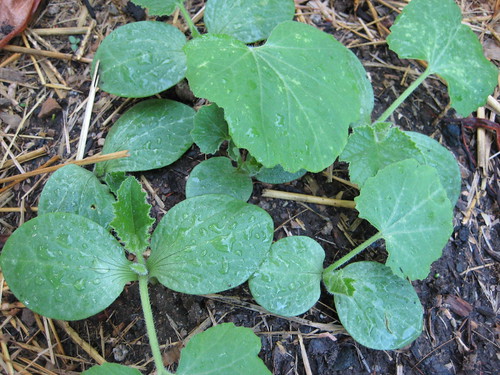
squash needs thinning

Now that my seedlings are all coming up, I figured I should post about what exactly I've got growing in my vegetable garden right now. As usual, I'm focusing on the summer standards--tomatoes, peppers, squash--as well as mixing in some new crops I've never grown before. Specifically, I'm growing:

Fish Peppers
Maule's Red Hot Peppers
Wenk's Yellow Hot Peppers
Austin's Red Pear Tomatoes
Hartman's Yellow Gooseberry Tomatoes
Mexico Midget Tomatoes
Listada de Gandia Eggplants
Golden Zucchini Squash
Guatemalan Blue Squash
Small Shining Watermelon
Strawberries
Empress Beans (snap bean)
German Butterball Potatoes
Stowell's Evergreen Corn

I got all my seeds from Seed Savers Exchange, which has a mouth-watering selection of heirloom varieties. Man, I love a good seed catalog!

Last year, my corn grew fairly tall and produced a few ears, but none of them made it to the eating stage before mysteriously withering or being attacked by bugs. This year I've got them in a sunnier spot in the lower raised bed, and I planted more rows for easier pollination. Plus, I grew peas in that spot last winter, which theoretically enriched the soil with lots of lovely nitrogen. So, if my corn sprouts can avoid being scratched to death by certain chickens (ahem), I think they have a good shot at producing edible ears this year.
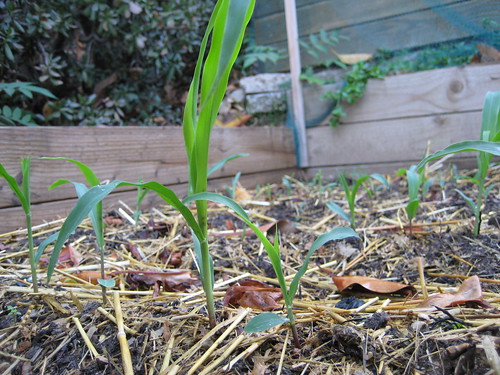
corn sprouts

I've had some decent luck with eggplants in the past, although I've lost a few to blossom end rot, and some others when they suddenly got a yellow tint. I think it's because I left them on the plant too long. Is that right, gardeners out there? This year, I'm trying them in containers and in the ground. And I made sure to add a calcium-rich soil supplement to help avoid that evil blossom-end rot.
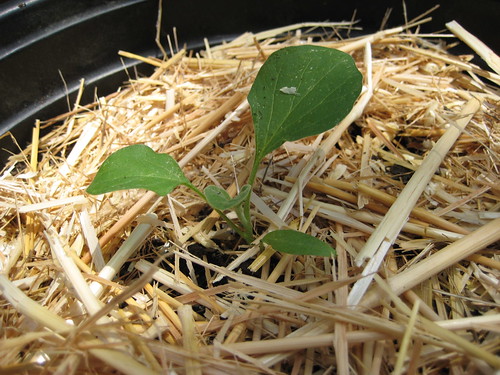
eggplant seeding

The new crops for 2009 are strawberries, watermelon and potatoes. The potatoes seem extremely happy in their grow bags, the strawberries are doing okay and the watermelon seedlings have come up and are making new leaves.

I've noticed my watermelon is growing more slowly than the other squash, which have been leafing out at a rapid rate. I'm not sure why. Hopefully it's because of the variety and not some issue with my soil. I'm really hoping to harvest some sweet, tasty watermelons in a couple of months. So, if you've got any tips for me, let me know.
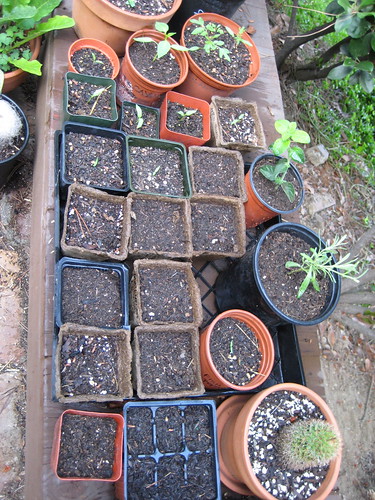
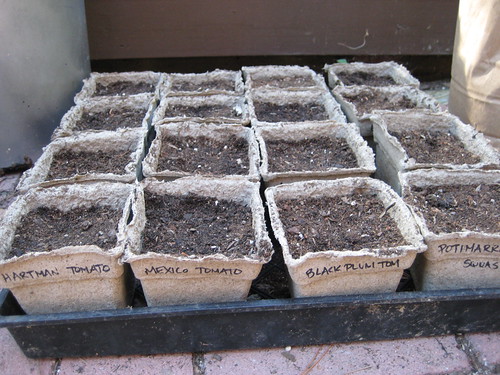
little pots in process

As usual, I got way too many seeds for my small gardening operation. I just really enjoy growing new and interesting heirloom varieties. (How can you possibly choose just one kind of tomato when they offer 60?) I've already got an excess of seedlings growing in my little pots, so certain friends and neighbors of mine can expect to find a free Mexico Midget or Hartman's tomato plant on their doorstep any day now. Hope you like them!
Read More 2 comments | Posted by Audrey |

Eco-Friendly Floor Finishing

Last weekend was all about putting finish on the new wood floor. At this moment, it's bright, shiny and clean... and almost done.

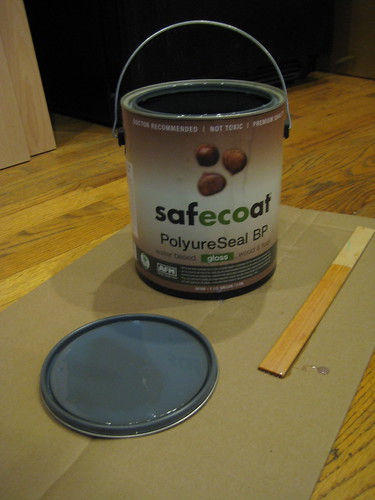
Four coats of finish were smoothed on over the course of the weekend, and I believe there are two coats left to apply. (Dakota decided to do extra coats since the kitchen is such a high-traffic area.) We ended up going with AFM Safecoat PolyureSeal BP, which I purchased at Architectural Coatings + Design Center in Tarzana. I found them to be very helpful and accommodating in terms of the finishes and amounts I needed.

After doing some online research, I decided that AFM Safecoat was the right choice for us. It's a water-based clear finish with very low VOC. It's also LEED qualified and contains no formaldehyde. I got a gallon of gloss and a quart of satin. Safecoat isn't cheap; the gallon ran me about $100 and the quart was about $30, but I think it's worth it to have a less toxic floor.

eco-friendly floor finish

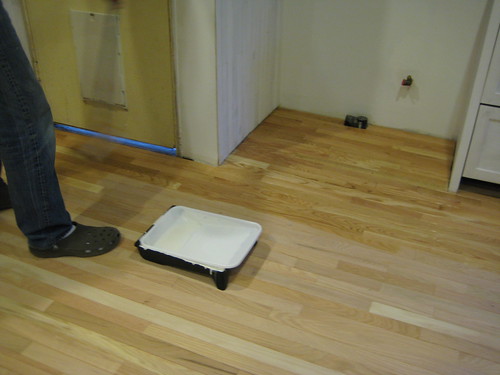
According to the directions, for a satin finish, you apply several coats of gloss first, followed by the satin. Here's an image of the first coat going down, after a thorough floor sanding by Dakota.

finishing the floor (1st coat)

The smell from the Safecoat PolyureSeal BP was fairly strong, but dissipated after about an hour. I've never refinished a floor before, so I can't really speak to how the odor compares to other polyurethane finishes. I do appreciate that the odor doesn't linger after the finish dries.

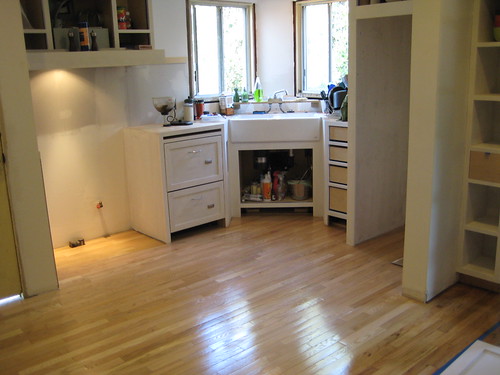
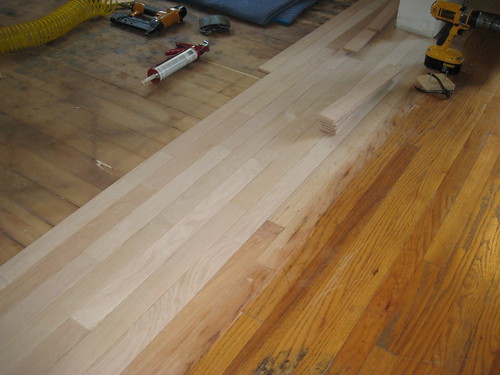
So far, the new floor looks great. The finish is shiny and smooth, and the transition between the old floor and new floor is noticeable but not distracting. Predictably, I now want to refinish the floors in the whole house. But I think for now we'll have to focus on the kitchen. (One project at a time!)

wood floor with several coats of finish
Read More 6 comments | Posted by Audrey |

Tip #3: Location Matters

Like many people, I have limited space for my vegetable garden. The combination of large, shady trees and a steep slope means I don't have many sunny spots in my backyard to put seeds in the ground. So, for me, carefully planning a garden layout is key.

Through a combination of trial-and-error and research, I've learned that you can't skimp on sunshine when it comes to certain crops. In particular, summer squash needs an extremely sunny spot. Last year, I planted in a location that got a bit too much afternoon shade and didn't get a single zucchini. (How embarrassing! I mean, zucchini is supposedly the easiest vegetable to grow.)

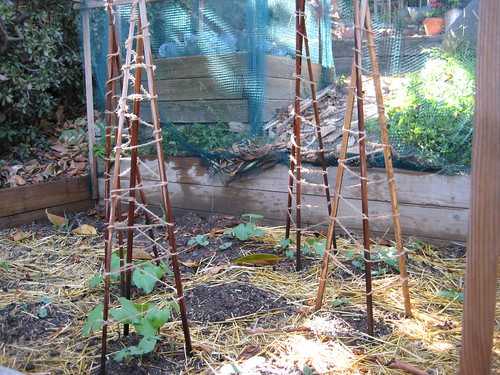
This year, I've got my squash, green beans and corn in my sunniest plot, just above the cactus patch. These crops should grow well together, since corn and beans grow up and squash grows out. That's the idea, anyway. So far, all three crops doing well, and I'm thinking this year's squash crop will be less humiliating.

bean poles and squash hills

I've found that other summer veggies, like peppers and carrots, can handle a bit more shade--although not too much. So, I've got those guys growing in slightly shadier spots. I'm lucky in that Southern California summer days are long and hot, so almost any spot is sunny for a couple of hours. Still, when planning your garden, I recommend you take into account various crops sunlight needs as much as you can.

A good reference for figuring out where to plant your veggies is Burpee's The Complete Vegetable & Herb Gardener. It's a giant reference manual that gives good advice on where to plant almost every vegetable in your garden, alongside detailed information on fertilizer needs and other important tips. Despite my trail-and-error tendencies, I have found this book to be extremely helpful.
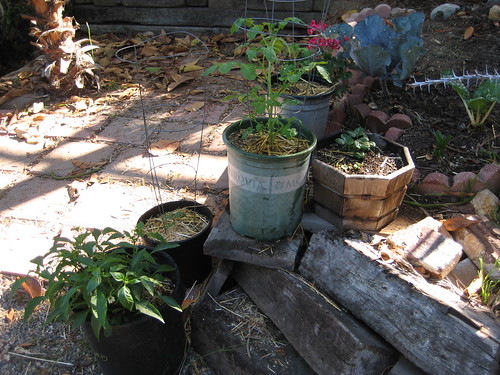
To be honest, though, everyone's garden is different. I think you have to keep testing different crops in different areas until you find the right spot and configuration for ideal production*. Tree trimming regularly would also probably help.

And, obviously, container gardening helps solve some of my space and sunlight issues. I'm growing tomatoes almost exclusively in containers this year. This will save me space, and allow me to move my plants to sunnier--or shadier--spots on the patio as needed.

tomatoes, peppers and strawberries

* Once I find the right spot for my in-ground veggies, I'll have to confront the whole issue of crop rotation--which is daunting considering my limited space. Perhaps since I'm growing small crops mixed together, it won't be too bad to grow the same crop in a very similar location the following year. We'll see...


Read More 2 comments | Posted by Audrey |

Tip #2: Mulch Like You Mean It

Time for another in my series of Tips from a Trial and Error Gardner. This time, I'm talking mulch.

eggplant seeding

In the last couple of years, I've learned that mulch is essential in my vegetable garden--especially when gardening in containers and most especially in the summer. The dry, hot summers of Southern California will dry out dirt quickly, and mulch can help keep the soil evenly moist and your plants healthy. Mulching also means you don't have to water your plants as heavily or as often.

Summer plants like tomatoes and eggplants don't respond well to fluctuations in soil moisture level. When the soil goes through a cycle of getting wet and drying out completely, your veggies can get blossom end rot. This has happened to me before, and, let me assure you, it's frustrating. Basically, a brownish or grayish spot appears on the end of a fruit as it grows, ruining it. Mulching can help prevent blossom end rot by holding water in the soil when it might otherwise evaporate. I've managed to stop blossom end rot in my vegetables by mulching around the base of my tomatoes and eggplants. This year, I'm doing the same with my squash, which are also known to suffer from blossom end rot.

In terms of what type of mulch to use, there are many options: bark, garden plastic or, my current favorite, hay. They all work fairly well. The nice thing about hay is that I can just turn it into the soil at the end of the season and it should break down quickly. (Plus, I use it as bedding in my chicken coop first.)

That's it for my thoughts on mulching. I have a couple more gardening tips in mind, and I plan to role them out in the next few weeks. Hopefully, at least one reader will find them helpful.

Previously: Tip #1
Read More 8 comments | Posted by Audrey |

What's wrong with this strawberry?

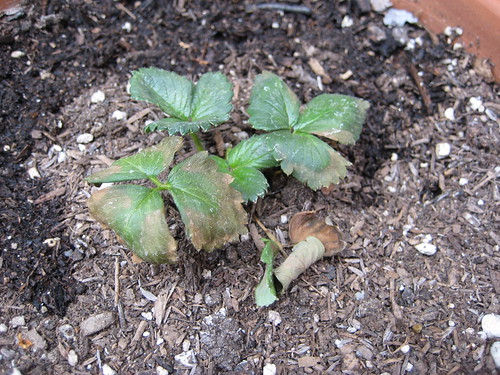
Recently, I posted about my first attempt at growing strawberries. I got several comments about how fun and relatively easy they are to grow, so I'm hoping to get some good advice now. Does anyone know what is wrong with this poor strawberry plant?

what's wrong with this strawberry

The other two are doing pretty well, but this one hasn't really grown new leaves, and the old ones are turning brown and dying rather quickly. Has anyone had this problem before?

My guesses:
1) I am over-watering.
2) I am under-watering.
3) It's not getting enough sun.

Currently, I'm experimenting by moving it to a sunnier spot and watering it less frequently. Any suggestions or tips about watering strawberries would be much appreciated.

Thanks!
Read More 8 comments | Posted by Audrey |

Like Chickens to a Hay Bale

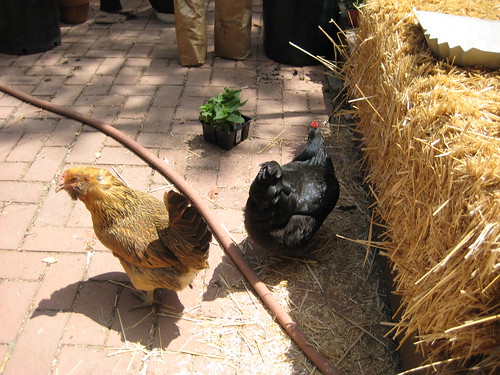
My chickens have a new obsession. Every time I let them out to free range, they are drawn to it like moths to a flame. Peggy and Tina just can't get enough of the hay bale.

chickens check out the hay

I don't know what it is about the hay that gets them so excited. They have plenty of dry weeds in the yard to yank up and fling around. Maybe it's the scent? Or maybe there's some kind of innate chicken sense that says, "Yes, I am a farm animal, and farm animals love hay." All I know is, no matter how many times I chase them away from it, the hens just keep coming back to the hay bale.

On the bright side, I'd rather the chickens pick at and obsess over the hay bale than my vegetable garden. I chase them away because they make such a mess, throwing hay all over the patio. But, really, I'd rather have a messy patio than come outside to discover they've pulled up all my bean sprouts.
Read More 1 Comment | Posted by Audrey |

Growing Potatoes in Big Green Bags

This year, I decided to try growing potatoes for the first time. The rumor is that they're pretty easy to grow, and I am a fan of potatoes any way you cook them. So, I ordered some seed potatoes from Seed Savers. I went with a variety called German Butterball, which are supposed to be tasty and to store well. (Note: You have to order your seed potatoes in advance and then choose the date in Spring when you'd like them to ship out. I chose an early date, since the climate is so mild here)

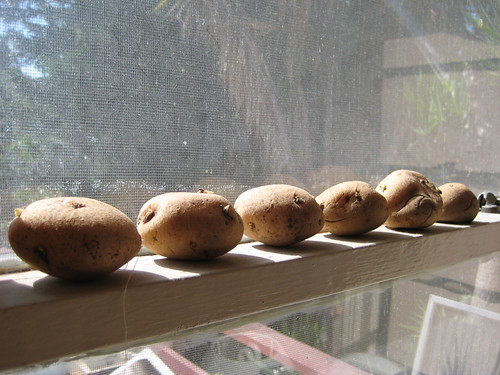
When my seed potatoes arrived in mid-March, I followed directions and placed them in a sunny but not-too-hot spot so that they could sprout. I went with the windowsill in the guestroom.

seed potatoes

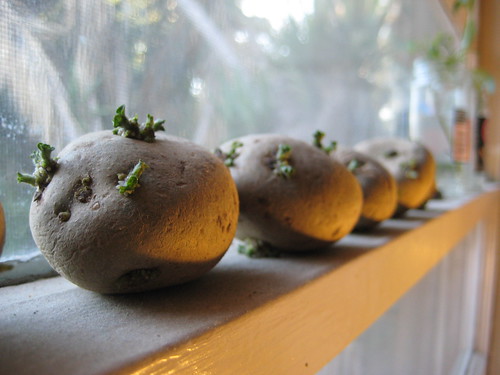
After about three weeks, the seed potatoes all had some nice green sprouts growing out of their eyes. My instructions said I should wait until the sprouts were 1 inch long. But, after another couple of weeks, that didn't seem to be happening, so I just went ahead and planted the seed potatoes as they were.

potatoes in the window

Because my garden space is limited, I decided to plant my German Butterballs in special Potato Planter Bags. They're basically big, green plastic bags with drainage holes at the bottom and sturdy handles. The bags come with fairly elaborate instructions about planting your potatoes in stages. Basically, as the green stalks grow, you add in more soil and compost. So the top of the soil slowly rises up as your potatoes grow.
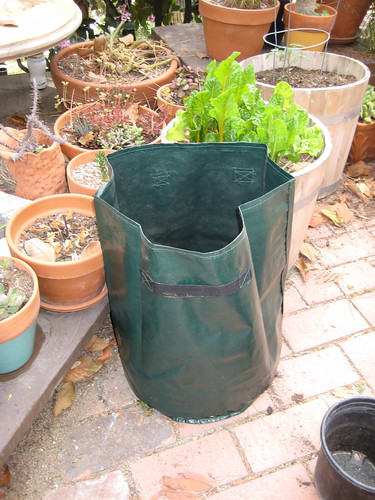
potato bag

Here's how the potatoes look today after two weeks in the bags. The leaves and stems seem fairly healthy, as far as I can tell. I was worried that planting them before they had a 1-inch sprout would mess them up, but that doesn't seem to be the case. I put a lot of compost in the bags, so I'm sure that's helping.

IMG_3797.JPG

It'll soon be time to add the next layer of soil and compost. And then I'll just have to be patient. According to Seed Savers, these guys need 100 to 120 days to reach maturity.
Read More 4 comments | Posted by Audrey |

We Have a Floor!

new flooring

Check that out! That is new flooring going down in the kitchen. New, beautiful, oak flooring--although, part of it isn't "new" at all. More on that later.

Dakota started laying the floor last weekend, after spending the previous weekend sanding down the subfloor. He rented a big belt sander from the hardware store, and spent a day scraping and sanding the subfloor until it was smooth, clean and ready for the next step. Here's Nigel enjoying the sanded subfloor.

Nigel shows off the sanded subfloor

Last weekend, the real floor started going down. It's red oak, to match the floors in the rest of our house. Most of the flooring was actually made from the old oak cabinet doors that were in our previous kitchen. Dakota had this brainstorm a while back, and I got really excited about it because reusing the old doors is both money-saving and environmentally friendly.

Cutting and milling down the cabinet doors and then adding a tongue and groove was quite an elaborate and labor-intensive process. (It's possible Dakota regretted his brilliant idea once he actually put it into action.) But, the result is really lovely. Dakota was able to make enough floorboards to cover most of the area, but we did have to purchase some new boards to complete the floor.

He's hoping to get all the floor down before next weekend, when my parents come to visit. One thing we still need to do is decide on an eco-friendly floor finish. I'm current searching the web for a low-VOC and as non-toxic as possible polyurethane finish. Suggestions are welcome.
Read More 2 comments | Posted by Audrey |

First Apple Blossom

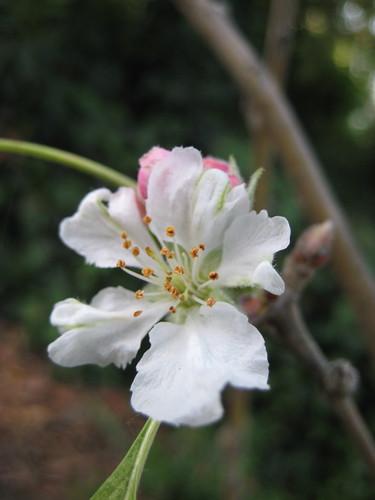
Pink Lady blossom

My Pink Lady apple tree started to bloom last weekend. It looks so pretty. The buds are pink before they bloom, and then they burst open into a frilly white flower.

Honestly, I'm relieved to know that the apple tree is doing well. I've been watering it religiously, but until recently it just had a few sad looking leaves hanging from its thin branches. Now, green leaves are appearing and buds are coming alive all over the place. Perhaps my fruit tree murdering streak is finally over. I did manage to bring my fig back to life, after all.

I've never grown my own apples before, so I'm very hopeful that the blossoms will be pollinated, the fruit will grow and I'll be picking beautiful, organic Pink Lady apples this Fall. I went apple-picking with a friend once outside of Boston, and the fresh-from-the-tree apples were so deliciously juicy and crisp. I'll be so happy if I can eat apples like that from my very own backyard orchard.
Read More 4 comments | Posted by Audrey |

New Attic Insulation

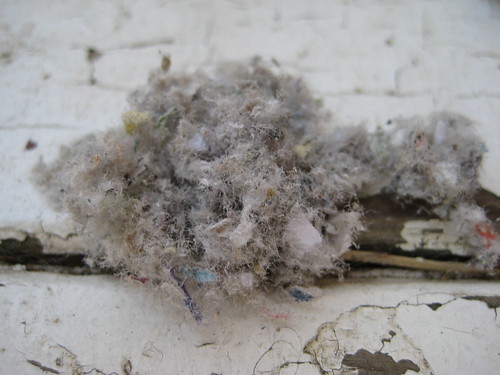
Cellulose insulation

Yesterday I had to work from home, so I decided to take advantage of that fact and have the attic insulated. This is something we've been planning for a while, and I wanted to get it done before the weather became too hot. So, I called up Everguard Home Insulation and made an appointment to have cellulose insulation blown into the attic.

Everguard was great. They showed up as scheduled, after calling to let me know they were on the way, and communicated clearly about what they were planning to do. They worked quickly and cleanly and got our 950 ft2 attic filled in about 45 minutes. Impressive.

The fluff blob above is a small chunk of the cellulose insulation that escaped from a roof vent. As you can see, it's basically fluffy, ground-up newspaper and cardboard fibers. To make it fire retardant, the cellulose is treated with boric acid. Unlike fiberglass, cellulose is recycled, environmentally friendly and non-toxic. So, it's perfect for green-living homeowners, like us.

And for frugal homeowners, the Southern California Gas Company offers a rebate of 15 cents per ft2. So we'll actually get a check for $142.50 after we submit our paperwork. Plus, there's a 2009 federal energy efficiency tax credit for 30% of the cost. So, we'll get even more money back when we file our tax returns. With all those incentives, I can't imagine not insulating the attic.

The new insulation, combined with some old, compressed and ratty fiberglass that was already up there, brings our attic insulation level up to R-38. This should hopefully make a big difference in how hot it gets inside the house this summer, especially when combined with new wall insulation, new ceiling fans and our solar attic fan.

I've said it before and I'll say it again, Who needs air conditioning! (Check back with me in July for the verdict on that one.)
Read More 5 comments | Posted by Audrey |

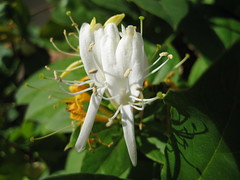
Honeysuckle in Bloom


honeysuckle in bloom
Originally uploaded by mipsy6
I love the scent of honeysuckle. We have a big vine growing on the corner of the house beneath the living room windows. I planted it a few years ago, and it's really grown in nicely.

This time of year, I catch the scent of it when I walk past it in the morning. And at night, the smell blows in through the open windows. There's something about the scent that makes me instantly happy.

Nothing says Spring like a honeysuckle in full bloom.
Read More 1 Comment | Posted by Audrey |

Sock-posting

Did you know you can compost your old socks? I should have known, since my sister told me a while back that I could compost dryer lint. Turns out, you can put any old cotton, silk or wool clothes in the compost. They're made of natural fibers, after all.

I learned about composting old clothes while watching a very funny and odd "instructisode" by The Guide Girls. They're a comedic/environmental duo who make informative videos about greening your lifestyle. My friend Sarah told me about them, and I recommend that you check them out. They're funny and helpful.

Anyway, I decided to try putting some old socks in my compost pile. I chopped them up into small bits to help them break down more easily, and I cut out the elastic band at the top. Dakota goes through a lot of socks, and we can't use all of them as rags. So, this seems like a great way to get rid of old cotton clothes that can't be donated, like socks, underwear and, well, rags.

sock scraps in compost

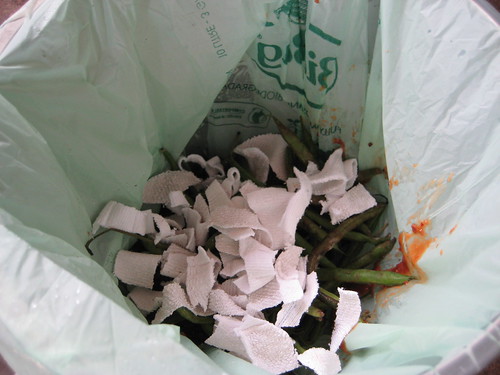
Speaking of composting, a couple of friends recently asked me what kind of kitchen compost bin I'd recommend. I've tried a few options, including the plastic kind with the charcoal filter in the lid, and I think my current setup is my favorite. It's a stainless steel pail, which doesn't absorb any gross smells or harbor any nasty bugs. For easier dumping and cleaning, we line the bin with BioBag Waste Bags, which break down in the compost bin. Basically we just dump it, spray it down with the hose, let it dry in the sun and it's ready to be refilled with kitchen scraps.
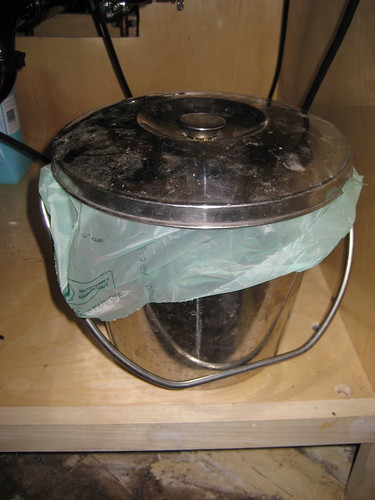
compost bin

I know other people like to keep their compost in a resealable plastic container in the freezer. That seems like it would work pretty well, too.
Read More 2 comments | Posted by Audrey |

Hey Hey Hay

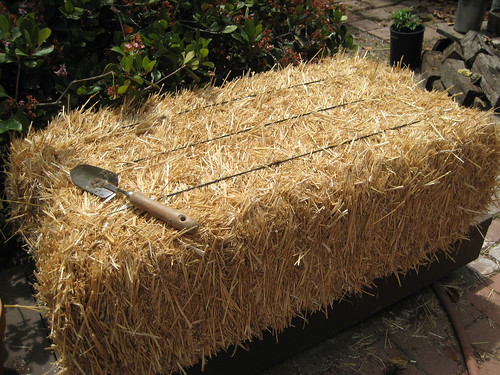
Nothing makes you feel like a true (urban) farmer like a big bale of hay. We got our first hay bale last weekend, and the plan is to get a variety of uses out of it.

hay bale

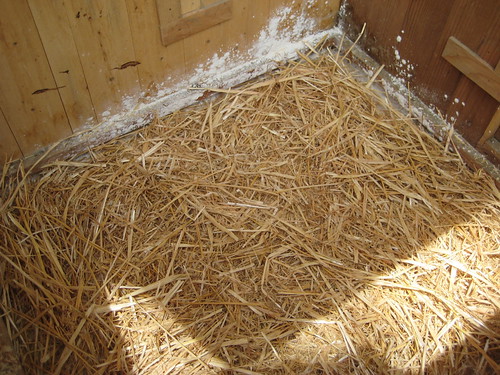
First, it'll be used as bedding in the chicken coop. For the past year, we've been using cedar shavings* that were the byproduct of a fence Dakota built a while back. He brought home 6 or 7 large trash bags of the shavings, which we used to line the floor of the coop. It worked really well and, better yet, was free. But, last weekend, the cedar shavings finally ran out, so it was off to a feed store in Burbank for a bale of hay.

Here it is lining the bottom of the coop, before I replaced the removable slatted floor. (That white stuff is diatomaceous earth, which is supposed to keep fleas and other bugs away.)

hay bedding in coop

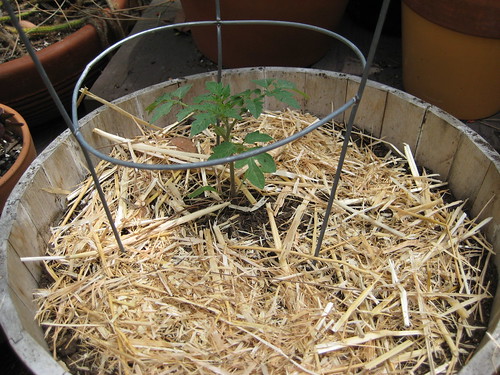
After the hay has served its purpose as a poop receptacle, it'll go onto its second life as mulch for my summer garden. I found out last year that a layer of mulch can make a BIG difference for my container plants like tomatoes and eggplants. And I know hay is also recommended as a mulch for squash hills.

I already put some hay scraps on my first container tomato of the season. Now that the temperature is rising, I know it'll help the plant stay perky and healthy.

hay mulch on tomato

* A note about cedar shavings and chickens: I have read on many message boards that cedar can be toxic to a chicken's respiratory system. That has not been my experience. We used cedar shavings for a year, and saw no ill effects for our hens. I should clarify that our chickens didn't bed down directly in the cedar. It was in a thin layer below the slats of the coop floor. I also know that Barbara Kilarski recommends cedar shavings in her book, Keep Chickens! So, I guess it's an individual choice for each chicken owner to make.


Read More 11 comments | Posted by Audrey |

The Joy of Cuttings

cutting with roots

I love growing new plants from cuttings. It appeals to my twin desires to save money and beautify my environment with lots and lots of plants. I have a couple of Copper Canyon Daisy bushes growing along our back fence that started out as cuttings. After a couple of years, they're as big and bushy as the original plant they came from.

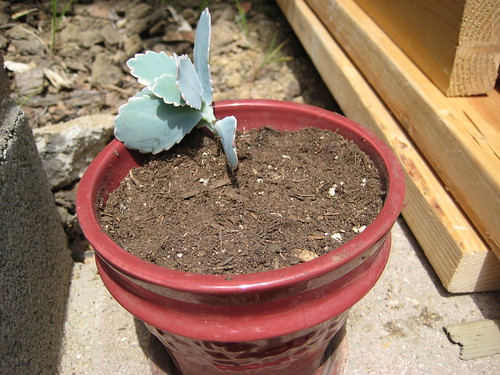
Recently, I started a few new cuttings, including some Copper Canyon Daisies, White Sage and a variety of succulent whose name I don't know. I just take some clippings from a plant, place each one in an empty jelly or olive jar full of water and sit them in a sunny windowsill. Easy-peasy. A couple of them rooted up quite quickly, so I planted them in pots this morning.

planted cutting

The White Sage takes a bit longer to grow roots. I've only successfully grown one of those. I think the woodier the stem, the more difficult it is to grow the plant from a cutting. For a gardening geek like me, it's kind of fun to experiment and see what plants I can manage to coax a root from. I'll let you know how it goes with the rest of my current cuttings.

Not to encourage any questionable activity, but growing from cuttings can also be a good way to get a new plant from one you like in your neighbor's yard. You just break off a small stem from a big, healthy bush while you're, say, walking by with your dog. Pop it in your jar of water, and pretty soon you've got a tiny version of their lovely plant--for free!
Read More 5 comments | Posted by Audrey |

Strawberries

After noticing some in the garden of my friend Nara last year, I decided to try growing strawberries. I'm not sure why--especially since the Internet claims they're quite easy to grow--but I'm somewhat intimidated. Maybe because the fruit seems more delicate than a pepper or tomato?

Despite my nervousness, I purchased three lovely strawberry seedlings at the Silverlake Farmers' Market last Saturday. They look exceptionally healthy and dark green, so that seems like a good start.

strawberries

I've got them in some wide pots, so they can spread out, and I added organic fertilizer and bat guano pellets to the soil. The containers are now sitting in two different sunny spots in the backyard. If all goes well, I'll have some shots of baby berries before too long.

Let me know if you have any pointers on growing strawberries in containers. I'm thinking mulch might be a good idea, but I know they send out runners, so maybe not?
Read More 5 comments | Posted by Audrey |

Nice surprises

I spent some time in the yard today, mostly getting ready for my summer vegetable garden by planting seeds in starter pots and trying to decide what will go where. Next weekend, I may plant the main raised bed, because I want to get started with my corn and yellow squash as soon as possible.

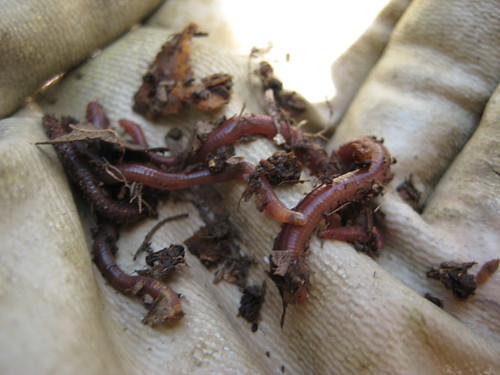
But anyway, as I was filling pots with dirt, I went over to the compost bin to get some nice, fertile compost to add to the soil mix. I opened up the door at the bottom, reached in and grabbed a handful of compost which was, to my surprise, full wet, wiggly worms.

worms!

Speaking as a gardener who frequently deals with dry, compacted soil, a big handful of worms is an exciting find. I promptly took them over to my garden beds, buried them and then sprinkled them with water. I'm hoping these worms survive and multiply. Happily, I believe those worms are only the tip of the (compost) iceberg. The bottom of the pile seems to be teeming with them. Hurrah!

And speaking of nice surprises, check out this lovely volunteer sunflower that just started blooming.

volunteer sunflower

It was planted by one of my hens, back when the chicken tractor was sitting on that spot. Wasn't that thoughtful? I noticed it growing a while back, and have been encouraging it ever since.

The volunteer sunflower inspired me to plant some more. After all, the chickens like the seeds, and they are (obviously) pretty easy to grow. While I'm not a huge sunflower fan, I think they'll make a nice addition the summer garden. And I like the idea of a flower that also provides a tasty snack.
Read More 2 comments | Posted by Audrey |

Kitchen Details, Big and Small

There's been a lot of activity in the kitchen since my last post about the remodel. Dakota has been working very hard on the sink, cabinets, dishwasher and some very cool details.

Here's the sink corner in progress. We acquired this beautiful sink from Dakota's dad, who got it in some kind of flood sale in Iowa. It's big, deep and I love the apron front. Dakota put in all new copper plumbing and installed the garbage disposal in this special way he learned from his dad. It's working out wonderfully.

plumbing hooked up

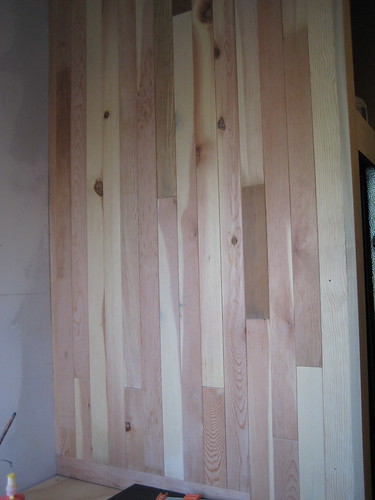
As a design element, Dakota made beadboard out of the old Douglas fir cabinet cases. He milled down the wood, cut it and added a tongue and groove. The beadboard covers the divider between the refrigerator and cabinets, and one side of the pantry on the other side of the kitchen. Eventually, it'll be painted green like the cabinets. I think it's a really smart reuse of wood from the old kitchen.

fridge divider wall covered in beadboard

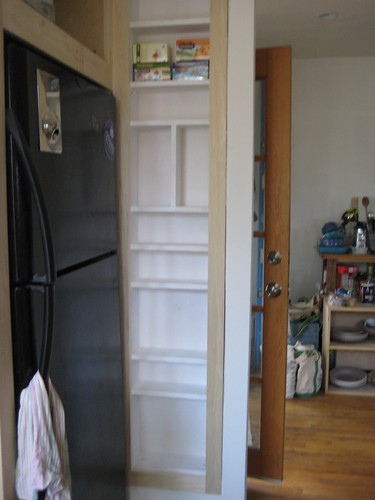
On the other side of the fridge is this awesome detail, a spice cabinet. It's a shallow cabinet built into the wall that will hold all our spice, vinegar and oil bottles. Dakota has big plans for this little nook, but I don't want to ruin the surprise.

spice rack

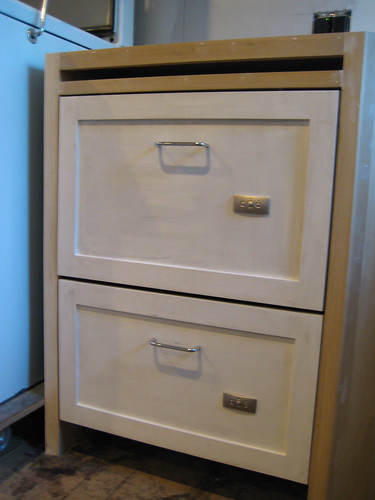
Also installed is our Fisher & Paykel double drawer dishwasher. Dakota made the custom fronts and added simple chrome pulls, which will eventually go on all the drawers and cabinet doors. So, this is kind of a preview of what the rest of the cabinets will look like (minus the green paint). The dishwasher is working well so far, although we had some problems with the drawers closing initially. I think we've worked it out, though.

IMG_3635.JPG

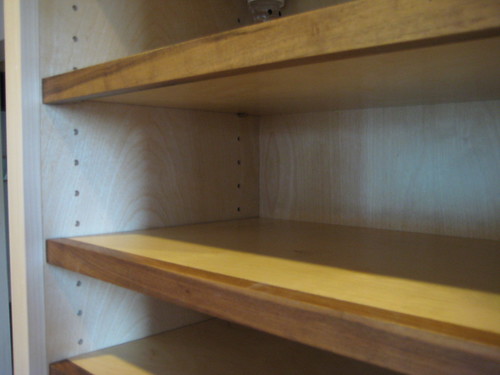
Just a couple of nights ago, Dakota brought home the shelves he made for the pantry and upper cabinets. The main part of the shelf is birch with a front edge of walnut. It's a small detail that will only be noticeable when the cabinet doors are open. It'll also match some other walnut details in the kitchen that are still to come.

IMG_3642.JPG

Things are really coming along on the remodel. In a few weeks, the floor will probably be installed. That should make a big difference in how "done" it looks. I'll be sure to post about it.
Read More 4 comments | Posted by Audrey |

Pots from Poop

I'm not sure what gardening blog or message board I was reading when I came across Cow Pots, but the product immediately appealed to me. You may already know about them if you're a fan of the TV show Dirty Jobs, which featured them a while back. Basically, Cow Pots are seed starting pots made from composted cow manure.

Cow Pots have a lot of very appealing features. They were designed by diary farmers who wanted to do something constructive with their excess manure and reduce the pollution created by their dairy. Manure is a renewable resource and fully biodegradable, unlike plastic, which takes petroleum to produce and doesn't break down in landfills. Plus, you can put your Cow Pots directly in the ground once your seedling is ready to be planted. That eliminates the possibility of damaging your seedlings during transplant.

I ordered two 12-packs of 4 inch pots and planted some tomato, pepper and eggplant seeds last weekend. The pots were sturdy and dry and didn't have any noticeable odor.

tomato seeds planted

One thing I have to keep in mind is that this kind of pot tends to dry out more quickly than a plastic pot, especially in the dry Southern California air. So, my Cow Pots will need to be watered more frequently.

Cow Pots also promise to help grow healthier, studier seedlings, because of the fertilizing aspects of the pot. I'll have to let you know if that claim turns out to be true.
Read More 1 Comment | Posted by Audrey |

White House Coop?

Bill Niman and Nicolette Hahn Niman have made a brilliant suggestion for the Obama's next sustainable step now that they've put in a vegetable garden: chickens! There's certainly plently of room on the White House grounds for a nice coop and run. Think how happy their guests will be to have fresh free range eggs for breakfast. Oh, and I bet Malia isn't allergic to chick fluff!

IMG_1567.JPG

Perhaps us backyard chicken enthusiasts should start a petition.
Read More 1 Comment | Posted by Audrey |

Classical Chicken

Here's a silly little thing I came across on the Internet today: Gonzo, his beloved Camilla, and some singing chickens.


Enjoy!
Read More 1 Comment | Posted by Audrey |

Water Wise

Recently, I got a little pamphlet in the mail along with my bill from the Los Angeles Department of Water and Power. It asks, "How Water Wise Are You?" There's little chart that allows you to compare your water use to the median water consumption of DWP customers.

I was happy to get this chart, because I've been wondering how well we've been conserving water, especially since our recently-planted fruit trees require more deep and frequent watering than most of our other landscaping. When I looked at the chart, I was delighted.

For a lot that's less than 7,499 square feet, the median winter water use, measured in HCF (hundred cubic feet), for a 2-month period is 24. Our water use for the last two months was 6 HCF. That's a quarter of the typical amount. My first reaction was, "Yippie!" My second reaction was, "Dang, how do people using the median amount afford their water bills?" I love it when caring about the environment translates into saving money. So often, it's the other way (i.e. buying organic or fair trade).

Dakota and I discussed why we manage to be so far under the median for water use, when, honestly, I don't feel like we work that hard at saving water. Obviously, part of it is that there are only two of us. But I don't think that can account for all of our water saving. Here are some factors I think help quite a lot:

1) Front-loading washer
Two summers ago, we got a new front-loading washer. It uses less water (and power) than a top loading washer, and less soap. I love it.

2) Low-flow shower head
When I moved into my house, I almost immediately installed a low-flow shower head. It's such an easy way to save water, especially when you're a big fan of hot showers. Gone are the days when a low-flow shower head meant an annoyingly low-pressure bathing experience. These days, water-saving shower heads make your pressure better, not worse. At least, that's what happened at my house. Almost six years later, our Earth Massage Showerhead is still going strong. It makes a big difference for us because Dakota usually takes two showers a day: one to wake up and one to clean off the sawdust after work. Both are vital to his happiness.

3) Toilet policy
In addition to having a low-flow toilet, like most houses in Los Angeles, we tend to not flush after every trip to the bathroom. No need to get into details, but I believe many hippies have signs in their bathroom beginning with the phrase, "If it's yellow, leave it mellow..." We don't have that sign, but we agree with the principle. Treehugger calls it the "Selective Flush." Some people are kind of grossed out by this idea, but it's how I grew up, so it seems completely natural to me.

4) Lawnless living
The single biggest water savings for us, I'm guessing, comes from our lack of a grass lawn. When I moved into the house back in 2003, there was a small lawn in the front, but Dakota and I took it out pretty quickly. In its place, we planted a mixture of California native plants, other low-water-use bushes and cacti. Now that the plants are established, they need very little water to flourish. I honestly can't remember the last time I watered the front yard. It's definitely been at least three months. We have a similar landscaping plan in the back, although obviously the vegetable garden and fruit trees do require watering several times a week. Still, I think our lawnless lot is what keeps our water bill so low.

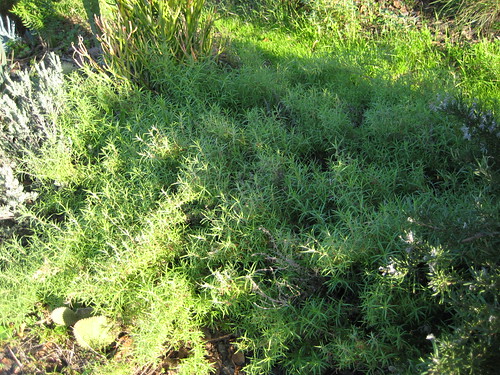
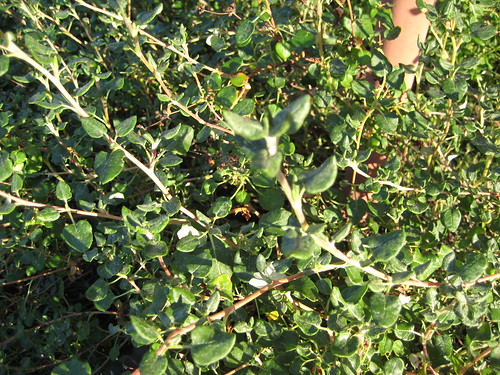
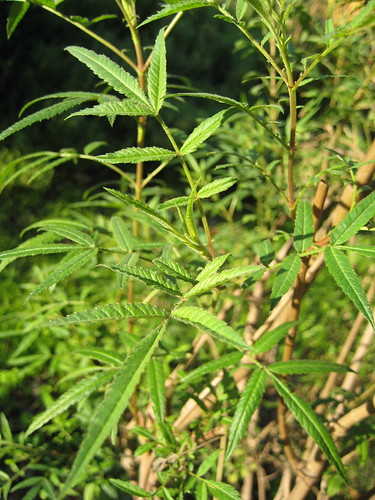
I love our California native plants, too. Here are a few that have thrived over the years, despite intense dry heat and bad soil.
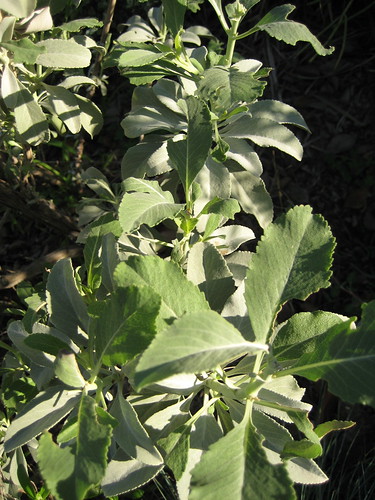
white sage
White sage. Has a very sage-y smell. The leaves are a really pretty pale green.

California fuschia
California fuschia. This one spreads sideways and has bright red flowers, which attract butterflies and hummingbirds.

Needle's buckwheat
Needle's buckwheat. This produces little white puffy flowers and grows like crazy. I'm constantly cutting it back. We have two varieties of buckwheat in the yard, the other is Red buckwheat.

IMG_3595.JPG
I can't remember the name of this one. It blooms yellow, daisy-like flowers and the leaves have a wonderful, herbal smell. It also grows nicely from cuttings. I have two more bushes in the backyard from cuttings from this plant.

Basically, we make almost no sacrifices in order to keep our water use low. We still take showers when we want and have a clothes washer and a dishwasher. I certainly put some back-breaking labor into getting the front yard plants established, but now that they're in, they require almost nothing from me. It's nice to know saving water can be fairly easy. Pretty soon, it'll likely be a requirement for living in Southern California. Maybe once the city is done giving out CFLs they'll move on to low-flow shower heads and cacti.
Read More 7 comments | Posted by Audrey |

Tips from a Trial and Error Gardner

Here in Los Angeles, it's almost summer garden time. Hurrah! I believe this will be my fourth year gardening in my current yard. As you might guess, I've become quite a gardening expert over the years. Actually, that's not true. You would be guessing incorrectly. Sorry. BUT, I have learned a few things, and I've decided to share those few things on this blog. Hopefully one or two readers will find them helpful.

Tip #1: Start your seeds early!

IMG_0317.JPG

Every year, I start my seeds earlier than I did the year before. And, every year, I realize that I should have started them even earlier. I think in Southern California it's particularly hard to get your timing right because all the seed packets say, "plant after the last frost." Um, what if you don't have frost, ever? I think my new rule of thumb will be: Plant when you don't have to wear socks to bed anymore. I guess this only works if you live in a house with very minimal heating capabilities, like ours, but perhaps you can find an analogous temperature test for yourself. (Perhaps, plant when you can walk your dog in the morning without getting painfully cold fingers.)

It's especially helpful to start the seeds for fruiting plants--tomatoes, peppers, eggplants--early. This is because, not only does the plant have to grow, but then it has to bloom, make fruit and the fruit has to ripen before you can eat it. This process can take a while, and if you want to be able to get several harvests from your plant before it dies, you gotta get things moving in early Spring.

I planted some tomato, pepper and eggplant seeds in small pots last weekend. And I will probably plant a few more rounds of seeds in the upcoming weeks. For seed-starting, I prefer using the 3 or 4 inch pots you get from the nursery when you buy a small cactus or flower. If you use smaller pots, they dry out more quickly, and you have to transplant really tiny plants into bigger pots at some point. Really tiny plants are really easy to kill.

So, that's tip #1. Look for more tips in the coming weeks. I think I have at least 2 or 3 more pieces of gardening wisdom in me. Definitely 2.
Read More 1 Comment | Posted by Audrey |

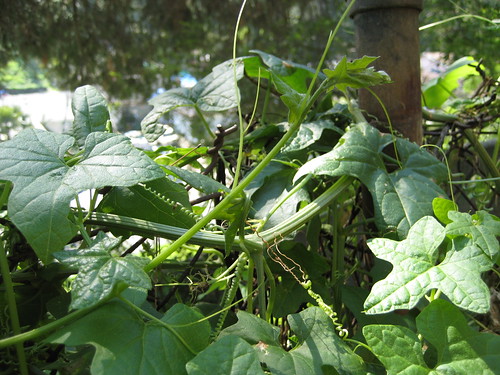
Name that Vine

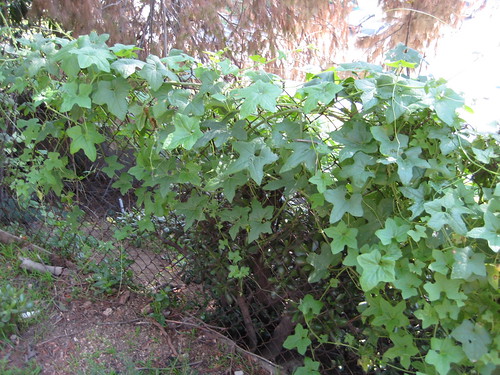
Every year around this time, a mysterious vine appears on the borders of my yard. It's bright green and fast-growing. Typically, I cut it back so it doesn't grow over my bushes. I have no idea where it comes from, if it was planted by my house's former residents or if it grows wild. Here it is growing on the fence at the bottom of the yard.

mystery vine

Close-up.

IMG_3563.JPG

Does anyone know what this vine is? Is is an invasive species I should dig up and destroy, or just a slightly-annoying Spring visitor?
Read More 11 comments | Posted by Audrey |

Sustainable Seating

In the last month, I have managed to acquire some very nice, and eco-friendly, new items for our living room.

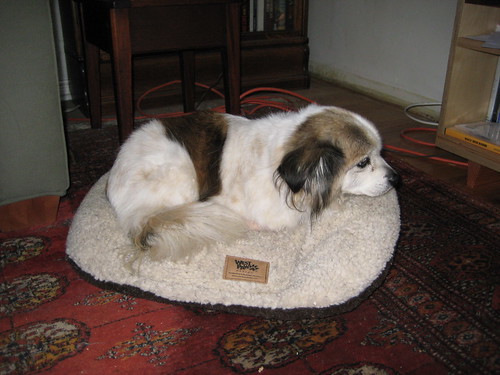
The first was a new bed for Nigel, our faithful animal companion. Nigel firmly believes in living a green lifestyle, but he also has rather specific needs when it comes to where he rests his head. So, after looking around at various organic and eco-friendly pet bed options, I decided on the Tuckered Out model from West Paw. It was a bit pricier than the beds I usually get Nigel, but its design seemed perfect for the way he likes to sleep, and the cover comes off for easy washing, so it should last quite a while.

West Paw Design is a pet product company with a commitment to green manufacturing practices, including material reuse, waste minimization and energy efficiency. And, all their products are made in their Montana factory, where they believe in paying their workers a fair wage, including health benefits. Nigel's new bed is filled with IntelliLoft fiber fill, which is made from recycled plastic bottles. As you can see, he finds it quite cozy.

Nigel's new bed

Last weekend, we made an even bigger upgrade and finally purchased a new fancy leather chair for our living room. Dakota and I have essentially been shopping for this chair for three years. We were looking for something that was comfortable but still slim and stylish enough not to overpower the space. Our house is quite small, and the living room is where we spend most of our awake indoor time. It seemed important to find just the right chair.

Happily, I finally found what we were looking for at the Cisco Brothers store on La Brea. Isn't it lovely?

new chair

Cisco Brothers is a furniture company headquartered in South Central Los Angeles. From what I have read, the owner, Cisco Pinedo, seems very committed to running a sustainable business and to being a positive force in the community. Since 2006, Cisco Brothers have used exclusively FSC certified hardwoods in their upholstered furniture and reclaimed wood in their cabinets and tables. In addition, they use water-based glues and environmentally friendly detergents to wash their fabrics.

Cisco has several showrooms around Los Angeles, and their style falls somewhere between traditional and modern. I felt very happy to purchase a chair that looked great and was made in Los Angeles with an environmental conscience.
Read More 1 Comment | Posted by Audrey |

Seasonal Tastiness

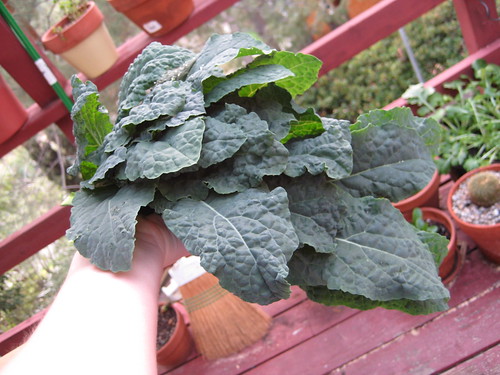
Check out this hefty bunch of kale from my deck containers. I love those dark green leaves; they just scream "healthy!" This bunch was consumed for dinner last Friday night. I boiled the chopped leaves and stems and then sprinkled them with salt, pepper and lemon juice. Tasty.

kale harvest

And speaking of fresh, seasonal food, I'm very excited about a resource I just read about on the Garden Punks blog. It's a handy Eat Local tool from the Natural Resource Defense Council, which tells you what produce is in season in your region. It even breaks California down into Northern and Southern and distinguishes between the early and late parts of each month.

For Southern California in early March, I should be eating: asparagus, avocado, beets, broccoli, grapefruit, lemons, tangerines, turnips, spinach and, of course, kale. The tool seems great for menu planning. It tells you what will be on sale at the store, or in the stalls at the farmers' market, before you leave your house.
Read More 1 Comment | Posted by Audrey |
Newer Posts Older Posts Home

GREEN FRIEDA

  • About
      This blog is about a variety of things I'm interested in, including gardening, backyard chickens, crafts, DIY home improvement and resource efficiency. My hope is that it's both informative and fun to read. I hope you like it. If you want to email me, click here.
  • Labels

    • animals (8)
    • baby (7)
    • bathroom (4)
    • cactus (1)
    • canning (1)
    • charities (3)
    • chickens (79)
    • compost (1)
    • crafts (9)
    • energy (8)
    • environment (24)
    • food (61)
    • gardening (137)
    • gifts (7)
    • good girls (10)
    • holiday (6)
    • home improvement (27)
    • insects (2)
    • kids (4)
    • kitchen (16)
    • native plants (16)
    • orchard (6)
    • pests (14)
    • politics (6)
    • reuse (16)
    • tips (10)
    • tree (1)
    • waste (2)
    • water (9)
    • wedding (2)

    Blog Archive

    • ▼  2014 (5)
      • ▼  June (2)
        • Chicken Landscaping
        • Poor Baldy
      • ►  May (1)
      • ►  April (2)
    • ►  2013 (20)
      • ►  November (3)
      • ►  June (6)
      • ►  March (5)
      • ►  February (3)
      • ►  January (3)
    • ►  2012 (13)
      • ►  September (1)
      • ►  August (2)
      • ►  July (2)
      • ►  May (1)
      • ►  April (2)
      • ►  February (1)
      • ►  January (4)
    • ►  2011 (33)
      • ►  December (3)
      • ►  November (5)
      • ►  September (1)
      • ►  August (3)
      • ►  June (7)
      • ►  May (2)
      • ►  April (4)
      • ►  March (1)
      • ►  February (4)
      • ►  January (3)
    • ►  2010 (34)
      • ►  November (3)
      • ►  October (2)
      • ►  September (4)
      • ►  August (5)
      • ►  July (3)
      • ►  June (3)
      • ►  May (1)
      • ►  April (6)
      • ►  March (5)
      • ►  January (2)
    • ►  2009 (94)
      • ►  December (6)
      • ►  November (8)
      • ►  October (6)
      • ►  September (6)
      • ►  August (9)
      • ►  July (13)
      • ►  June (12)
      • ►  May (12)
      • ►  April (3)
      • ►  March (8)
      • ►  February (6)
      • ►  January (5)
    • ►  2008 (54)
      • ►  December (4)
      • ►  November (3)
      • ►  October (3)
      • ►  September (3)
      • ►  August (7)
      • ►  July (6)
      • ►  June (9)
      • ►  May (2)
      • ►  April (2)
      • ►  March (4)
      • ►  February (7)
      • ►  January (4)
    • ►  2007 (16)
      • ►  December (3)
      • ►  November (1)
      • ►  October (3)
      • ►  August (3)
      • ►  May (2)
      • ►  April (2)
      • ►  February (1)
      • ►  January (1)
    • ►  2006 (28)
      • ►  November (1)
      • ►  October (3)
      • ►  August (3)
      • ►  July (1)
      • ►  June (4)
      • ►  May (5)
      • ►  April (1)
      • ►  March (5)
      • ►  February (2)
      • ►  January (3)
    • ►  2005 (10)
      • ►  December (1)
      • ►  November (1)
      • ►  October (2)
      • ►  September (1)
      • ►  July (1)
      • ►  June (4)

    Related Blogs

    • Homegrown Evolution
      Framed
      4 years ago
    • DigginFood
      How to gain popularity through buying Twitter followers
      9 years ago
    • The Tangled Nest
      The First Egg: Light, Life, and Gratitude
      10 years ago
    • Monkey Lobster
      Summer Slide Show
      12 years ago
    • Rambling LA
      LOSING YOUR LAWN
      12 years ago
    • Rancho Garbanzo
      3 1/2 years later - Our Wedding Photobook
      12 years ago
    • Urban Chickens
      Infographic time: the chicken coop checklist
      13 years ago
    • Ramshackle Solid
      Hoop and Pole
      13 years ago
    • Our Yellow House
      Still Knitting
      13 years ago
    Show 5 Show All
    Follow GreenFrieda on Twitter

    Links

    • Backyard Chickens
    • Tree People
    • Seed Savers Exchange
    • L.A. Works
    • to do something
    • Mohair Gravy

    Followers

  • Search


    • Home
    • Posts RSS
    • Comments RSS
    • Edit

    © Copyright Green Frieda. All rights reserved.
    Designed by FTL Wordpress Themes | Bloggerized by FalconHive.com
    brought to you by Smashing Magazine

    Back to Top