• Home
  • Posts RSS
  • Comments RSS
  • Edit
Blue Orange Green Pink Purple

featured post

Homemade Granola

Recently I tried making my own granola. It ended up being quite simple, and I recommend trying it yourself. Dakota and I both find most store-bought granolas way too sweet and full of "extra" flavors. So, my goal was to make granola that was simple, healthy and tasty.

Read More

Overwaterers Anonymous

Hello. My name is Green Frieda, and I'm an overwaterer.

It's true. Not only do I water too frequently, but I also water too briefly. Only recently have I come to terms with my over-watering habit and resolved to change.

I think my obsession with watering comes from two sources: (1) the arid Southern California climate means that topsoil dries very quickly (2) I am a nervous and impatient gardener. Instead of giving my garden a deep soak every 5 to 7 days, I would give it a short spray-down every other night. This, as you might imagine, lead to some problems.

Here's one tell-tale sign of my watering problem: a deformed pepper leaf.
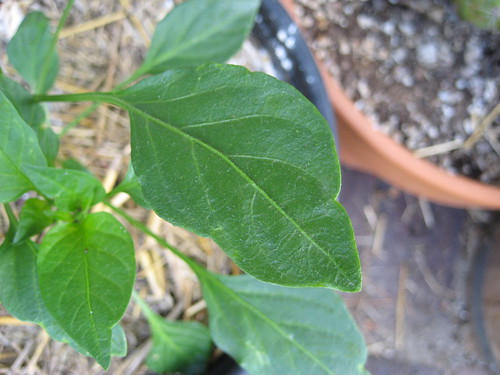
deformed pepper leaf

Pepper plants--even ones in containers--don't need to be watered very often. If you give them too much water, the leaves get all bumpy and twisty and the plants don't set fruit. Since I stopped overwatering, my pepper plants have made nice, symmetrical leaves and started flowering profusely.

I think my over-watering is also the reason why my corn stalks can sometimes be unstable and my squash often die on the plant before they even bloom. I'm hoping that new, better watering habits will provide me with a bigger crop this summer. According to my research, it should.

The other day, I was talking to my dad about my debilitating overwatering addiction, and he gave me a very helpful tip. As you probably know, many gardening books, including my favorite--Burpee's The Complete Vegetable & Herb Gardener--tell you to water a crop a certain number of inches per week. I wondered aloud to my dad about how I could know when I'd watered my squash an inch, since I'm using a hose with a spray nozzle. And he said, "Use a tuna can."

"What does a tuna can have to do with anything?" You might ask. Well, here's the deal: You place a tuna can in your garden alongside your vegetables. Then, if you need to give your crop an inch of water, you water it until the tuna can is full. Since the side of a tuna can is about an inch high, it's a simple way to measure how much you've watered. Nice, huh? (By the way, my dad attributes his knowledge of this method to Texas gardening expert Jerry Parsons.)
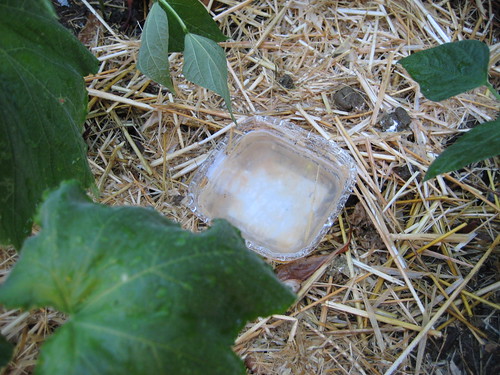
measuring how much I watered

I didn't have an empty tuna can available at the time I needed one, so I used an empty hummus container instead. It worked just as well. If you want to be really precise, you can use a rain gauge or a sprinkler gauge. (But a tuna can or hummus container is free.) It's likely I am not the first person to hear about this tuna can method, but I wanted to pass it on in case it might help someone else.

For the last couple of weeks, I've been pretty good about watering deeply and infrequently, and that's not just because I had a business trip last week. I think I am seeing the results of my restraint in heartier, greener plants. Hopefully, I can keep my addiction in check, although the dry, hot month of August will be a challenge.

The first step is admitting you have a problem.
Read More 7 comments | Posted by Audrey |

Cranky, Broody Hen

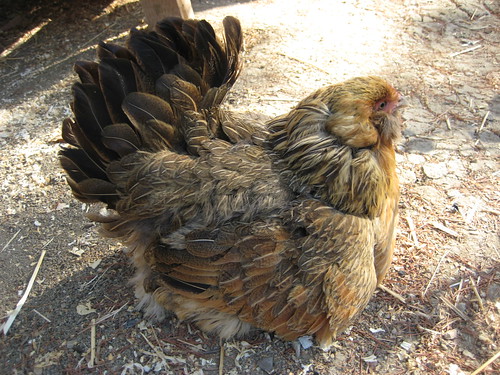
Bad news, chicken fans. Peggy has gone broody. Basically, this means that she's decided she wants to sit on the nest all day so she can hatch some of the eggs she's been laying. That's nice of her, but, unfortunately, her eggs are never going to hatch because we don't have a rooster. So, I'm going to have to figure out how to break her broodiness.

I noticed that Peggy was acting a little weird on Sunday. She seemed cranky and was fighting with Tina a lot while they free-ranged. I was a little worried that she was feeling sick or having a problem with her eggs, so I looked at her vent. Happily, it appeared normal and healthy.

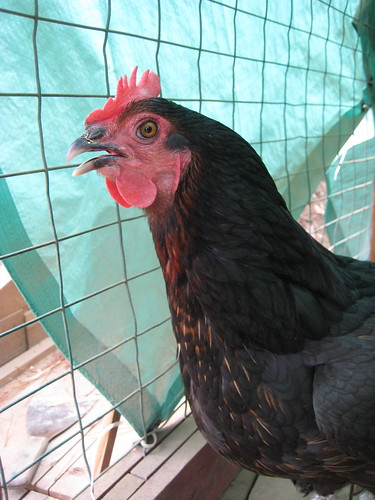
I realized Peggy was broody when she didn't come out of the coop yesterday morning. Normally, she runs right out when I come up to the door and literally leaps out of the run and into the yard. Yesterday morning, I found her stubbornly sitting in the nesting box like this.

IMG_4127.JPG

Peggy puffed up angrily and yelled at me when I opened the lid to the nesting box. I decided to leave her alone, in case she was just laying an egg. But, when I got home last night, she was still in the nest. This time, she had two eggs under her--one of hers and one of Tina's.

So, I decided to force her to go out. When I reached in to pick her up, Peggy shrieked and clucked. She pecked me (hard) when I touched her. Eventually, I lifted Peggy out of the nest and put her on the ground outside the coop. She sat there pouting, all puffed up and irritated.

 IMG_4130.JPG

After a couple of minutes, Peggy got over her anger and ran around the yard a bit. But, once I put the chickens in for the night, she got right back on her nest (despite the fact that there were no eggs).

So, I repeated the process this morning, lifting Peggy out of the nest and putting her out in the yard. She had a nice scratch in the dirt and stretched her wings but went back into the nesting box after a while. I did see her eat and drink a little, so I'm not yet worried about her health. Still, I would like to break her of her broody behavior.

This time of year it's tricky, because I hate to lock my girls out of the coop all day. It's probably several degrees cooler in the coop than it is in the run, and with temperatures in the 90s, every degree helps. I think I may have to, though, if Peggy continues her broodiness.

I have read various other methods online. Many people put their broody hen in a wire cage with food, water and no bedding for several days. Some others mentioned dipping your broody hen's butt in cold water, which sounds somewhat traumatizing--for the hen and the human. I also read on Feathersite that you can put several ice cubes under your chicken's butt in place of eggs. Maybe that sends the signal that the eggs are too cold and won't hatch? Anyway, I might try that one tomorrow if Peggy is still broody. At least that method has the added benefit of keeping her cool.

I'll let you know how it goes.
Read More 11 comments | Posted by Audrey |

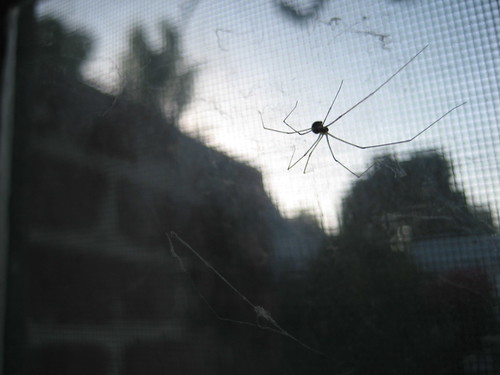
Spider Season

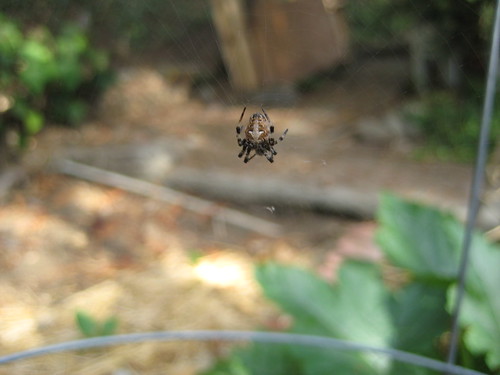
garden spider

It's spider season at our house. To be honest, we have spiders all year long, but there are certain times of year when spiders just seem to be everywhere.

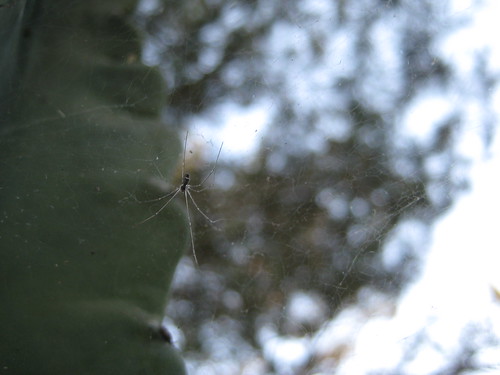
spider on cactus

On Sunday morning, I came out to find that a spider had built its web in the middle of the living room! It stretched its silk from the ceiling fan switch all the way down to the rug. After admiring the spiders ambition, I unfortunately had to destroy it's web. It's one thing to have spiders in the garden--or even a windowsill--but quite another the have one blocking the way to the couch.

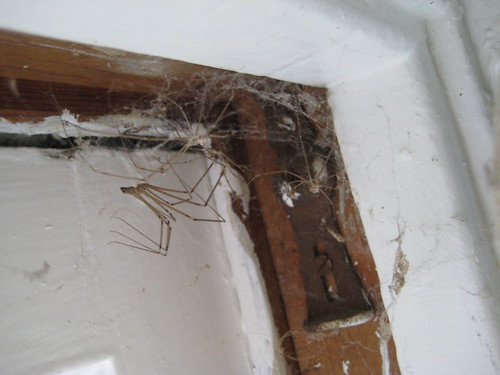
window frame spiders

Our home hosts several different types of spiders. The ones in the corners of the window frame can sometimes make a bit of a mess. But, since we spend most hot days with the doors and windows wide open, I appreciate their help with keeping the flying bug population under control.

window spider

So, the house spiders and I have a certain understanding. They stay out of my way, and I keep the web disturbances to a minimum. It's working for us so far.
Read More 2 comments | Posted by Audrey |

Xeriscaping Before and After

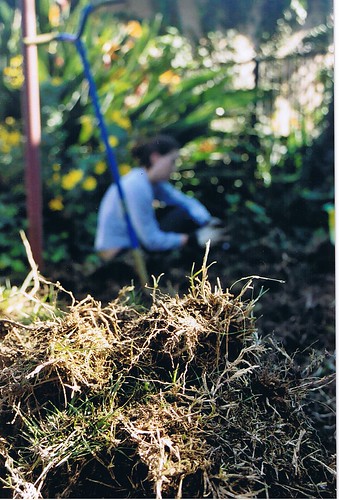
Last night, while digging through old photos, I found some great "before" shots of our front yard. Dakota and I xeriscaped the front yard in January 2004, removing the grass and putting in native plants from Matilija Nursery in Moorpark.

We started by digging up the pitiful grass lawn and pulling out all the grass clumps and runners we could. I remember the ground was exceptionally hard, and removing grass roots was extremely tedious. If I did this now, I would use the sheet mulching method.

digging up front yard grass

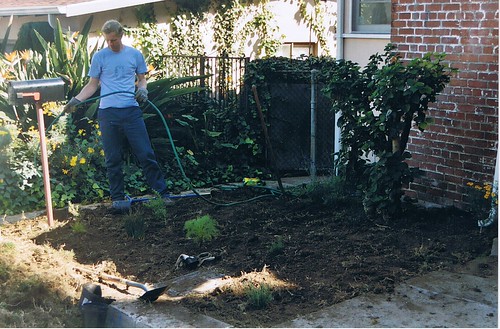
After we removed the grass and loosened the hard-packed soil as much as possible, we put in our native plants. Some of them thrived, but others, sadly, didn't make it and were replaced by new drought-tolerant shrubs. The little plant on the far right with the yellow flowers is now a giant, bushy copper canyon daisy that nicely frames one side of the front steps. (You can see it on the far left side of the "after" shot below.)

Watering the just-planted native plants

In all, I think the original planting took two days of very hard work. This was followed by extensive grass removal for the next two years or so. I know, that sounds annoying, doesn't it? It kind of was. BUT, now the yard requires barely any maintenance. I just water it once every two weeks or so in the dry season and prune back some of the bushier plants when they grow too far into walkways.

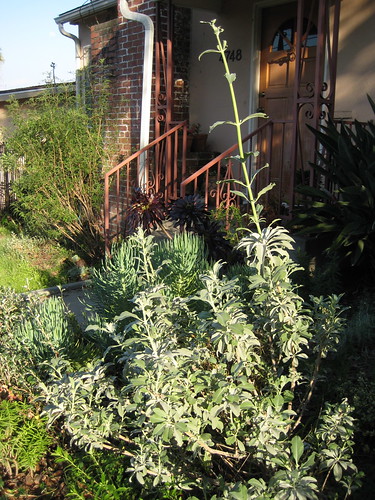
Five years later, the front yard looks like this.

White sage

I'm pretty happy with our results. Xeriscaping can be hard work. But, spread over a number of years, caring for a garden of native plants is way less time-consuming than a grass lawn.

More on our drought-tolerant front yard here and here.
Read More 2 comments | Posted by Audrey |

Good Garden News

I know I've mostly been posting about problems with my summer garden, but it's not all floppy stalks and lazy cabbages. There have been some positive vegetable garden developments as well.

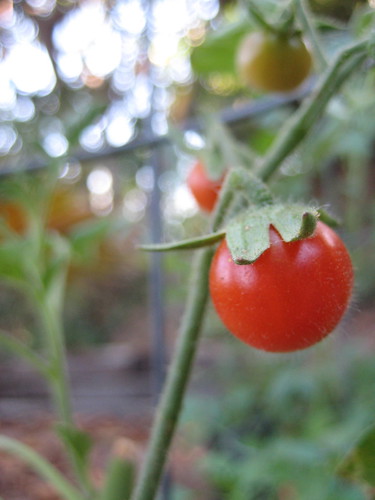
My first tomatoes ripened recently, and more are on the way. The little fruit below is an heirloom variety grown from seed called Mexico Midget. As the name implies, these tomatoes are quite tiny. But, they're tasty--kind of tart, actually--and very cute. I have several more plants of this variety with lots of green fruit, as well as some Hartman's Gooseberry tomatoes in the process of ripening. The Austin Red Pears are kind of taking their time, but they'll be along in a few weeks.

ripe tomato

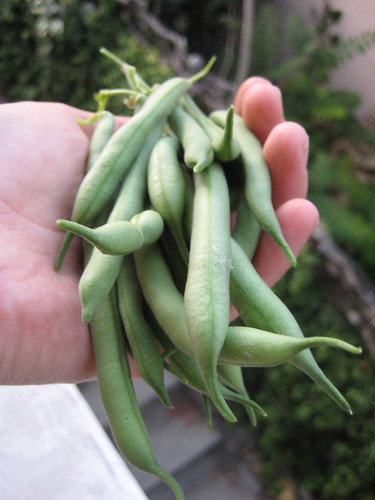
In addition to my tomatoes, I've harvested several handfuls of green beans. I'm growing a bush bean variety called Empress. The plants have been very productive, despite their small stature. I eat the beans raw, fresh from the garden, and they're crisp and delicious. Fresh green beans are one of my favorite summer foods.

handful of beans

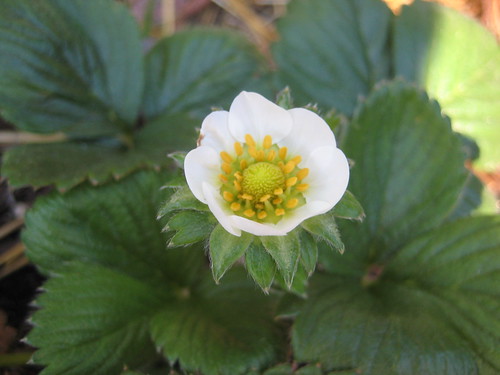
Many other plants are blooming, and should produce fruit soon. My summer squash have made a few male flowers, and I might have a small golden zucchini harvest soon... if I'm lucky. Yesterday, I noticed the first white flowers on a few pepper plants. And, on Monday, my strawberry plant finally bloomed. This seems late for a strawberry, but I read somewhere that some varieties produce all summer. So, hopefully this one will make some nice fruit.

strawberry blossom

My corn is slowly but surely growing taller and the stalks are thickening. I hope to see some ears in the next few weeks. My winter squash is sprawling, but has yet to set any fruit. We'll see how that goes. And my eggplants are making lots of thick, fuzzy leaves, but no flowers just yet.

So, hope is in the air in my little garden. I think it's possible that I'll have some impressive harvests in the next three or four weeks. I shouldn't speculate, though. I don't want to jinx it.
Read More 1 Comment | Posted by Audrey |

Countertops Sweet Countertops

This month has been a productive and exciting one in our ongoing kitchen project. The most exciting improvement, so far, has been the addition of much-needed countertops.

A couple of weeks ago, Dakota brought home the lovely, hand-made butcher block top pictured below. It's smooth and square and perfectly sealed, and I love it. Plus, the butcher block is a re-use, so the materials cost nothing. Dakota cut and glued together strips from a hard maple tool* left over from a custom table he made for a designer client.

butcher block island top

The butcher block top sits on our kitchen island. It sticks out farther on one side, so that we can pull up a stool and eat, or just hang out in the kitchen while someone else is cooking.

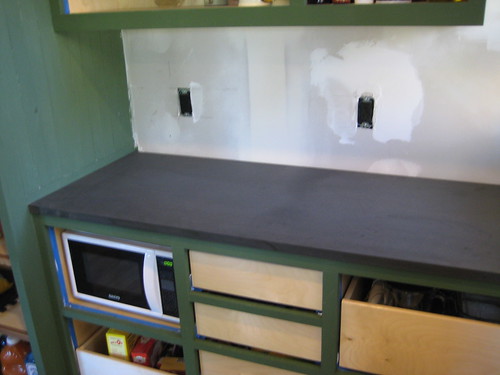
Last weekend, Dakota cut the Richlite counter tops that we're using in the rest of the kitchen. Richlite is a sustainable building material that looks and works in a way similar to slate. Here's the description from the company website:


Richlite® is primarily paper treated with phenolic resin and baked to create a solid sheet. During the production cycle the layers of paper are gradually crossed-linked with each other to create solid, durable sheets... Richlite® paper comes from pulp that is derived from trees, which is produced from paper purchased from FSC-Certified sources and/or recycled paper.


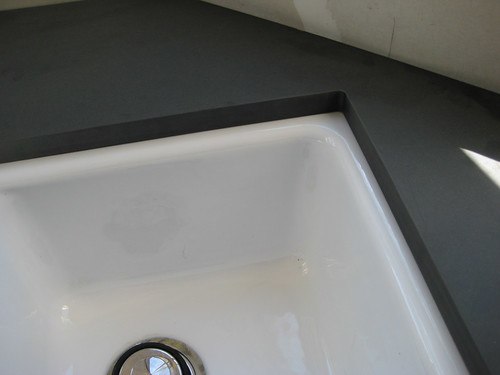
In addition, if you're concerned about such things, Richlite doesn't off-gas and they create no hazardous waste during the production process. It comes in a variety of nice colors, it's scratch and stain resistant, and you can put hot pots on Richlite without damaging it. In the shot below, the countertop hasn't been sealed yet. In it's final form, it will be a bit shinier.

richlite around sink

Dakota took great care in cutting our one sheet of Richlite because, besides being green, it's kind of expensive. Although, I believe it's pretty comparable, price-wise, with many other common countertop materials. My parents actually gave me this particular sheet of black Richlite for my 30th birthday. Great gift, huh?

richlite countertop

Tomorrow, the painted cabinets are getting a layer of sealant. Once that's done, we'll be able to attach the countertops permanently. I am pretty psyched to have them installed. It's been okay working with cutting boards on top of raw plywood cabinet tops, but having the real surfaces will make cooking so much nicer. And, our green kitchen will be that much closer to completion.

* A "tool" in this context is a sort of mold around which a metal table top was spun and bent.
Read More 3 comments | Posted by Audrey |

Insulation Verdict

We've been lucky in Southern California this summer. So far, the temperatures have been relatively mild. But, the last week or so, it's been hot enough to weigh in on the effectiveness of our cellulose attic insulation. And my decision is... it's great!

During the day, the house is noticeably cooler than the outdoors. I haven't found myself sweating while doing light cleaning on a weekend afternoon. And when I come into the house after working in the garden, it's feels nice and cool--not stuffy.

That's all great, but the true benefit of the insulation comes at night. Previously, the house would feel warm and stuffy in the evenings. Now, it's just as cool as it is outdoors. On previous summer evenings, we would sit in the living room with as few items of clothing on as possible, trying not to sweat. Now, I wear thin sweatpants when relaxing after work. It's that much cooler!

My final piece of evidence is this: We have yet to dig out window air conditioner out of the garage. The insulation is working so well that our bedroom is cool enough to sleep in with just a few open windows and a ceiling fan. The cheapskate in me is delighted by how much we're saving on our energy bills.

So, with all this evidence, I can definitely recommend that everyone upgrade their attic insulation to R-30. The insulation, along with the solar attic fan and our indoor ceiling fans, has really made living in Los Angeles without central air conditioning easy. And even if you do have central air, I'm sure your energy bills will go way down with the new insulation.
Read More 2 comments | Posted by Audrey |

The Slowest Cabbage Ever

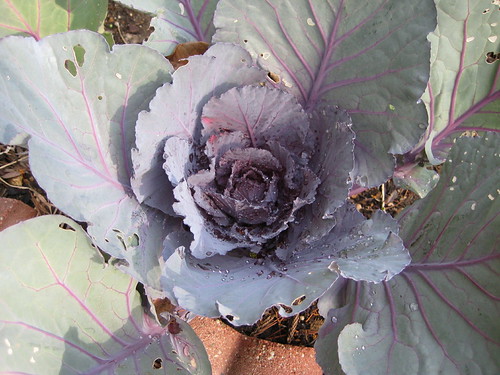
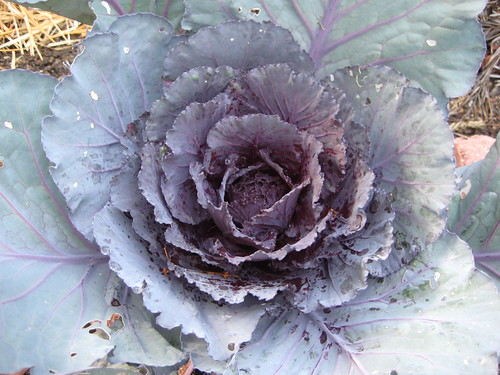
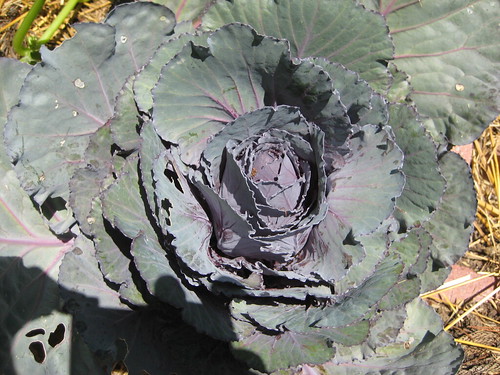
Last winter was my first time growing cabbage, and I am not sure I really got it right. Most of my plants were destroyed in a particularly brutal soil-ravaging by the local gang of skunks. (Or at least that's who I've decided to pin the crime on. It could have been raccoons.) One hardy purple cabbage survived. It's been slowly and steadily growing over the past five--yes, five!--months.

Cabbage on February 15
Cabbage

Cabbage on March 7
purple cabbage

Cabbage on May 4
cabbage in progress

Cabbage on May 31
go! cabbage! go!

Cabbage on July 3
cabbage

So, as you can see, my cabbage has been growing very, very slowly and still has only formed a rather puny head. At this point, I'm thinking of just harvesting the damn thing. It's taking up a valuable sunny spot in my upper bed, and, at this rate, it won't have a sizable head until Christmas.

Odds are, the cabbage head won't even be that tasty since hot weather apparently makes cabbage bitter. But, I plan to eat it no matter what. I put in all this time growing it, after all.

I'm not sure if I'll grow cabbage in my next winter garden. They're pretty, but they take up a lot of space. If I do grow them, I plan to research exactly how to make them happy. Five months for one tiny head of cabbage is not an experience I want to repeat.
Read More 4 comments | Posted by Audrey |

Floppy Potato Plants

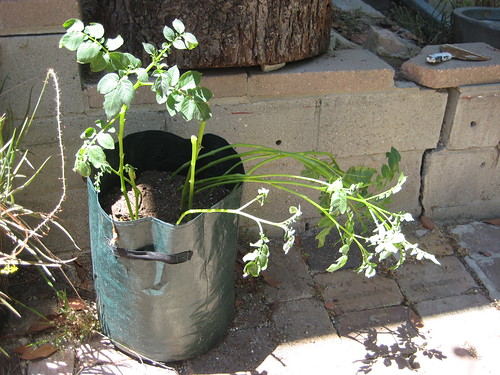
IMG_4028.JPG

Since I'm new to potato growing, I am hoping someone with a bit more experience can help me figure out what--if anything--is wrong with these potato plants. They have been happily growing in their bags over the last month or so, but, all of the sudden, things seem less promising.

I have two primary concerns:
(1) Their stalks have flopped over.
(2) They don't seem leafy enough.

I had been trying to keep the soil in the potato bags moist, but I also don't want to over-water them. Now, I'm not sure whether I need to water more or less. I added about an inch more compost to the bags, in case that would help, and also fed the potatoes with some liquid organic fertilizer that is high in potassium. I haven't seen any bugs hanging around, so I don't think they're under attack by a garden pest.

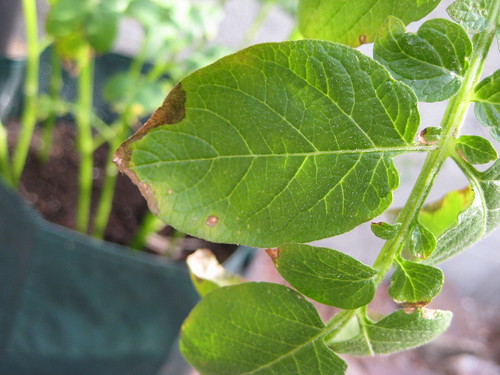
I have removed quite a few yellowing, dying leaves from the stalks. And some of the leaves currently on the plants look like this:

IMG_4035.JPG

Usually I don't worry too much about dropping leaves, but the potato stalks look really bare. Could they have some sort of leaf blight? I was thinking it might be too hot for them, but it's really only gotten into the 90s a couple of times this summer, and my gardening book says potatoes are pretty happy up to 85 degrees. So, what could be bothering my potato plants?

As you can see, I'm feeling a bit anxious about my potato crop. To be honest, I'm into the nervous phase with my entire vegetable garden. Everything is producing baby fruit, but nothing has ripened for harvest yet. I have had several experiences in the past where everything goes wrong at this particular phase--withering squash, pepper flowers that won't make fruit, blossom-end rot on tomatoes--so I'm worried. This is the phase where I start reading gardening message boards and getting confused by conflicting advice about nitrogen levels and how many inches to water your zucchini. Perhaps I just need to chill out.

But anyway... Does anyone have some potato growing advice? Should I be concerned about the floppy, spindly plants? Or should I just calm down and cross my fingers that tubers will eventually form inside those big green bags?
Read More 13 comments | Posted by Audrey |

Tip #4: There Will Be Bugs

If you're growing a garden, one thing you can count on is that there will be bugs. If you're growing fruits and vegetables organically, there will be LOTS of bugs. Some will be friendly, many will be annoying and a few might be worth killing. Of course, the insects in any garden vary by region, crop and landscape. Here are a few I have encountered, and some lessons I've learned while trying to deal with them.

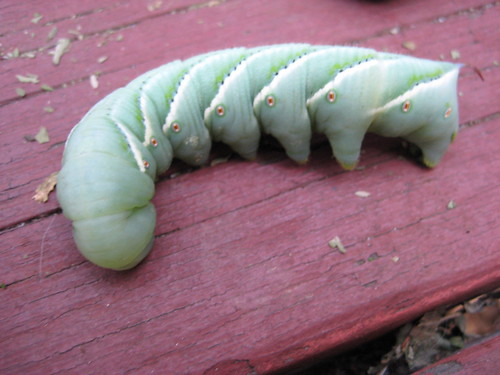
big ol' green caterpillar
Tomato Hornworm

These chubby green caterpillars are are pretty common in summer gardens, from what I can tell. I have certainly had them every year I've grown tomatoes. In their behavior, they act very much like the main character in a book my dad used to read me, The Very Hungry Caterpillar. That is to say, they eat and eat and eat everything in their path. Primarily, they go after the leaves of my tomato plants. But, they will also take a nice big bite out of an unripe fruit, which is pretty frustrating. And speaking of frustrating, tomato hornworms are the exact same color green as a tomato plant, so they can be difficult to find.
Verdict: Foe
Telltale signs: Large chunks of leaves missing, entire stems stripped of leaves, bites out of fruit
How to get rid of them: The best way for a small gardener is to find and pick off tomato hornworms by hand. They are kind of gross to touch when they get big and squishy, as in the image above, so wear gloves if you need to. As I mentioned, tomato hornworms tend to blend in, but you can sometimes find them by following their poop. Tomato hornworm droppings can looks like tiny black bits of dirt on a leaf or, if the caterpillar is really big, large green bits. I usually spend a couple of minutes in the morning looking over my tomato plants, scanning for bites out of leaves and then turning those leaves over to look for caterpillars. When you find one, pick it off with your hands and feed it to your chickens. (If you don't have chickens, you can drown them in a bucket of soapy water.)

Spider Mite

I have had a couple of infestations of spider mites on my eggplants. The mites themselves are tiny red bugs, and they make fine webs over and between the leaves of plants. Eventually, the leaves with the webbing die. While they're not as immediately destructive as other garden pests, they're not very good for a vegetable crop, so it's best to get rid of them when they appear.
Verdict: Foe
Telltale signs: Fine webbing over leaves, tiny red dots on leaves (those are the mites)
How to get rid of them: Some people use soap sprays, but I have found that the best way to get rid of spider mites is to just blast them with water using a hose sprayer. Every night for a week or so, blast both the top and underside of leaves with a strong spray of water. This knocks off the mites and also creates humidity, which spider mites hate. It takes about a week, but usually I can get rid of spider mites with this method.

white fly spirals on underside of leaves

Giant Whitefly

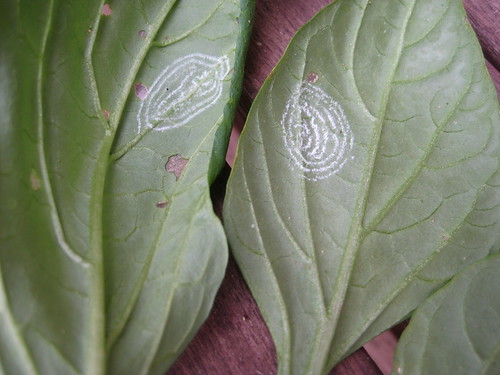
Giant whiteflies make a fluffy, white "beard" on the underside of leaves, eventually destroying them and weakening the plant. (I once had a hibiscus in my front yard that was completely infested with whiteflies, and eventually I had to take it out.) Despite their name, giant whiteflies are pretty small. They look like tiny, white bugs fluttering around your plant. This year, I found a few giant whitefly egg spirals on the bottom of my pepper leaves (see above). Thus far, they haven't taken hold on any of my plants, so I am not too worried. But I am keeping an eye on my peppers and checking the underside of leaves often for more spirals.
Verdict: Foe
Telltale signs: Small, white spirals on the underside of leaves, or, later, a white, hairy substance on underside of leaves.
How to get rid of them: Remove leaves with spirals. If whiteflies infest your plant, try a soap spray. This is supposed to work fairly well, although I haven't tried it yet.
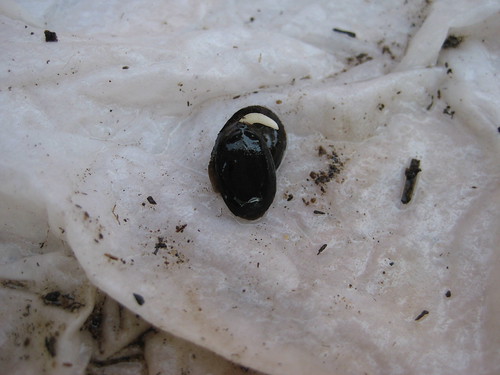
This post is getting rather long, so I think I will break it into two parts, and write about the rest of the bugs in my garden in another post. I hope the above information has been helpful. Stay tuned for Part 2 of this Tip, coming soon.

Previous Tips from a Trial and Error Gardner:
Tip #1: Start Your Seeds Early
Tip #2: Mulch Like You Mean It
Tip #3: Location Matters


Read More 8 comments | Posted by Audrey |

Luffa from Seed

Did you know that you can grow your own exfoliating luffa? I only found this out last year. Before that, I was under the impression that luffas, like natural sponges, came from the ocean. Nope! Turns out, they're a gourd. So, of course, I decided to grow some. Unfortunately, it took me a little while to find and order some luffa seeds. I may be planting them too late this year, but maybe I'll get lucky.

To give myself a jump start, I tried sprouting some seeds before planting them. I put a few luffa seeds in a wet paper towel, slid them in a plastic bag and set it on a sunny windowsill. Apparently, luffa seeds really like the heat. In about a week, I had some nice little sprouted seeds.

luffa seed, sprouted

I planted these seeds in some compost-rich soil in my Cow Pots. From what I have read, luffa doesn't like to be transplanted, so the Cow Pots are perfect since they just got directly into the ground with the plant. A couple of seeds have already come up and should be ready for in-ground planting next week.

Now I just have to figure out where to put them. Apparently, the vines get very big and like to climb fences. Perhaps I'll try them down at the bottom of the yard on our chain-link fence. The soil isn't great, but it's nice and sunny down there.

I will be very happy if I manage to actually grow and harvest some luffa this year. If I get enough, I could give them as Christmas gifts. I could even make some soap or candles to go with them. For a DIY gift-lover like me, that would be a dream come true.
Read More 2 comments | Posted by Audrey |

Line Drying Time


After an unusually damp and overcast June, I think we've finally entered prime line-drying season here in Southern California. I especially like drying sheets this way. While they take ages in the electric drier, sheets dry so quickly and smell so nice when hung in the sun. Plus, who doesn't enjoy saving money and electricity?

Yesterday, I came across a helpful post on the blog The Tangled Nest featuring some excellent tips on how to hang different clothing items on the line. It explains the best way to put up t-shirts, pants and sweaters without stretching them out. And it reminded me that I need to get some clothespins. While you're there, be sure to check out the rest of the blog. She's got a great-looking chicken coop and a lovely, lush garden to admire (and covet).

At the moment, we have a clothesline hanging between the deck and a metal pole that supports the string of patio lights. It's not the most elegant spot, but it works for the moment. Dakota is interested in getting an inside-out umbrella shaped Solar Clothes Dryer. They save space, can be closed up when not in use and apparently work very well. I'll be sure to post my thoughts if we end up getting one.


Read More 5 comments | Posted by Audrey |

Chickens on Display


My sister sent me this New York Times piece and slide show about Wijlre Castle, in the Netherlands, which, besides having gorgeous grounds and an amazing art collection, sports a glass-walled, indoor/outdoor chicken coop.


According to the Times, when the couple renovated an old tool shed on their grounds, they asked their architecht to create "a space with room for a gallery, a henhouse, a greenhouse for orchids and a tool shed." He was a bit surprised at first, but, as a chicken-lover, he embraced the challenge. The result looks really cool: art on one side and ultra-modern chicken living on the other.

I feel like it would be so cool to be able to watch your hens scratch and cluck from the comfort of your own living room. Although, I do have one question: How often do they have to clean poop off the glass? (My guess: pretty often.)


photo credit:
sitting chicken and art
Originally uploaded by pierre swillens
Read More 3 comments | Posted by Audrey |

Growing Food in the Front

While I'm lucky to have a pretty big backyard, the amount of open, sunny space is rather limited. This is a problem for a budding vegetable garden addict like me (pun intended). So, somewhat inspired by Food Not Lawns and Edible Estates, I planted some veggies in the front yard this year.

Since I spent years converting my small front yard from grass to drought-tolerant plants, and getting those plants established, I won't be removing any bushes to make room for veggies. Instead, I am growing some tomatoes and squash in the few open spaces between my grasses, cacti and shrubs.

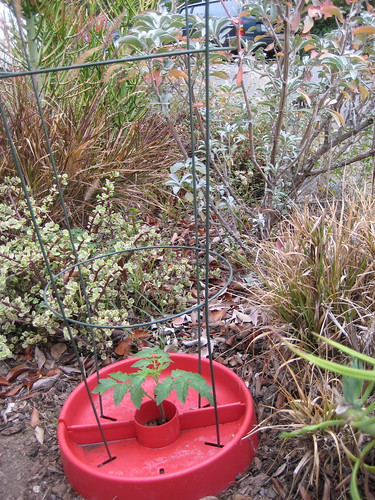
Here's a nice tomato seedling planted between White Sage, Elephant Bush and Purple Fountain Grass.

tomato among drought-tolerant plants

All three of my front yard tomatoes are planted fairly far back from the street, in an attempt to shield them from neighborhood dogs and their pee. In addition, I am using Tomato Craters at the base of each plant. I actually bought these last year to help with my cut worm and water evaporation issues. This year, I'm hoping the Tomato Crater and tomato cage combination will also help keep neighborhood cats--and other animals--from digging around, pooping near or otherwise messing with the plants.

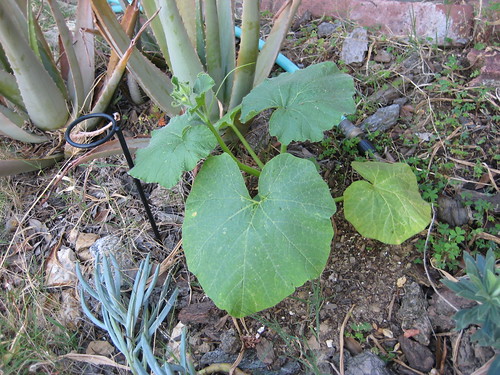
My other plan is to try growing sun-and-space-loving winter squash in the front. So far, I have one Potimarron Squash vine growing next to my aloe patch, and a couple more seedlings that will be ready to plant next weekend. The front yard seems like an especially good spot for spreading squash. They'll be able to curve and twist their vines wherever they please, and should get all the sunlight they could ever want in the unshaded left side of the yard. I'm optomistic that, if the plants can tolerate the front yard's poor soil, I'll have a nice crop of squash in a few months.

squash growing in front yard

I really only have two concerns about my front yard crop:

  1. Will I be able to protect my veggies from neighborhood pets and their excretions?
  2. Will the soil be too poor for the plants to make fruit?

I am hoping the combination of nearby cacti, artifical barriers and the winter squash's thick skin will allay my first concern. The second issue is trickier. I made sure to add worm-filled compost and organic fertilizers to the soil around each of my seedlings, but I can only do so much when planting in between established plants with big root systems. The front yard soil is all rock and clay on one side and extremely sandy on the other. I guess it'll be an interesting experiment to see how the veggies do in inhospitable earth. Happily, I have plenty of tomatoes and squash growing in the back yard. So, even if all my front yard crops fail--and I don't think they will all fail--I'll still have plenty to harvest out back.


Read More 0 comments | Posted by Audrey |

Last Winter Harvest, Here Comes Summer

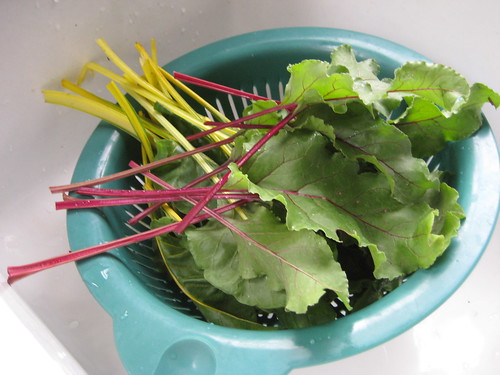
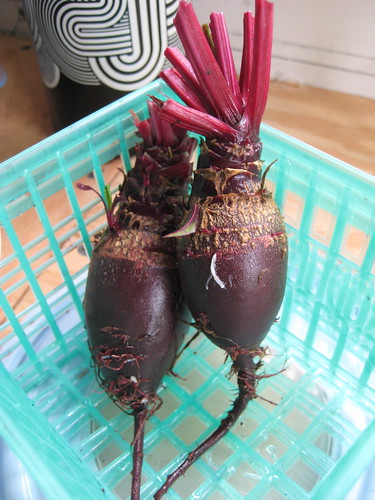
On Saturday, I picked the last of my winter garden (not counting the purple cabbage, which has decided to take forever to form a head). The final harvest from the seeds I planted last Fall included a nice bunch of chard and two healthy beets.

last chard and beet greens

The beets were roasted and added to a salad last night. As always, they were delicious. The greens will be chopped, sauteed and eaten as a side this evening.

last beets of the season

Happily, it looks like I won't have to wait long for more fresh veggies from the garden. My first summer harvest is imminent. Several of the tomato plants are sporting green baby fruit. Since I mostly planted small heirloom varieties this year, it shouldn't take them too long to reach maturity and ripen. Here are some baby Mexico Midgets, grown from seed.

growing tomatoes

Check out all those tiny hairs on the plant. I looked them up, and apparently they're called trichomes. It seems these hairs are responsible for the classic tomato-plant scent. So, there's an interesting factoid for all you garden nerds out there.

The rest of my summer crop probably won't be harvest-ready for at least another month. I have some peppers that might blossom in another week or two, and my squash, while big and bushy, have yet to make a single flower. Hopefully now that the weather is warming up they'll get down to business.

In the meantime, we'll just have to get by on cherry tomatoes. And by "we," I mean Dakota. I don't really like tomatoes that much. But I do love to grow them!
Read More 2 comments | Posted by Audrey |

Peggy Shows How It's Done

Last Sunday, during my weekly chicken-coop cleaning, Peggy decided to give me a front row seat to her egg-laying process. Ever the chicken documentarian, I immediately reached for my camera. (Clearly, I do not respect my hens' personal boundaries. Sorry girls!)

My attention was called to Peggy's private moment when I heard some angry clucking coming from the open coop. For some reason, Tina was annoyed that Peggy was using the nesting box and was trying to get her out. Tina's kind of a bully sometimes. Seeing that Peggy needed to lay, I picked up Tina and locked her in the run.

Here's Tina feeling left out.

Tina

With Tina out of the way, Peggy settled into the pine shavings and got comfy. Because the lid was up on the coop, I could see straight into the nesting box where Peggy sat, waiting for the magic to happen. But, if I got too close, Peggy would make a little cluck/hiss noise, as if to say, "Get out!" (If you've never heard a cluck/hiss before, it's a weird sound, but the intent is crystal clear. Peggy also cluck/purrs sometimes. Really!) So, I went away to let her do her thing.

About 10 minutes later, I heard Peg stand up and start moving around. I returned to the coop and caught her in this position.

someone just laid an egg

Don't you love that expression? And the way she's standing cracks me up. It's so awkward.

Peggy hung out in the nesting box for a few more minutes, perhaps admiring her freshly-laid egg. Then, she hopped out into the yard, and the real show began.


Peggy's Post-Egg Cluck from Audrey on Vimeo.


This is how both of my hens announce that they've just laid an egg. It is loud and long and they do it every time. I guess it's good that Peggy and Tina take pride in their work, but still. Think of the neighbors!
Read More 5 comments | Posted by Audrey |

Pretty Green Insects: Friend or Foe?

bugs on a wilted iris

These bright green grasshopper-esque insects looked so lovely on a wilted purple iris blossom yesterday that I just had to take their picture. And check out those crazy antennae. They must be at least three times as long as their bodies. Oddly enough, despite their sensitive head gear, they didn't seem the least bit annoyed when I got in their face with my camera.

So, what are they? Can one of my bug-loving readers help me identify them? I'm curious about their names and wondering if they're nice, beneficial insect friends or plant-devouring foes. Either way, I'll probably leave them alone.

They better be careful, though, because they're dangerously close to the coop and two hens who love gobbling up bugs.
Read More 4 comments | Posted by Audrey |

Painting with Milk Paint

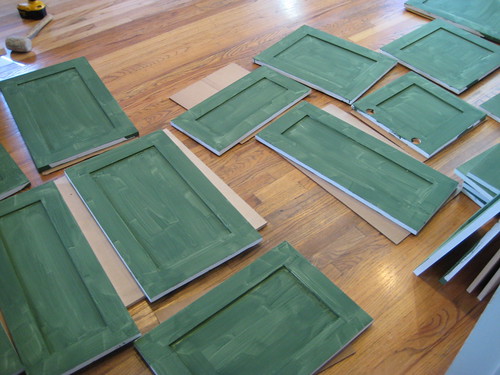
doors drying

Last weekend, we started painting the kitchen cabinets. As I mentioned before, we're using SafePaint, which is a variety of milk paint made by The Old Fashioned Milk Paint Company. Milk Paint is formulated from three, non-toxic ingredients: milk protein, lime and natural pigments. Regular milk paint tends to give a thinner, streakier finish, which would work in a room with a more "old fashioned" style. But since ours is a more modern kitchen (with Shaker influences), we went with SafePaint, which goes on thicker for more even coverage.

Milk paint can be a bit tricky, as we learned, because it comes as a powder that you mix with water. Our first batch was a little lumpy, possibly because we didn't use the right utensils to stir it. To smooth out the lumps, Dakota added more water. This didn't change the color at all, but the paint went on a little thin, as you can see on the cabinet doors above. Happily, that was just the first of two coats--after a coat of Dunn-Edwards Eco-Shield Primer--so it didn't matter too much.

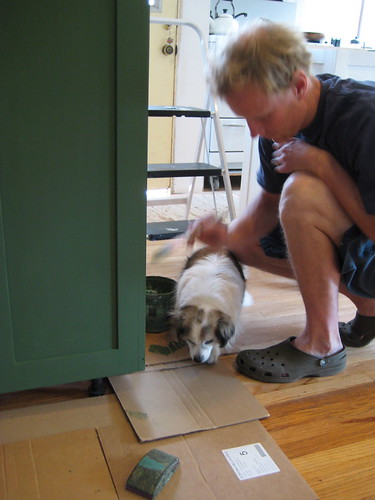
He's Nigel helping Dakota paint the pantry.

Nigel helps

Eventually, we found that mixing the paint using a whisk works well. The second batch of paint was thicker, had fewer blobs and went on in a more uniform manner. In addition, we found that SafePaint goes on much better with a brush than with a foam roller. I don't mind using a brush on the cabinets, but painting the walls or ceiling that way will be rough. So, I think we're going to try a different roller--perhaps a fluffier one--on the walls and see how that goes.

SafePaint has absolutely no odor, and drips wipe up easily with a wet rag. And I suspect that if your overly-curious dog should happen to accidentally lick some of it up, he'd be fine. So far, despite the minor lumpiness issue, we're pretty happy with the product.

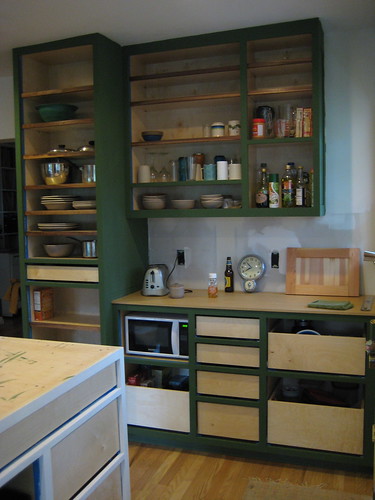
After two coats, I think the cabinets look really great. As Dakota pointed out, we picked a very "masculine" green--like something you'd see on the wall of a British pub. (The color itself is called Lexington Green, which fits.) I am having a hard time imagining how things will look once the cabinet doors are on and everything else is installed and painted. But right now, the painted cabinets go nicely with the oak floors, so that's a good start.

one side painted
Read More 2 comments | Posted by Audrey |

Potato Bag Update

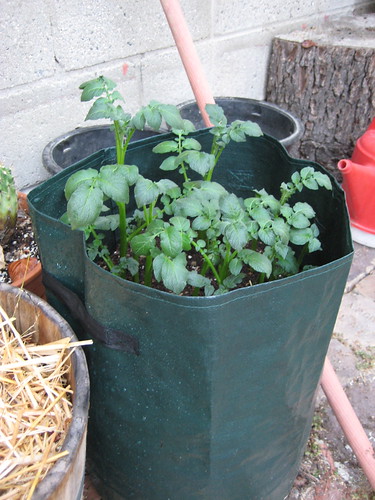
potatoes going strong

The potato bags I wrote about last month are working out really well. The green shoots grew up from the seed potatoes incredibly quickly. In fact, they grew so fast that I barely had time to fill in the soil behind them. Now, the bags are completely full of a mixture of soil and compost, and I mixed in a little organic fertilizer for good measure.

From here on out, the potatoes should be pretty low-maintenance. They just need water, sun and perhaps a bit of liquid fertilizer from time to time. Apparently, I'll know they're ready for harvest when flowers appear. According to Seed Savers, my German Butterballs should take 100 to 120 days to reach maturity. I have my fingers crossed that I'll have some delicious, organic, home-grown potatoes to roast this Fall. Yum!
Read More 6 comments | Posted by Audrey |

New Look for the Blog

If you come here often, you'll notice that I'm trying out a new blog layout. There are so many cool ones out there just waiting to be downloaded, but I ended up going for something simple so I could try to customize with my very limited computer skills.

Let me know if anything on the blog is wonky or annoying. I'd rather have a site that's user-friendly than one with fancy features.
Read More 2 comments | Posted by Audrey |

LADWP Lawn-Removal Rebate

IMG_2003.JPG
I was excited to hear on the radio the other day that, in addition to its strict new lawn sprinkler regulations, the Los Angeles Department of Water and Power just unveiled a lawn-removal rebate program.

The official title is the Residential Drought Resistant Landscape Incentive Program, and the goal is to encourage Los Angeles residents to remove their lawns in favor of drought-tolerant landscaping, water-permeable hardscaping or mulch. They'll give you a dollar for every square foot of lawn you remove and replace, which is pretty great considering you'll already be saving a bunch on your water bill just by eliminating all that expensive grass-watering.

I really appreciate the fact that the LADWP isn't just penalizing water wasting like leaky sprinklers and driveway washing, but is also incentivizing water conservation when it comes to yards. Xeriscaping is already pretty popular in my neighborhood, but hopefully now that you get a little cash back for doing it, even more people will rip out their grass and put in California natives. The bees will be so happy!

It's too late for me to cash in on the rebate, but if you're thinking about taking out your lawn and want to know more about the LADWP program (which requires pre-approval), go here.

And here are my posts about my xeriscaped front yard:
Water Wise
In Bloom

UPDATE: I've noticed quite a few people coming here using search terms like "LA DWP lawn removal," so I wanted to link to a resource that I think would be really helpful for people who want to get rid of their grass lawns. The Garden Punks blog has a couple of great, step-by-step posts about sheet mulching, and their most recent one is really informative (and well-illustrated). If I'd known about it at the time, I would have definitely used their technique when removing my lawn. So, if you're planning to take out some grass and cash in on the DWP rebate, I recommend you check it out.
Read More 2 comments | Posted by Audrey |
Newer Posts Older Posts Home

GREEN FRIEDA

  • About
      This blog is about a variety of things I'm interested in, including gardening, backyard chickens, crafts, DIY home improvement and resource efficiency. My hope is that it's both informative and fun to read. I hope you like it. If you want to email me, click here.
  • Labels

    • animals (8)
    • baby (7)
    • bathroom (4)
    • cactus (1)
    • canning (1)
    • charities (3)
    • chickens (79)
    • compost (1)
    • crafts (9)
    • energy (8)
    • environment (24)
    • food (61)
    • gardening (137)
    • gifts (7)
    • good girls (10)
    • holiday (6)
    • home improvement (27)
    • insects (2)
    • kids (4)
    • kitchen (16)
    • native plants (16)
    • orchard (6)
    • pests (14)
    • politics (6)
    • reuse (16)
    • tips (10)
    • tree (1)
    • waste (2)
    • water (9)
    • wedding (2)

    Blog Archive

    • ▼  2014 (5)
      • ▼  June (2)
        • Chicken Landscaping
        • Poor Baldy
      • ►  May (1)
      • ►  April (2)
    • ►  2013 (20)
      • ►  November (3)
      • ►  June (6)
      • ►  March (5)
      • ►  February (3)
      • ►  January (3)
    • ►  2012 (13)
      • ►  September (1)
      • ►  August (2)
      • ►  July (2)
      • ►  May (1)
      • ►  April (2)
      • ►  February (1)
      • ►  January (4)
    • ►  2011 (33)
      • ►  December (3)
      • ►  November (5)
      • ►  September (1)
      • ►  August (3)
      • ►  June (7)
      • ►  May (2)
      • ►  April (4)
      • ►  March (1)
      • ►  February (4)
      • ►  January (3)
    • ►  2010 (34)
      • ►  November (3)
      • ►  October (2)
      • ►  September (4)
      • ►  August (5)
      • ►  July (3)
      • ►  June (3)
      • ►  May (1)
      • ►  April (6)
      • ►  March (5)
      • ►  January (2)
    • ►  2009 (94)
      • ►  December (6)
      • ►  November (8)
      • ►  October (6)
      • ►  September (6)
      • ►  August (9)
      • ►  July (13)
      • ►  June (12)
      • ►  May (12)
      • ►  April (3)
      • ►  March (8)
      • ►  February (6)
      • ►  January (5)
    • ►  2008 (54)
      • ►  December (4)
      • ►  November (3)
      • ►  October (3)
      • ►  September (3)
      • ►  August (7)
      • ►  July (6)
      • ►  June (9)
      • ►  May (2)
      • ►  April (2)
      • ►  March (4)
      • ►  February (7)
      • ►  January (4)
    • ►  2007 (16)
      • ►  December (3)
      • ►  November (1)
      • ►  October (3)
      • ►  August (3)
      • ►  May (2)
      • ►  April (2)
      • ►  February (1)
      • ►  January (1)
    • ►  2006 (28)
      • ►  November (1)
      • ►  October (3)
      • ►  August (3)
      • ►  July (1)
      • ►  June (4)
      • ►  May (5)
      • ►  April (1)
      • ►  March (5)
      • ►  February (2)
      • ►  January (3)
    • ►  2005 (10)
      • ►  December (1)
      • ►  November (1)
      • ►  October (2)
      • ►  September (1)
      • ►  July (1)
      • ►  June (4)

    Related Blogs

    • Homegrown Evolution
      Framed
      4 years ago
    • DigginFood
      How to gain popularity through buying Twitter followers
      9 years ago
    • The Tangled Nest
      The First Egg: Light, Life, and Gratitude
      10 years ago
    • Monkey Lobster
      Summer Slide Show
      12 years ago
    • Rambling LA
      LOSING YOUR LAWN
      12 years ago
    • Rancho Garbanzo
      3 1/2 years later - Our Wedding Photobook
      12 years ago
    • Urban Chickens
      Infographic time: the chicken coop checklist
      13 years ago
    • Ramshackle Solid
      Hoop and Pole
      13 years ago
    • Our Yellow House
      Still Knitting
      13 years ago
    Show 5 Show All
    Follow GreenFrieda on Twitter

    Links

    • Backyard Chickens
    • Tree People
    • Seed Savers Exchange
    • L.A. Works
    • to do something
    • Mohair Gravy

    Followers

  • Search


    • Home
    • Posts RSS
    • Comments RSS
    • Edit

    © Copyright Green Frieda. All rights reserved.
    Designed by FTL Wordpress Themes | Bloggerized by FalconHive.com
    brought to you by Smashing Magazine

    Back to Top