• Home
  • Posts RSS
  • Comments RSS
  • Edit
Blue Orange Green Pink Purple

featured post

Homemade Granola

Recently I tried making my own granola. It ended up being quite simple, and I recommend trying it yourself. Dakota and I both find most store-bought granolas way too sweet and full of "extra" flavors. So, my goal was to make granola that was simple, healthy and tasty.

Read More

Safer, Softer Play Dough

homemade playdough
I have always thought that making play dough for my son sounded like a good idea... in theory. But it also seemed like one of those things that might be a big pain in the ass, and I wasn't certain the final product would be as good as the store-bought stuff. But, my son started preschool last week and they use school-made play dough. It looks pretty great and all the kids love it, so I decided to give it a shot last weekend.

Turns out, it's easy and the dough at the end is actually nicer than the store stuff. I used this recipe from Instructables. It involves cooking the dough for a little bit, but was still quite simple.
homemade playdough
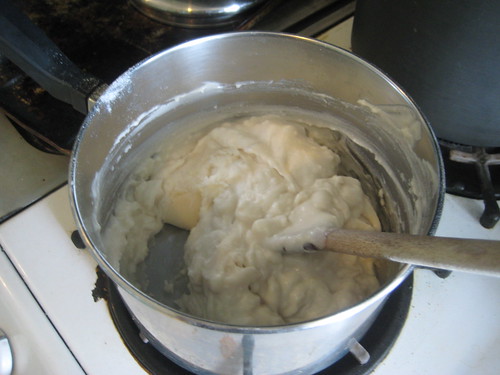
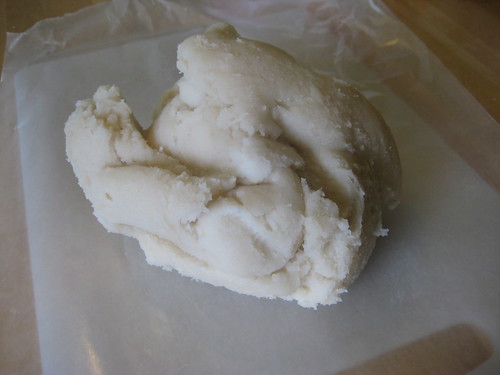
You stir everything together and then cook is mostly to dry the dough. What you end up with is something that looks a lot like sugar cookie dough.
homemade playdough
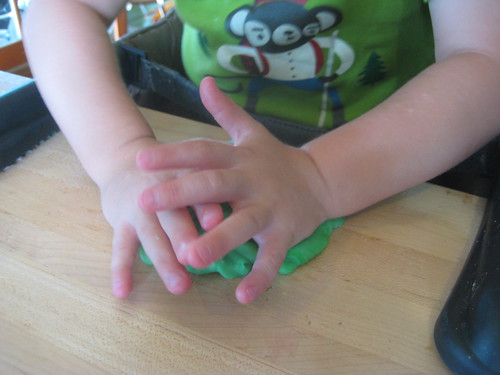
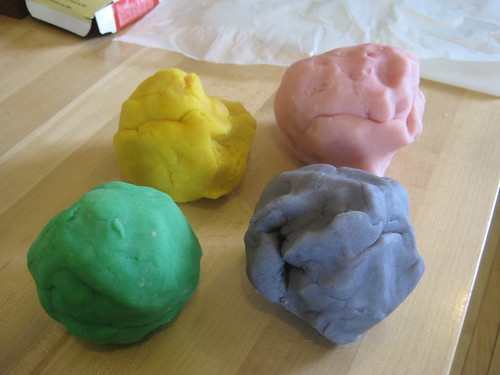
After kneading briefly, I added food coloring, making colors based on my son's shouted requests: "yellow!" and "pink!"
homemade playdough
He loves the stuff, and is constantly begging to play with it. I've the play dough it in a big airtight container on the counter, and it seems to be holding up wonderfully. Another nice thing is that this dough can really teach color blending. A little chunk of pink plus some yellow makes a lovely orange after some vigorous toddler kneading.

Oh, and if he eats it, no big deal. Everything in the dough is technically "food." I doubt he would want it after a quick taste, though. It's very salty.
Read More 1 Comment | Posted by Audrey |

One Okra at a Time

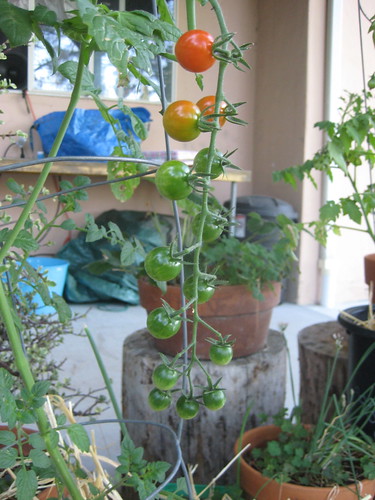
Despite my aforementioned laziness, this summer's container garden has been quite successful so far. I started harvesting a few weeks ago, and we've had a pretty steady supply of tomatoes ever since. I bought one of those mixed seed packs of different cherry tomato varieties, and ended up with only one red variety. The rest are yellow pear or golden cherries. Luckily, my son loves yellow tomatoes most of all.
cherry tomatoes
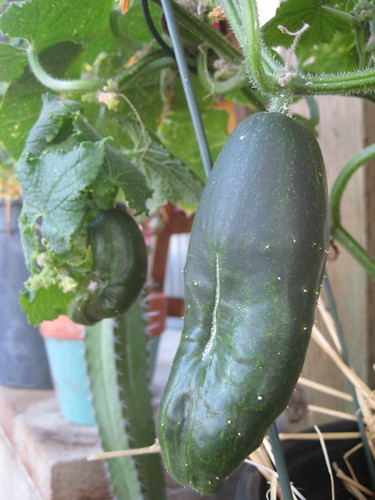
I ended up with two containers of cucumbers--two plants per container--and both containers have been producing fruit fairly regularly. These are the Spacemaster variety, so they are supposed to grow well in smaller spaces. The fruit is pretty tasty, although the skin is very bitter so they are best eaten peeled.
spacemaster cucumber
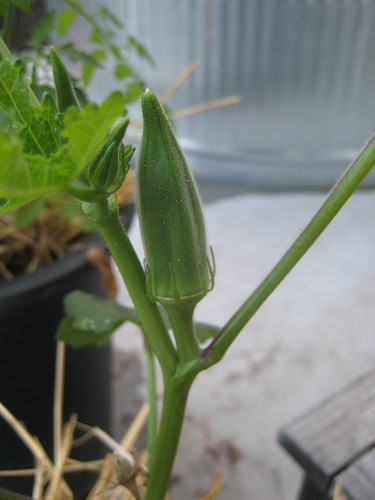
And, best news of all, I grew some okra from seed! I actually have two okra plants growing and producing spears at the moment. I'm still only getting one okra at a time, but that's progress, right? Sort of.
okra!
I did notice some spindly-looking okra plants in the demonstration vegetable garden at the Natural History Museum recently. So, maybe okra plants never get that busy, at least in home gardens. I am keeping both plants in full sun and fertilizing every couple of weeks, so I am hopeful that they'll continue to produce. I might even beat my previous record of four okra in a season.
Read More 0 comments | Posted by Audrey |

Cactus Puberty

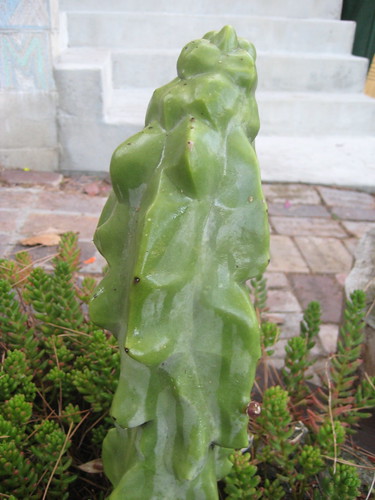
She's going to be so mad at me for posting this but... my favorite cactus just got her first pimple! They grow up so fast, don't they?
cactus with "pimple"
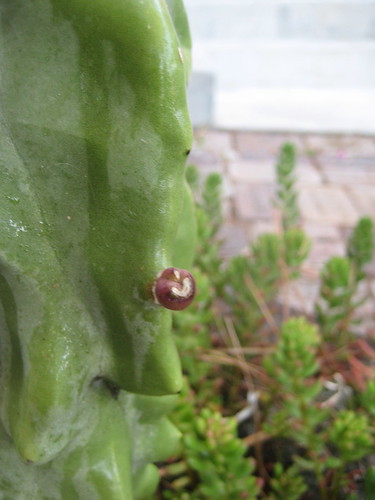
Here's a close-up of the blemish, which is positioned a few inches up on the cactus' back side.
cactus pimple
Of course, I think it's really a bud for a side growth. So, my special cactus may have a new "arm" very soon.

This is especially exciting because this is probably my fanciest and most treasured cactus. I can't remember what it's called, but this cactus is originally from Mexico and is now sadly extinct in the wild. It grows in a pillar and has this very cool, wavy-looking exterior--almost as if it's melting in the heat. My parents bought it for me a California Cactus Center many years ago to celebrate a promotion at work. It now sits in a place of honor in one of the cactus planters Dakota built into our patio.

I am delighted that my "Celebration Cactus" is doing well enough to grow another limb. Perhaps, if it gets big enough, I can take a cutting and grow a new fancy melting cactus to keep this one company. Or, even better, I can grow another one to give as a gift.

For now, I will have to be patient. The pimple is quite small, and I don't want to make the cactus too self-conscious.
Read More 2 comments | Posted by Audrey |

New Hall Closet

I am way behind in posting about the bathroom remodel, and so much has happened! It's really looking good and functioning well for us. So, I will try to roll out a few updates over the next week or two. First off, we have a new hall closet!

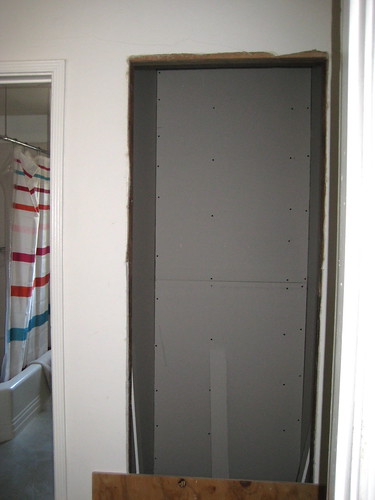
Here it is in process with drywall installed and the doorway cut out. This closet was previously a shower opening into the bathroom (obviously). As I have mentioned before, we decided it was silly to have a separate bath and shower in a very small house with minimal closet space. Plus, the shower stall had old tile and very poor ventilation, which meant that it was always disgusting and mildewy, no matter how hard I scrubbed it.

Dakota demolished the interior of the shower, disposed of all the gross tile and cleared out a space for the closet. Then, he very carefully cut a new doorway into the hall. This was all very dirty and sweaty work. I contributed by getting our son out of the house for several weekends. He is completely enthralled by Dakota using power tools, and it would have been impossible to do anything with him at home laughing, grabbing and getting covered in plaster dust.
new hall closet drywalled
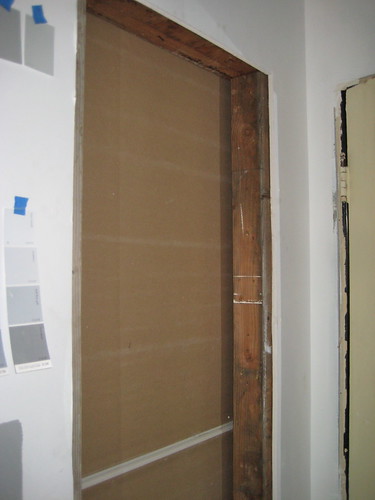
Here is the shower door with one side covered in drywall. The other side was closed in shortly after, and we inset a little box-shelf for displaying artwork and knick-knacks. (I'll share an image of that soon.)
new hall closet drywalled
Dakota redid the plumbing in the bathtub, and installed a shower head so that we now have a nice bath/shower combo. This is much better for our needs, and the new white tile around the bathtub is much easier to keep clean.

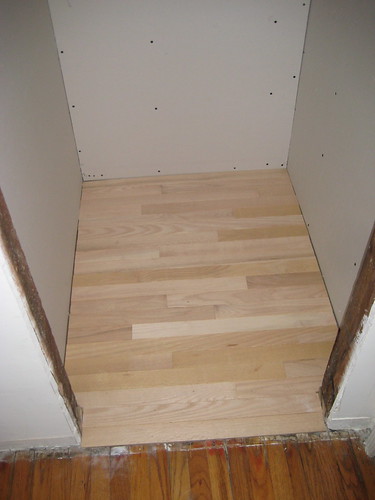
We had some oak flooring left over from the kitchen remodel, so we were able to continue the wood floor into the closet.
new closet floor
As of today, the closet is still under construction. It has a door, but both the closet and door need paint and we're still deciding on the best shelving configuration. Still, I am already so delighted to have a place to store vacuum cleaners, strollers, extra paper towels and all the other bulky items one would like to have close at hand. Pretty soon, we'll even have a bar up so we can hang up our jackets instead of draping them across the nearest chair.

It's the little things...
Read More 0 comments | Posted by Audrey |

Small Potato (Harvest)

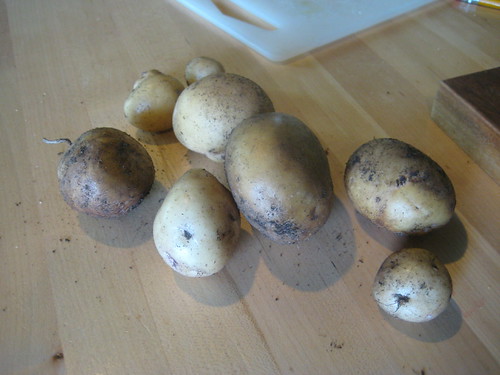
IMG_1013
Guess what? I actually managed to grow some potatoes in those bags. Not very many potatoes, but the above potatoes were grown and harvested last month. So, I am not a complete potato bag failure this time around.

And I still have a second bag waiting to be dug up. I suspect there will be even more tubers in that one. The stalks in bag #2 lasted longer and just wilted last week. I think the key is afternoon shade and infrequent watering.
Read More 2 comments | Posted by Audrey |

Summer Containers

I'm thinking it may be another lazy summer, gardening-wise. I have cleared the upper bed and planted some watermelon seeds--more on that later--but the lower bed remains a tangle of bug-destroyed winter greens and weeds. I just can't get up the energy, or find the time, to deal with it.

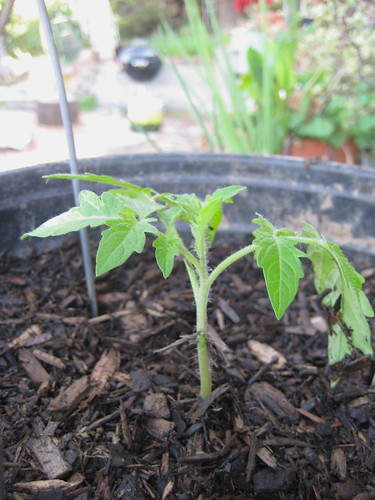
On the bright side, I managed to start my tomato seeds pretty early, so my son and I were able to spend last Saturday transplanting small plants into large containers. Container gardening much easier to manage than in-ground gardening if you simultaneously need to watch a curious 2-year-old. My son could wander around, filling small pots with soil, digging in containers with a shovel and playing in a water bucket I set up for him, while I filled 5-gallon pots with a mix of compost and garden soil.

I managed to get five tomatoes transferred to large containers. All will produce cherry-sized fruit of various colors, which my son will be happy to devour in a month or two.
tomato seedings transplanted
I have quite a few more tomato seedlings still growing in small pots. I might plant them in the ground somewhere, or maybe I will give them as gifts to friends and neighbors. I'll probably end up with enough to do both.

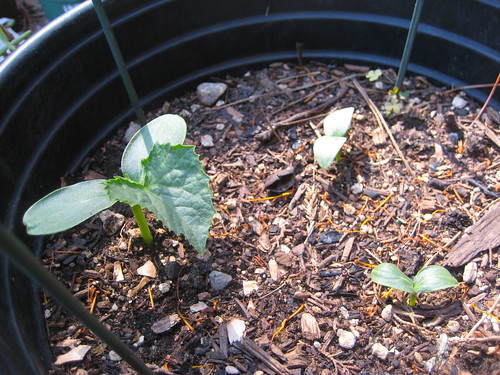
I also planted some Spacemaster Cucumber seeds in a large container a few weeks ago. They took a little while to germinate, probably due to the colder-than-usual April weather. But recently they have sprouted, and I am hoping to get them to climb up a tomato cage and bear some crisp fruit this summer.
cucumbers in container
Because I am a glutton for punishment, I also planted some okra seeds in pots at the same time I planted the tomatoes. Despite a compost-rich soil mix and dutiful seed-scratching, not a single seed sprouted. I recently re-planted some of the pots. Maybe the warmed weather will help this time. Or maybe I am doomed to never successfully grow okra. How tragic for a gardener from Texas.
Read More 0 comments | Posted by Audrey |

In Bloom

The late spring rains have brought some nice blossoms to the garden this April. Including...

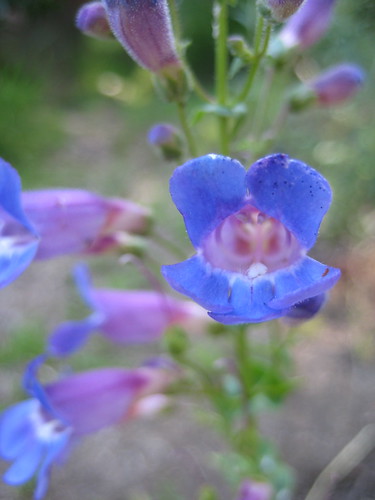
The Royal Penstemon I got this winter from the nursery at the Theodore Payne Foundation. Royal Penstemon
The blossoms on the Royal Penstemon are really lovely, and butterflies and other pollinators seem really into them. I saw a butterfly just hanging out inside one of the blooms the other day, drinking in the awesomeness. I guess that's the benefit of planting natives.

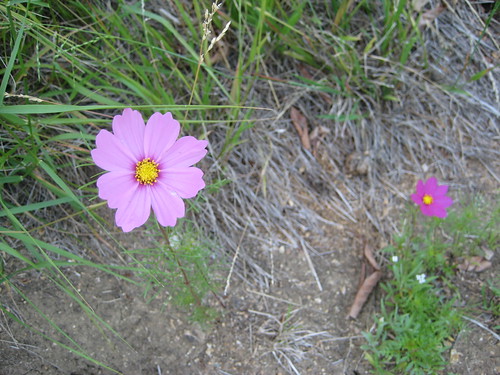
Also currently blooming are one small lupine and a few pink Cosmos from the wildflower seed mix my sister gave me for Christmas. More Cosmos, scattered throughout the backyard, are on the way.
wildflowers
Plus these, whose name I can't currently remember.
wildflowers
Speaking of my sister, she has an amazing wildflower display in front of her house in San Antonio. Mine is pretty pitiful in comparison, but I'm still happy to see some pretty spots of color around the backyard.

The front yard is really bushy and overgrown, but in bloom as well, which is great. I am planning to prune it back soon and recover the paths with some wood chips we got from friends a couple of weeks ago. There are bees everywhere, to the point where I'm concerned about my son accidentally grabbing one when he picks lavender blossoms. But still, it's nice to see so many happy bees.
Read More 1 Comment | Posted by Audrey |

Growing Bags of Potatoes

Despite some past failures, I have recently decided that I really enjoy growing potatoes. I don't even have to buy seed. I just accidentally leave potatoes from my produce delivery box in the pantry for too long, and I've got some starters almost ready to plant.

Last year, I grew potatoes in the ground, but this year I decided to use the potato bags again. I think I have it figured out this time. I planted earlier--in March--and I'm keeping them bags out of direct sun and being careful not to over-water. I think my last potato bag disaster was due to hot summer temperatures combined with overzealous watering (due to the hot temperatures). So far, things seem to be going well.

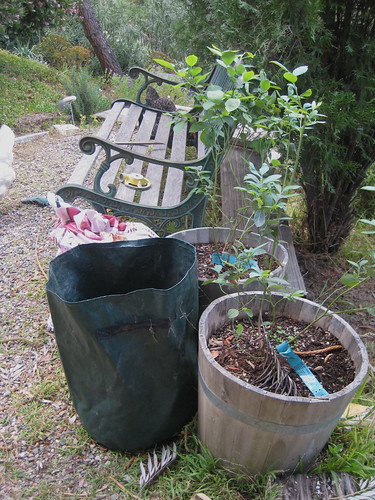
Here is the first bag I planted back on March 18, sitting next to my two blueberry bushes.
blueberries and potato bag
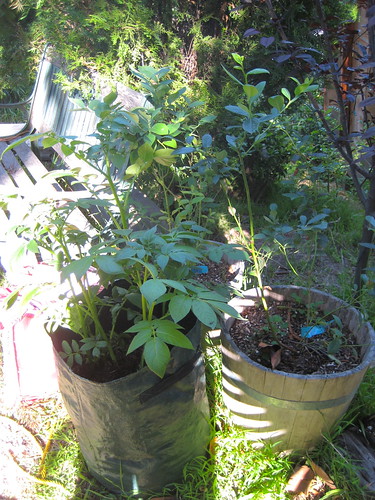
And here it is today, April 28. Potatoes grow so quickly!
potato sack
Today I filled in dirt and compost around the stalks until it was almost to the top of the bag. Now, I just have to wait and try not to get to crazy with the watering. If I'm good, I should have some potatoes by June. What could be easier than that? (I hope I'm not jinxing myself by saying that.)
Read More 3 comments | Posted by Audrey |

Olive Tree

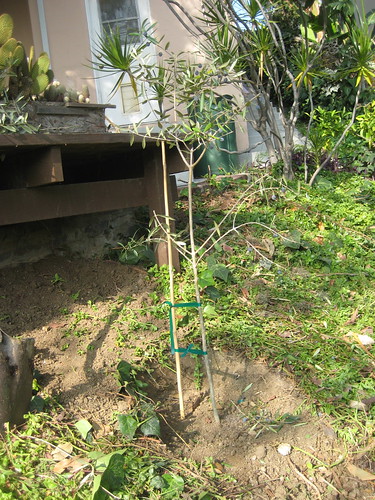
Olive Tree Planted
For my birthday last fall, Dakota gave me this nice olive tree. We finally planted it in the backyard last month. Originally, I was thinking I'd put it in the front yard in front of our bedroom window, but Dakota pointed out that the fruit might attract (loudly chirping) birds. Instead, it's on the slope just below the cactus planters and above the Pink Lady Apple and the peach tree.

I pruned it back pretty well when we planted it and tried to water it deeply. We're having a pretty dry rainy season, so I think I'll need to do some more deep watering soon to help it get established. Or, La Nina could get it together and send us some rain!

The tree is an olive variety called Arbequina, which is supposed to be good for both oil and eating. It's also self-fertile and fairly hardy, which makes it a good tree for a home orchard. Originally from Spain, the Arbequina apparently does well in Southern California.

From what I gather online, it might take a few years to get an olive harvest, although the tree had fruit on it when Dakota gave it to me. How fun would it be to press our own olive oil? I wonder how one does that. I guess I'll have to do a little research. Either way, I really love the look olive trees with their silvery-green leaves. So, if we get fruit I'll consider that a bonus.
Read More 4 comments | Posted by Audrey |

Pie Garden

Last Spring, a friend of mine posted a photo on Facebook of her daughter picking and eating blueberries in her backyard. I immediately got really excited. It had never occurred to me that I could grow blueberries in Los Angeles, but my friend lives in Glendale, so, obviously, I can.

A couple of weeks ago, my husband, son and I headed off to the San Gabriel Nursery. San Gabriel Nursery is sprawling and has a huge selection of plants, including lots of fruit trees and bushes. I'd done a little research beforehand, and found that you need two blueberry bushes to get fruit. Happily, they had three different southern highbush varieties, which are the blueberries best suited to our area. I picked out one Misty Blueberry and one Jubilee Blueberry.

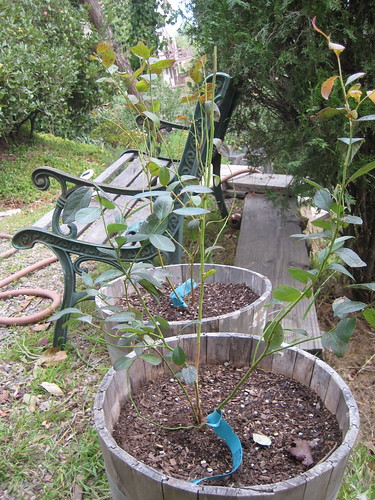
Here they are potted up in some "half-barrel" planters in the back yard. I planted them in soil specially made for potting azaleas, because blueberries like their soil highly acidic. You can get azalea potting soil at most nurseries. I've had them out for a few weeks now, and they seem pretty happy. One bush has even put out some new leaves.
blueberry bushes
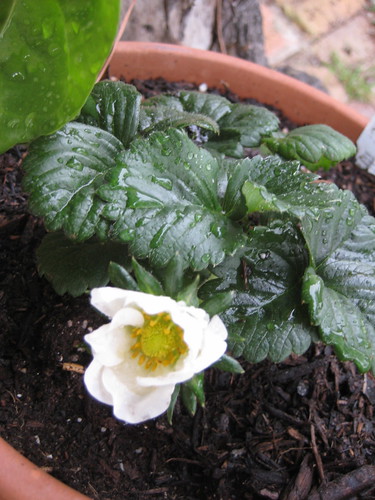
After we found the blueberry bushes, I couldn't resist doing a little browsing. It's hard when there are so many plants to look at. I noticed some good-looking and inexpensive strawberry plants. I always like growing fresh strawberries, so I grabbed a couple of those.
strawberry
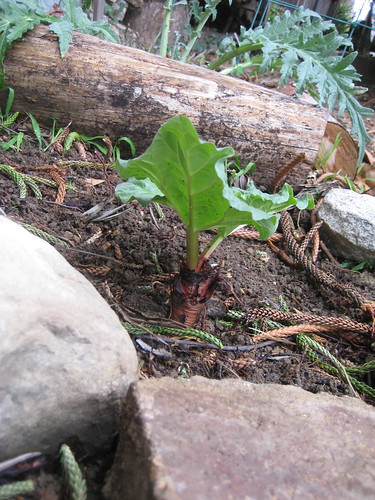
And then, I noticed something kind of cool sitting next to the strawberries and artichokes in what must have been the perennial fruit and vegetable section: rhubarb. Dakota's parents grow rhubarb in their garden in Iowa, but it never occurred to me to grow it here in Los Angeles. I'm a pretty big fan of perennials you can eat, especially now that my gardening time is pretty limited. So, I decided to go for it.

After getting home and doing a little research online, I have found a mix of opinions about whether it's really possible to grow tasty rhubarb in Southern California. The plants like to get cold, although the variety I got--Cherry Red--is supposed to be the best for this part of the world. So, we'll see.
rhubarb
I planted the rhubarb next to the artichokes on the edge of the upper garden bed. That should keep it away from the hot midday sun once summer rolls around. Hopefully it will be happy there.

Once I planted everything, I realized that I have inadvertently created a pie garden. If all goes well, I could bake an awesome strawberry-blueberry-rhubarb pie from my own backyard. (To be honest, Dakota would bake that pie. He's the pie guy in our house.) Plus, I already have a peach tree and two apple trees. Imagine the pie possibilities! Because I am a huge gardening nerd, the idea of a pie garden is really exciting. I hope it works out.
Read More 2 comments | Posted by Audrey |

Easy Cheese

Dakota got me this very cool book for Christmas called Home Made. It's got gorgeous pictures, and, most importantly, simple easy-to-follow recipes for making jams, biscuits, cheese and other basic but delicious fresh foods. In fact, the instructions for cheese-making seemed so simple that I decided to try making some for our New Year's Day party.

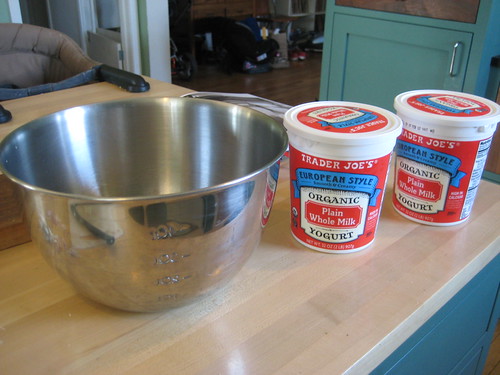
I made a soft, cow's milk cheese good for spreading called Labneh. The recipe is crazy easy, but I won't write it out here because I don't want to steal from the author of Home Made. I'm guessing you can find directions online pretty easily, although the book is worth purchasing. Basically, it involves yogurt, salt and garlic.
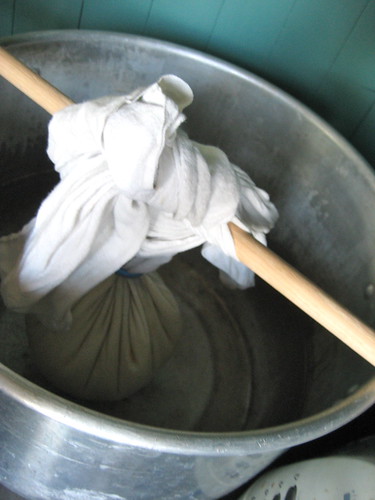
Making Cheese
You put all that stuff in a clean dishcloth. And here's a tip: Use a dish cloth, not cheese cloth. Cheese cloth is too porous for this particular method. Then, you hang your bundle-o-yogurt over a big pot or bucket and walk away. I left mine hanging--which strains out the water--for about 24 hours.
Making Cheese
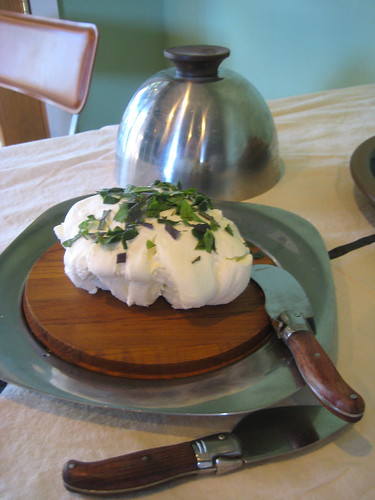
Finally, you open up the dishcloth and put your cheese on a platter. Add fresh herbs and you're done.
Fresh Made Cheese
I thought the cheese was very tasty, and I got many compliments from my party guests. In fact, they ate it all, so I know it must have been good. Home Made has a few other cheese recipes that I'm hoping to try, including a sweet breakfast cheese with vanilla bean. Yum.

So, it turns out soft cheese making is one of those awesome things that seems really fancy and time-consuming, but are actually easy-peasy. I love those things.
Read More 3 comments | Posted by Audrey |

The Floor, The Floor

Dakota has been working on the bathroom floor for the last several weeks, and it's almost done. Pouring a cement floor is not an easy process, and there were some ups and downs, but I think it's going to end up looking great.

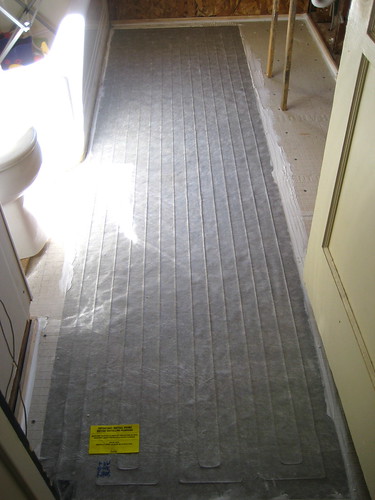
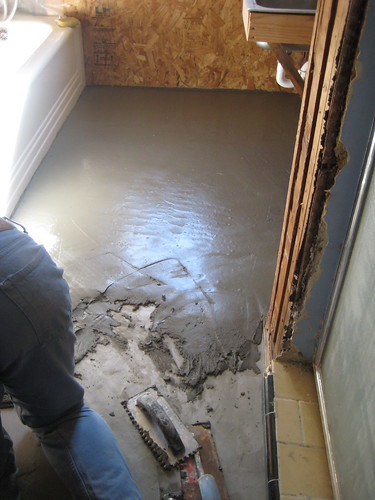
Here's the radiant floor heating that was laid down on top of the subfloor and covered with the first layer of cement. It has a thermostat with a timer attached, so, once it's all hooked up, we'll be able to set the timer for just before bath time or when we wake up in the morning, and then walk into an already-toasty room. This will be a nice change from our old, drafty, freezing one.
radiant floor heating
Dakota made the first cement layer fairly thick and added some pea gravel to make each bag of cement go a little farther (cement is expensive). Because he was mixing using a drill and a special mixing attachment, it was a bit difficult to get the consistency just right.

For a moment there, he thought he'd added too much water and that the first layer would never dry--especially since it was also cold and rainy outside. If cement doesn't set properly, the only solution is to break it up and start again. This was a scary thought considering we had a fairly expensive heating element hiding underneath that cement. Happily, it eventually dried.
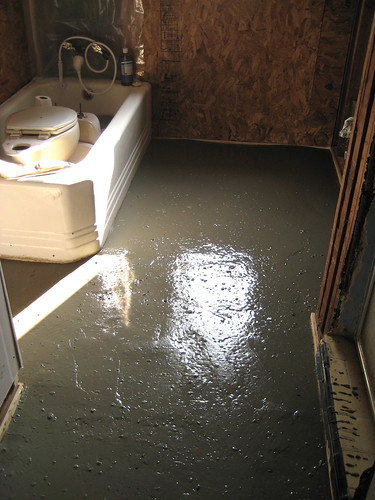
pouring the cement floor
Notice the toilet in the bathtub in the photo above. That was a little tricky since we only have one bathroom. Happily, we have some friends who live close by and, well, I don't mind peeing in the bushes in a pinch.

Next came two more thin layers. For the last layer, Dakota rented a better, stronger drill to mix the cement. This helped the consistency immensely, and I know if he did it again he'd have gotten the right mixing tools from the start.

Here's the last layer going down.
last layer
Now, the floor is dry and cured, and Dakota will do a little patching and add a seal and then it's done. There are already a few cracks and water spots on the floor, but we like it that way. It adds a nice patina to the surface. Perfect is boring.

This weekend, Dakota will hang the rest of the drywall and then start work on the cabinets. The floor was the most difficult part of the remodel--well, besides tile, which we're hiring professionals to do--so hopefully the rest of the work will go fairly quickly. I can't wait for the cabinets. Right now, all our bath products and cleaners are in boxes in the bedroom. It's a bit cramped.
Read More 1 Comment | Posted by Audrey |

Winter Greens, Slow Beets

IMG_0057
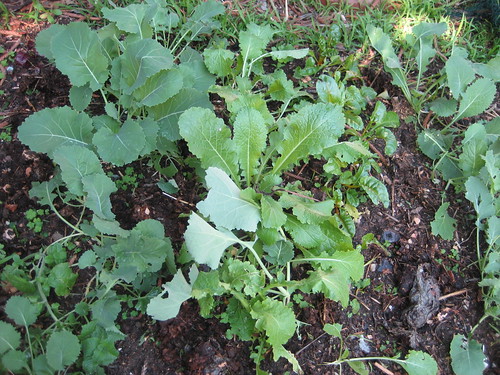
Well, things are moving along slowly in the winter garden this year. But I do seem to have one bed that could provide a decent harvest. This is the uppermost bed, which I planted first--but still late--in October. So far, the turnips and collards look the most promising. The chard is a little small, but it could rally. I always seem to do well with chard.

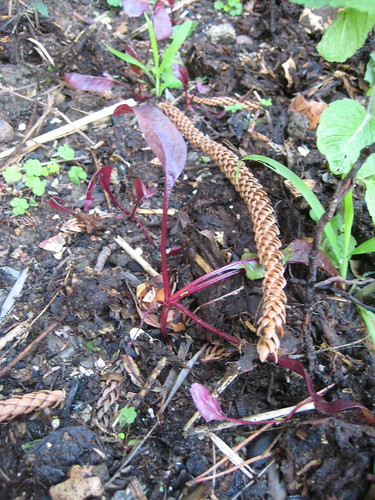
The beets, unfortunately, are taking their time. IMG_0059
These guys are barely out of the seedling stage, and it's almost January. I added some compost to try to encourage them. We'll see what happens. I remember having beet issues last year, as well, Perhaps they don't like my soil. Hmmmm...

The lower bed is looking pretty pitiful, although I might get some peas out of it when all is said and done. Next winter, I pledge to plant early and tend carefully. Hopefully I'll have the time to make that happen.
Read More 1 Comment | Posted by Audrey |
Newer Posts Older Posts Home

GREEN FRIEDA

  • About
      This blog is about a variety of things I'm interested in, including gardening, backyard chickens, crafts, DIY home improvement and resource efficiency. My hope is that it's both informative and fun to read. I hope you like it. If you want to email me, click here.
  • Labels

    • animals (8)
    • baby (7)
    • bathroom (4)
    • cactus (1)
    • canning (1)
    • charities (3)
    • chickens (79)
    • compost (1)
    • crafts (9)
    • energy (8)
    • environment (24)
    • food (61)
    • gardening (137)
    • gifts (7)
    • good girls (10)
    • holiday (6)
    • home improvement (27)
    • insects (2)
    • kids (4)
    • kitchen (16)
    • native plants (16)
    • orchard (6)
    • pests (14)
    • politics (6)
    • reuse (16)
    • tips (10)
    • tree (1)
    • waste (2)
    • water (9)
    • wedding (2)

    Blog Archive

    • ►  2014 (5)
      • ►  June (2)
      • ►  May (1)
      • ►  April (2)
    • ►  2013 (20)
      • ►  November (3)
      • ►  June (6)
      • ►  March (5)
      • ►  February (3)
      • ►  January (3)
    • ▼  2012 (13)
      • ▼  September (1)
        • Safer, Softer Play Dough
      • ►  August (2)
        • One Okra at a Time
        • Cactus Puberty
      • ►  July (2)
        • New Hall Closet
        • Small Potato (Harvest)
      • ►  May (1)
        • Summer Containers
      • ►  April (2)
        • In Bloom
        • Growing Bags of Potatoes
      • ►  February (1)
        • Olive Tree
      • ►  January (4)
        • Pie Garden
        • Easy Cheese
        • The Floor, The Floor
        • Winter Greens, Slow Beets
    • ►  2011 (33)
      • ►  December (3)
      • ►  November (5)
      • ►  September (1)
      • ►  August (3)
      • ►  June (7)
      • ►  May (2)
      • ►  April (4)
      • ►  March (1)
      • ►  February (4)
      • ►  January (3)
    • ►  2010 (34)
      • ►  November (3)
      • ►  October (2)
      • ►  September (4)
      • ►  August (5)
      • ►  July (3)
      • ►  June (3)
      • ►  May (1)
      • ►  April (6)
      • ►  March (5)
      • ►  January (2)
    • ►  2009 (94)
      • ►  December (6)
      • ►  November (8)
      • ►  October (6)
      • ►  September (6)
      • ►  August (9)
      • ►  July (13)
      • ►  June (12)
      • ►  May (12)
      • ►  April (3)
      • ►  March (8)
      • ►  February (6)
      • ►  January (5)
    • ►  2008 (54)
      • ►  December (4)
      • ►  November (3)
      • ►  October (3)
      • ►  September (3)
      • ►  August (7)
      • ►  July (6)
      • ►  June (9)
      • ►  May (2)
      • ►  April (2)
      • ►  March (4)
      • ►  February (7)
      • ►  January (4)
    • ►  2007 (16)
      • ►  December (3)
      • ►  November (1)
      • ►  October (3)
      • ►  August (3)
      • ►  May (2)
      • ►  April (2)
      • ►  February (1)
      • ►  January (1)
    • ►  2006 (28)
      • ►  November (1)
      • ►  October (3)
      • ►  August (3)
      • ►  July (1)
      • ►  June (4)
      • ►  May (5)
      • ►  April (1)
      • ►  March (5)
      • ►  February (2)
      • ►  January (3)
    • ►  2005 (10)
      • ►  December (1)
      • ►  November (1)
      • ►  October (2)
      • ►  September (1)
      • ►  July (1)
      • ►  June (4)

    Related Blogs

    • Homegrown Evolution
      Framed
      3 years ago
    • DigginFood
      How to gain popularity through buying Twitter followers
      8 years ago
    • The Tangled Nest
      The First Egg: Light, Life, and Gratitude
      9 years ago
    • Monkey Lobster
      Summer Slide Show
      10 years ago
    • Rambling LA
      LOSING YOUR LAWN
      11 years ago
    • Rancho Garbanzo
      3 1/2 years later - Our Wedding Photobook
      11 years ago
    • Urban Chickens
      Infographic time: the chicken coop checklist
      12 years ago
    • Ramshackle Solid
      Hoop and Pole
      12 years ago
    • Our Yellow House
      Still Knitting
      12 years ago
    Show 5 Show All
    Follow GreenFrieda on Twitter

    Links

    • Backyard Chickens
    • Tree People
    • Seed Savers Exchange
    • L.A. Works
    • to do something
    • Mohair Gravy

    Followers

  • Search


    • Home
    • Posts RSS
    • Comments RSS
    • Edit

    © Copyright Green Frieda. All rights reserved.
    Designed by FTL Wordpress Themes | Bloggerized by FalconHive.com
    brought to you by Smashing Magazine

    Back to Top