• Home
  • Posts RSS
  • Comments RSS
  • Edit
Blue Orange Green Pink Purple

featured post

Homemade Granola

Recently I tried making my own granola. It ended up being quite simple, and I recommend trying it yourself. Dakota and I both find most store-bought granolas way too sweet and full of "extra" flavors. So, my goal was to make granola that was simple, healthy and tasty.

Read More

Winter Planting for Spring Wildflowers

It drizzled a little yesterday, and that moisture, combined with a good couple of days of rain earlier this month, has really helped with my plan to cover the yard in wildflowers this Spring. I've tried planting wildflowers in the past, but I didn't get the seeds scattered early enough and they failed to grow. This year, I was determined to get the seeds spread during LA's (very brief) rainy season, so they'd actually have a chance to germinate in favorable growing conditions. So far, it seems to be working.

IMG_4840.JPG

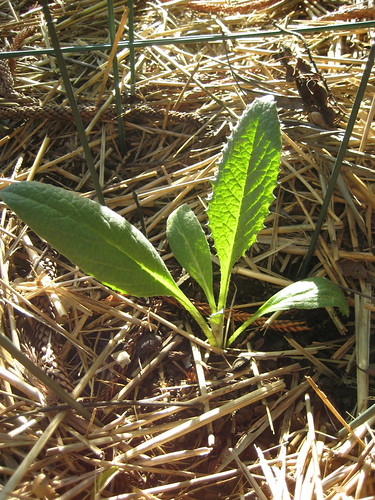
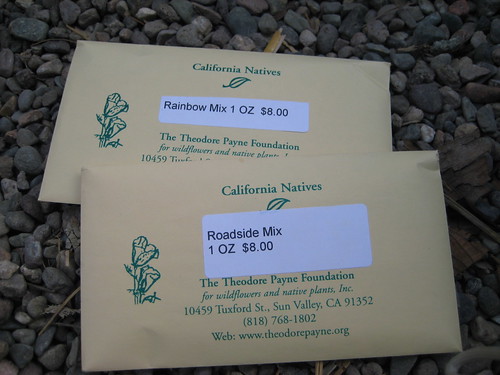
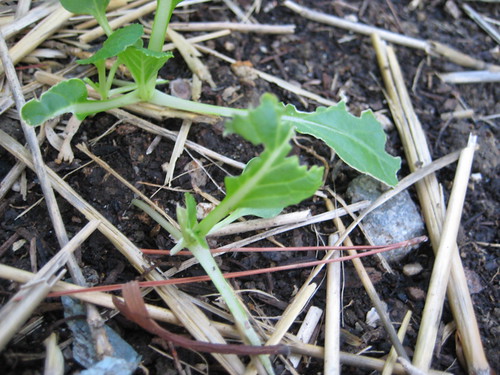
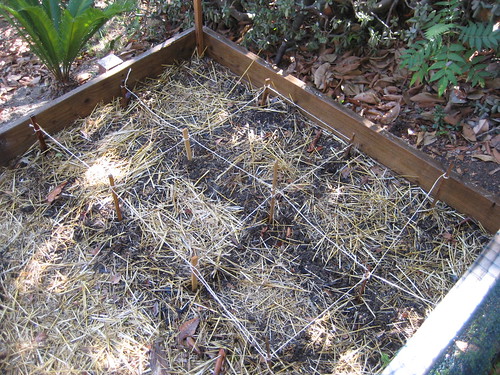
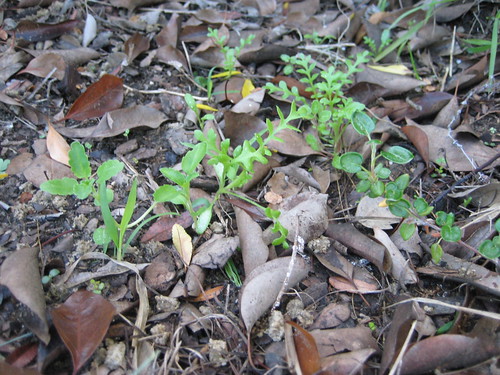
The little green plants poking up through the leaves in the photo above are California native wildflowers, although I can't tell you exactly which varieties. I purchased a whole bunch of seeds from the Theodore Payne Foundation website a couple of months ago. After browsing through their giant catalog of seeds--both annual and perennial--and using Google image search to figure out what the flowers would look like, I ended up ordering 14 different types. I know, I went kind of overboard. I tend to do that with seed catalogs. Luckily, seeds are fairly inexpensive.

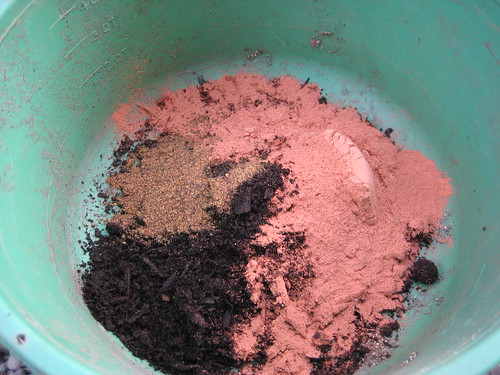
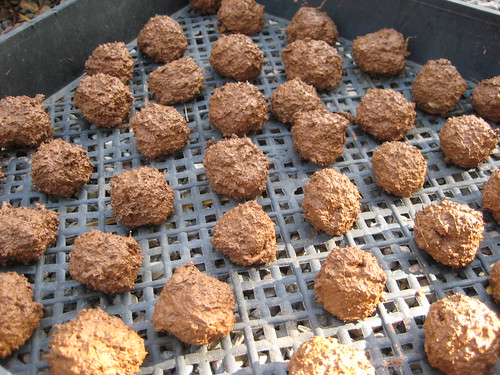
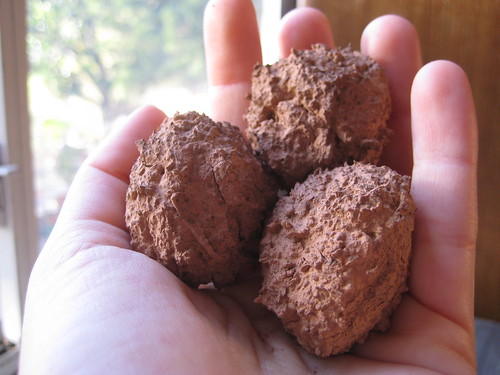
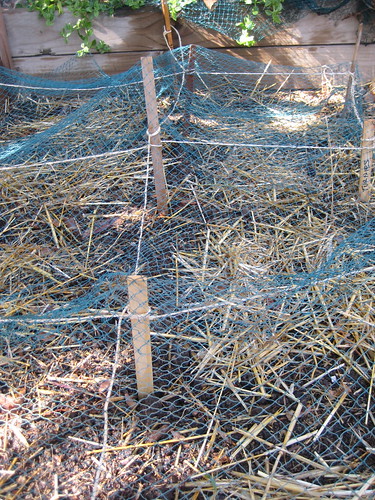
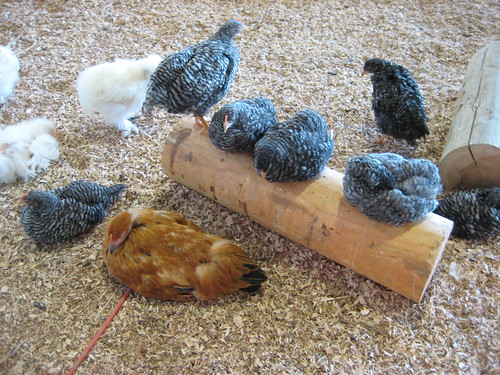
A few packets of Theodore Payne wildflower seeds went into my seed bombs, and the rest were scattered all over the front and back yards. The front yard wildflowers probably have a better shot, since they don't have to contend with curious chickens and their scratching claws. But, I think I spread my backyard planting locations around enough that I should get a pretty bunch of blooms all over both yards this Spring. I hope so, anyway.

The wildflowers will bring in native bees, butterflies, hummingbirds and other pollinators, which will help my fruit trees and garden plants. And, of course, they'll provide a fun Springtime burst of color. Once they've finished blooming, most of the wildflowers should reseed themselves, so I wont have to go on another seed spree next Fall.

If you're interested, it's not too late for you to plant your own wildflowers. The real rain should hit Southern California in January and February, so if you scatter some seeds soon, they will still get a good start. If you don't want to order online, most garden stores sell California Poppy and lupine seeds, both of which are natives that grow well in Los Angeles.
Read More 3 comments | Posted by Audrey |

Happy Holidays


I made this year's holiday card with my Print Gocco, a Japanese mini-screenprinting machine I got as a gift a couple of years ago. It's so fun and easy to use, and I would really like to make cards and other prints more often. They don't sell them in the U.S. anymore, but you can get one pretty easily on eBay, and Paper Source sells supplies through their website.

I hope you're all having a good time with family and friends this holiday season. Around here, we're getting some much-needed rest. It's been a busy year, and there are even more home-improvement projects, garden plans and other exciting developments coming in the New Year.
Read More 0 comments | Posted by Audrey |

Hopes for Artichokes

artichoke plant

Just before the rains earlier this month, I planted two artichoke seedlings. I grew them from seed purchased from Botanical Interests, and they were looking hearty enough to go into the garden bed. Plus, I figured the rains would help them get established.

Taking a tip from Eric at Ramshackle Solid, I dug a deeper hole than I usually would and then filled it up with compost. Eric mentioned that artichokes can have a 4 foot long tap root, so they need as much room to grow down as they do to grow up. I don't think I dug nearly deep enough, but hopefully the artichokes will dig the rest of the way on their own.

I also put up a ridiculous barricade around the artichoke seedlings to protect them from the evil claws of our local skunks and the curious beaks of certain chickens. So far, the barricades--made from tomato cages--have held and the seedlings are growing.

I will be so happy if we get to harvest fresh artichokes this Spring. I remember the smell of artichoke fields along the Northern California coast when I was in college, and it was amazing. Perhaps we'll have a bit of that scent in our yard next year.
Read More 2 comments | Posted by Audrey |

Seed Bombs

Over Thanksgiving weekend, I finally got around to a project I've wanted to try for years: making seed bombs. I think I first heard about seed bombs in reference to the Guerrilla Gardening movement. The basic idea behind a seed bomb is that it allows you to easily spread native seeds--usually wildflowers--into places where you wouldn't normally have access, like vacant lots or the land beside highway offramps.

I walk or drive past countless vacant lots, empty hillsides and partially-completed construction projects (ugh) every day, and ever since I heard about seed bombs I've been itching to decorate these areas with a splash of Spring color. This year, I finally remembered to make them at the right time (late Fall) so that I can throw them throughout Southern California's all-too-brief rainy season.

The first step was to get the supplies together. The seed bomb recipe calls for compost, dry red clay powder and seeds. The compost was easy, but the clay was harder to track down. After calling around a bit, I found that the only place to get it locally seems to be Echo Ceramics in West Los Angeles. I was loathe to drive all the way over there, but, happily, Dakota had a job in that part of town so was able to drop by and pick up some clay powder for me.

ready to make seed bombs

Since I wanted to make sure I was spreading native California wildflowers, I purchased my seeds from the Theodore Payne Foundation. You can visit their facility in Sun Valley or just order online. For this project, I ordered some of their wildflower mixes. If you don't want to go to Theodore Payne, you could also go to the garden center and buy some California Poppy and lupine seeds, which both tend to be pretty ubiquitous.

native wildflower seeds for seed bombs

Now, here's where I went a little off the standard instructions. Many recipes I found online recommended a ratio of 5-3-1 or 5-5-1 of clay-compost-seed. But then, I found a couple of posts on a website called Broken City Lab where they tested various seed bomb mixes to see which bombs had the most successful germination rate. They found that less clay was better (although they weren't using red clay), and recommend the following recipe: 1 part seeds, 1 part clay, 1 part coffee grounds, 8 parts soil and 1 part water.

After this research, I decided to go light on the clay at first and see how well the mixture bound together. I also added some granulated organic fertilizer to give the seeds a little boost. Here's my mixing bowl with the compost, red clay and canola meal fertilizer.

seed bomb ingredients (minus seeds)

I slowly added water until I got a thick, sticky mixture. By the way, I recommend wearing gloves when you do this. It's messy work.

wet seed bomb mixture

Once I got the clay, compost and seed mixture to a good consistency, I started rolling it into balls. I made mine about the size of a golf ball, for easy throwing. Each wet seed bomb was placed on an old nursery tray. I think I got about 40 seed bombs out of my first batch.

tray of seed bombs

Then, the tray of wet seed bombs went into the basement (a cool, dry place) to dry for three days.

Here are the completed seed bombs.

finished seed bombs

They seem to have dried nicely and stayed together well, with no major cracks. So, I think I using less clay worked out. I didn't measure precisely, but I'd say it was about a 3 to 1 ratio of compost to clay.

Now comes the fun part: throwing the seed bombs. It's actually raining today, so maybe I'll chuck some on my way to and from work. Then, I'll have to keep tabs on those spots this Spring, to find out if I managed to grow some pretty native flowers in some otherwise boring vacant lots.
Read More 3 comments | Posted by Audrey |

Christmas Crafting

Last weekend, I started working on various Christmas gift projects. As usual, I'm starting too late, but hopefully I'll still manage to crank out some good stuff before it's too late. My goal is to not purchase anything and give only handmade gifts. We'll see how that goes.

One thing that may help me this year is that I learned how to sew. Previously, I was pretty much relying on knitting (and a little wood burning) for all my homemade gifts. While I'm not exactly a fast (or particularly competent) sewer, I can usually finish a project in a few hours, versus several days--or weeks--for a knitted item.

NOTE: If you are related to me and would like to be surprised by your Christmas gift, I urge you to not click on any of the links in this post. I will be vague in the text, but I am including links in case other people are looking for good handmade gift ideas. Anyway, you've been warned.

Last weekend, I sewed a couple of these. I highly recommend this project for beginner sewers looking for something cute and practical to make for their loved ones. I managed to make two in an afternoon, and I think they turned out pretty nicely. Who doesn't like a cozy plaid flannel, after all?

sewing a gift

I also made some good progress on these. So far, I've found the pattern pretty easy for an intermediate knitter like me. And they're knitting up fairly quickly, so I think I'll actually be able to finish them soon if I can get up the energy to knit on weeknights. That would be good, because I've got a few other projects I'd like to knit for various family members.

knitting a gift

That's what I've got going on so far. I'm also hoping to make something like this for a few friends. And I've got some nice fabric that would make excellent dishcloths, so if I can just manage to sew in a straight line, I think I could make some snazzy dishcloth sets for a few other people.

In addition to the knitting and sewing, I also hope to can something to give away this holiday season. I checked out a few recipes, and hopefully I can find some time in the next few weekends to fire up the water bath. Now that I've learned how to pickle things, I feel like I should use my skills to make some tasty, tangy gifts. Nothing says Christmas like homemade pickles, right?

It's actually possible that my all-homemade holiday goal will happen. I'll let you know if I make it, although I might end up caving and buying some things at a craft fair. That's almost as good as making it myself, I think.
Read More 1 Comment | Posted by Audrey |

In Bloom

nasturtium in bloom

The paperwhite narcissus I blogged about the other day have bloomed. Well, the ones in the bathroom have. The rest will burst open any day now. Narcissus are such a easy, satisfying flower. They're pretty, grow quickly and they smell great. Go get your blubs now. You won't regret it.
Read More 1 Comment | Posted by Audrey |

Winter Garden Progress

So far, things are going pretty well with my winter vegetable garden. I have seedlings popping up everywhere, including some nice-looking beets in the big raised bed, plus some chard, turnips, collards and lots and lots of radishes.

beet seedlings

Another happy crop is the fava beans, which are growing like crazy. I keep waiting for them to begin flowering, though. Thus far, they're all stalk and no bloom. It's possible I planted the favas a bit too densely, but they seem hearty at the moment, so I'm not going to worry about it. Fava beans don't really seem to climb naturally, but I'm having good luck weaving them around the supports of my bean poles, and I tied up some stray stalks this weekend to keep them from wandering into neighboring plots.

fava beans

I'm also having excellent luck with the oak leaf lettuce. Any day now, I'll enjoy a salad of these pretty green leaves. I'm considering waiting until there are one or two radishes ready to harvest, though, so I can have a little garden salad. The radishes are growing quickly, so it shouldn't be too long.

oak leaf lettuce

My garden netting has kept most digging predators away, so my main issue this winter is bugs. Something is really going after my bok choy. I've got it planted in two different squares in the big raised bed, and in both locations the leaves are under attack. I haven't seen any slugs or snails around, so I'm not sure what creature is doing this. Could ants be the culprits?

something is eating the bok choy

There are certainly plenty of ants wandering all over the garden. I'm worried that'll mean big aphid trouble very soon. I have sprinkled some diatomaceous earth around the beds, but the ants don't seem particularly concerned by it. Is boric acid a better bet? I've never used it. I don't mind ants, but I absolutely hate the aphids ants bring. They are so ridiculously hard to get rid of once they take hold.

Oddly enough, the mystery bug appears to be sticking mostly to bok choy, with only the occasional dalliance with the chard or fennel. The bok choy seems hearty, though, so maybe it'll make it past the seedling stage without being completely destroyed. I have it planted in my upper bed as well, so it might have more luck there.

The only other concern has been the too-warm weather. I don't want my greens to bolt before they're even big enough to eat. Temperatures have cooled down a little, and I really hope that once December gets here we'll have mostly cool days for the rest of the winter. Those high-70s days might be nice for working outside, but they're no good for growing winter greens.
Read More 2 comments | Posted by Audrey |

Vintage Sink Bargain

Now that we're almost done with the kitchen remodel (a year later), Dakota and I have started planning the next step in our DIY effort to make our home nicer, and, more importantly, more space-efficient. Phase 2 involves remodeling the bathroom.

Our bathroom is in decent shape at the moment, if you ignore the cracked tile floor, mildewed grout, lack of knobs for the bathtub and damp, unventilated shower. We do ignore these things, but we don't particularly like them. Plus, it seems crazy to have a separate bathtub and shower stall in a 945 ft2 house.

The current plan is to take out the shower and turn it into a closet that will open onto the hall. This will provide a much-needed place to store the vacuum, mop, ironing board and other bulky items that are currently propped in various corners. We're also going to replace the floor, make new cabinets, install a new countertop and convert the tub to a tub/shower combo. AND, we're getting a new sink. Well, new to us.

In fact, we already got the sink. Our design plan is to go with the vintage/modern look that worked so well in the kitchen. So, we have been on the lookout for a nice vintage sink to go with the tub we've already got. For the last few months, we've been poking around architectural salvage stores, including Pasadena Architectural Salvage and even Hippo Hardware in Portland. Both places had nice old sinks, priced between $125 and $175. That's an okay price, but not great.

A couple of weeks ago, we decided to stop by the Habitat for Humanity Re-Store in Pasadena, just to see what they had available. When we pulled up, I was delighted to find a huge selection of vintage sinks stacked in the parking lot. They had about 20 or 30 different models of various ages and conditions. After poking around for a while, we picked our favorite: a white, porcelain sink that kind of matches our tub. The price tag for this lovely vintage sink? $15!

vintage sink, $15!

Not only do we get the environmental benefit of buying a salvaged product instead of new, but the sink was a crazy bargain. And, the money we did pay goes to Habitat for Humanity, a great organization. It's a win-win-win. I am thrilled.

Hopefully, our luck will hold out, and we'll find some other bargains for the rest of the bathroom project. Right now, we're thinking of using cork for the floor and Dakota's going to make concrete countertops. We're still contemplating the material for the tub/shower walls, although we might go with Corian, because Dakota is becoming a certified fabricator. Plus, no tile means no scrubbing grout.

The bathroom remodel won't begin until the kitchen is completely done, which will probably be another month or so. But, hopefully, it'll go relatively quickly. It's a smaller room and the plan is less ambitious than a floor to ceiling kitchen remodel. I'll let you know when the work begins.
Read More 1 Comment | Posted by Audrey |

Delicious Vegetarian Enchiladas

I have never cooked enchiladas before, but the other night, inspired by this recipe on Homesick Texan, I decided to try it. As a native of San Antonio, I have always been a fan of Mexican food, but I rarely cook it at home. (Well, we eat a lot of quesadillas, but that doesn't count.) Something about Homesick Texan's recipe reminded me of one of my favorite dishes, Enchiladas Suizas, and I wanted to see if I could recreate the tangy/creamy flavor in my own kitchen.

Also, I have been looking for a good way to use Trader Joe's Chicken-less Strips, and this recipe seemed perfect. It has plenty of sauce and spice to mask any possible weird fake meat flavor.

As my first step I pan-fried the Chicken-less Strips in a little bit of vegetable oil, just to brown them and warm them up a bit. When it's in the pan, you can barely tell it's not real chicken.

After that, I followed Homesick Texan's recipe relatively closely, although I halved it because I don't think we could eat 12 enchiladas in one sitting, even with Dakota's large appetite. Instead of canned tomatillos, I used canned salsa verde, because that's what was in the pantry. And I used vegetable broth instead of chicken broth, to keep the whole dish vegetarian.

Below you can see the enchiladas just before they went in the oven. I used Homesick Texan's tip about briefly heating the tortillas in a lightly oiled frying pan, and it really helped. Store-bought corn tortillas can be really brittle, but the few minutes in the pan made them easy to roll up.

And here are the enchiladas ready to eat. I found them exceptionally tasty. The combination of sour cream, salsa verde and jack cheese was just right; the flavor took me back to some of my favorite Tex Mex meals. And, honestly, I thought the Chicken-less Strips did their job nicely. They provided some extra protein in the meal and kept the enchiladas from being too mushy and cheesy.(Dakota felt the texture was a bit off, but he still gobbled up his enchiladas, so it must not have bothered him too much.)

Overall, I found enchiladas to be a pretty easy dish to cook. They might be better for a weekend dinner because of the time it takes to prepare the sauce, but I can imagine making them on a weeknight, especially if you make the sauce in advance (and get home from work before 7:30). I'm not sure why I was so intimidated by enchiladas in the past, but I definitely plan on making this recipe again soon--perhaps for some vegetarian friends when we finally start having people over for dinner again.

Read More 1 Comment | Posted by Audrey |

Terror in the Coop

Last week, I discovered the one thing that terrifies my chickens more than any other. The one thing that sends them frantically flapping and squawking in fear. The thing that, more than any other, causes my chickens to take refuge in their coop and refuse to come out. And that thing is...


A dried sunflower head.

You heard me. Now, let me just point out that Peggy and Tina are not fraidy-hens. In fact, there are several things that they should rightfully be afraid of that don't phase them at all. This list includes Nigel, our dog, who, while small, could certainly take a bite out of their legs or neck if he felt like it, and Scampers, the cat who lives in our backyard, whose pretty feisty and good with her claws. The chickens are so unconcerned with Nigel and Scampers that they will walk right between them, causing a convergence of pets that I am not entirely comfortable with. (Happily, everyone practices the survival technique of completely ignoring all the other animals and focusing on me, the provider of food.) So, despite their lack of fear response to actual (unlikely, but possible) predators, when it comes to a dried sunflower head, my chickens exercise extreme caution.

I discovered this fact last week, after my friend Chris very kindly provided me with a big bag of dried sunflower heads from his own garden. I had mentioned to him once that my chickens liked sunflower seeds, so he saved these seed-filled heads especially for them. On Tuesday morning, I strolled down to the coop with what I thought was a wonderful treat for the girls. I figured I'd hang the sunflower on the run fencing, and then the girls could have fun pecking out and eating the seeds over the next few days. That is not what happened.

When I entered the chicken run with the sunflower, Peggy immediately flipped out. She started squawking and flapping and jumping back and forth across the coop. Tina joined in, but with less gusto, as if she wasn't entirely sure what was happening, but trusted Peggy that it was serious. Eventually, both hens scrambled their way into the coop to hide. I was a bit confused about what the problem was, and, honestly, I was late for work. So, I figured I'd just put the sunflower head up as planned and the chickens would eventually calm down and come outside to have their treat. I had also scattered some carrot peels, which they love, in the run, so I figured they would venture out for those for sure.

The following morning, when I went down to let the chickens out for their morning free range, it was clear Peggy and Tina had not left the coop since I last saw them. The carrot peels were untouched, their feeder still had food in it and there they were, huddled together inside the coop. Now, my chickens are extremely food motivated and there is no food inside the coop (just water). They spent a whole day inside, not eating their feed, which they love, or the carrot peels, which they really love, because they didn't want to risk walking past the dreaded sunflower head. That is how afraid they are of this inanimate object.

After shaking my head at the ridiculousness of chicken behavior once again, I removed the sunflower head from the run and lifted the chickens out of the coop and into the yard. They wouldn't go out on their own, just in case the sunflower head was just hiding somewhere out of sight, ready to pounce. Once they realized the sunflower was really gone, they managed to relax a little and are now back to their normal selves.

Happily, the chickens still love sunflower seeds, and Chris' gift won't go to waste. While they weren't looking, I shook a bunch of seeds out of the head and spread them all over the run. Peggy and Tina gobbled them right up, unaware that those tasty treats had come from the very object that had so terrified them the day before. Duh duh dummmmm!
Read More 43 comments | Posted by Audrey |

Bulb Forcing Fun

Now that the holidays are almost here, I'm getting in the mood to make the house a bit more decorative and festive. Since I'm cheap and don't like spending money on cut flowers or store-bought decorations, I find other ways to spruce things up. One of those things is forcing bulbs indoors.

This year, I've got several pots of paperwhite narcissus scattered around the house. I'm also trying some freesia bulbs for the first time, for some added color. Both paperwhite narcissus and freesia have pretty, fragrant flowers and smallish bulbs that can be packed into a houseplant pot, or any other appropriate container that might be lying around. I picked up the bulbs for both plants at my local Orchard Supply Hardware, but they're basically everywhere this time of year.

To start, I planted the bulbs in a mixture of potting soil and vermiculite. Vermiculite is a granular mineral used in gardening that helps keep soil loose and moist. It's good for planting bulbs because their roots need good drainage and consistent moisture. I also put a layer of gravel in the bottoms of my pots to keep the soil well drained so the bulbs don't rot. There are lots of sites that provide bulb forcing instructions online if you need them, including this one. But, honestly, it's really easy and hard to screw up.

For the first two weeks, I kept my planted bulbs in the basement, where it's cold and dark. This helps them establish good roots before they start sprouting up. During that time, I kept the soil mixture moist with frequent watering.

Once the roots were established, I took my pots upstairs and spread them around the house near sunny windows. They're looking good so far, and I can see some flower stems coming up on a couple of them. When they bloom, the narcissus and freesia will release a light, fresh scent that'll make the house smell great. Plus, they'll be pretty. If I can find some more planting containers, I may plant another group this weekend so that I can have flowering bulbs in the house for the whole holiday season.

After my narcissus and freesia have finished blooming, I'll cut them back and plant them in the yard. They may not come up out there unless we have a good rainy season this year, but I think it's worth the attempt. I planted some last year, and actually noticed a few green shoots coming up the other day. Technically, outdoor bulbs are supposed to bloom in the Spring, but in Southern California none of those rules seem to apply.
Read More 0 comments | Posted by Audrey |

Peppers Prefer Fall


Despite the fact that peppers are usually considered a summer crop, I've noticed that, in my garden, the peppers are much happier in the Fall. I got some decent harvests from a few of my plants this summer. But, now that the days are shorter and the nights cooler, most of my pepper plants are blooming like crazy and covered in baby fruit.


It's nice to have something to harvest from the garden this time of year, since the winter crops are still young and several weeks--or months--from harvest. The plant above is an heirloom variety called Lemon Drop. The seeds are actually from 2008, but I decided to try them again this year since I got zero peppers of this variety last year. Happily, my one Lemon Drop plant has grown exceptionally hearty over the last month and is now producing like crazy. I can't wait to taste the fruit when they're ripe.

I've also got several Wenk's Yellow Hot and Maule's Red Hot plants thriving in various pots. If the Fall and Winter continue to be mild, I should be able to get at least one big harvest out of all my pepper plants before Christmas.
Read More 0 comments | Posted by Audrey |

Homemade Granola


Recently I tried making my own granola. It ended up being quite simple, and I recommend trying it yourself. Dakota and I both find most store-bought granolas way too sweet and full of "extra" flavors. So, my goal was to make granola that was simple, healthy and tasty.

My batch was made using this recipe from Curious Bird blog, with some minor changes. I also doubled the recipe, because we tend to go through cereal pretty quickly. I am storing some of the granola in a mason jar in the freezer where it will keep longer, and the rest has been steadily disappearing from the pantry.

Basically, you just stir together a bunch of oats, nuts and coconut flakes, add a little sugar, spices and oil and bake the whole thing in the oven until its toasty. Then you add raisins or other dried fruit and you're done. Simple as that.

I may experiment a bit more on my next batch, but probably not too much. The point is to have a simple, hearty breakfast cereal for less than it would cost in stores. So, getting too fancy would be beside the point.
Read More 3 comments | Posted by Audrey |

Farm Fresh Delivery

We started using an organic produce delivery service last month, and so far I really like it. The company is called Farm Fresh to You, and I originally learned about them at the Los Angeles County Fair.

I've been interested in joining a CSA or produce delivery service for a while, but I hesitated because many of them require you to sign up for a whole season. What's nice about Farm Fresh to You is that you can join or cancel whenever you want. You can also easily change your delivery frequency, box size and produce type on their website. And you can let them know if there are certain fruits or vegetables you're not interested in getting, so you don't get a delivery of something you won't eat. The user-friendliness is really great, and the produce is fresh and flavorful.


The photo above shows our second delivery. That's the "regular mixed" box, which we're currently getting every-other week. It had a good mix of seasonal fruit, including oranges, apples and grapes, and Fall vegetables and greens. I like how this kind of service helps me plan meals around seasonal produce. It gives me a starting point, and then I search for recipes that use what I've got and sound tasty. I've never cooked with pumpkin before, and I'm not sure I would have if one hadn't shown up in our box.

Another thing I like about Farm Fresh to You is that they tell you exactly where each item in your box is grown. Most of the produce comes from California, with a couple of items from further up the West Coast (apples, pears). The company's first farm was in the Capay Valley, near San Francisco, but they now have farms closer it Los Angeles in Riverside County and near San Diego. That means the produce is all relatively local--perhaps not as close as farmers market veggies, but much closer than most supermarket produce.

The combination of convenience and variety is really working for us so far. I'm looking forward to receiving our next box this Wednesday.
Read More 4 comments | Posted by Audrey |

House Plant Sitter

After spending most of the year at home, we finally took a vacation earlier this month. Dakota, Nigel and I loaded up the car and drove up to Portland to see family and friends. We were gone for over a week.

Since Nigel came along, we only needed someone to come over every other day to check on the chickens and grab the mail. A chicken-sitter was surprisingly easy to find. I guess the fresh eggs are totally worth it.

To keep my indoor plants alive without creating additional work for the chicken-sitter, I decided to try something I saw on the Craft Magazine blog a while ago. It's a simple house plant wicking system involving a bowl of water and some strips of cotton. (Full instructions at the link.) The whole thing took about 10 minutes to set up.

Here are my plants the day we left on our trip.

And here they are 9 days later, when we arrived home.

The houseplants look just as green and healthy, if not more so, than they did when we left. The strips of cotton--in this case cut from an old undershirt--wicked the water out of the bowl and kept the plants' soil evenly moist.

The large bowl seems to have just lasted the 9 days in a relatively cool house. I am guessing that in the summer the water might go a little more quickly. Still, I recommend this method for the next time you go on vacation. It's much nicer than coming home to dead or dried-out plants.
Read More 0 comments | Posted by Audrey |

Sewing Stash Score

When I was visiting my family in Texas a couple of weeks ago, I had the opportunity to sort through trunks and bins filled with fabric and sewing notions that belonged to my grandmother. She died in 2000, but her stash was so massive--and awesome--that we're still finding new treasures 9 years later.

My grandmother was a wonderful seamstress and needleworker. I have a wall hanging of embroidered sandpipers she made sitting over the fireplace in our living room and a personalized quilt with squares hand-embroidered by my grandmother and her mother tucked safely in my linen closet. Not only was she skilled, but my grandmother had good taste, in a 1960s & 70s way. Jonthan Adler would salivate over her needlepoint pillows. I just wish I had learned more from her when I had the chance. Instead, I am frequently inspired by her craftmanship. I still have baby bags she made for me 32 years ago, with not a single loose stitch!

Always the bargain-hunter, my grandmother collected a massive stash of fabric, embroidered linens, thread and sewing notions over her lifetime. My mother, my sister and I have been giving it away, selling it and using it ourselves for the last 9 years, and we've still got so much left. This time, I brought home rolls and rolls of decorative ribbons, elastic and seam binding. Plus, my sister helped me find some pre-embroidered panels, some made by my grandmother and some she purchased at antique and vintage stores, ready to be made into pillows or bags. My sister also threw in some vintage fabric she found at various thrift stores.

I arrived back in LA with a bag stuffed full of cool fabrics and inspiring supplies. Now I just have to figure out how to use it all.
Read More 2 comments | Posted by Audrey |

Fall Planting

Last Sunday, after spending the previous day canning, I decided to keep with the homesteading theme of the weekend and plant some seeds for my winter garden.

For the first time, I staked out sections in the larger raised bed and planted my crops in little chunks. I guess this is sort of square foot gardening, although I have never read that book. I mainly did it to stay better organized and to see how different crops like different spots in the garden. I also hope it will help manage bugs, but I'll let you know how that goes.

1st winter garden planting

In this section, I planted fennel, lettuce, radishes, turnips, beets, chard, bok choy and fava beans. I have seeds for spinach, artichokes and collards as well, but I wanted to plant in stages. Plus, spinach, chard and collards work well in pots, so I may end up growing most of my greens in my container garden.

After planting, I mulched with a light dusting of straw and then covered the whole section with garden netting. Netting is essential, as I have lost countless seedlings to curious squirrels and skunks. Last Fall, skunks tilled my upper bed so many times that only two beets made it to maturity. So far, the netting seems to be holding them off.

IMG_4506.JPG

I'll plant another section in a week or two. If all goes well, I'll be able to continuously harvest throughout the winter. That's a big "if," but I choose to be optimistic.
Read More 0 comments | Posted by Audrey |

First Time Pickling: Peaches, Peppers & Beets

Last weekend, I finally got a chance to do something I've wanted to try for ages: home canning. Canning seems like the perfect marriage of all my favorite hobbies: gardening, cooking and making gifts for people. Dakota got me a bunch of canning supplies for my 31st birthday, and, a year later, I finally got a chance to try them out.

The first step was shopping for supplies, which was more difficult that I expected. I picked up some cases of Ball canning jars at Orchard Supply Hardware. They had several sizes in stock, although not the pint jars called for in most of my recipies. I just decided to make do with the three sizes available. OSH also sells cheese cloth, which you'll need to make a spice bag. The spices I needed were more difficult to track down. I went to three different stores, including Whole Foods, looking for pre-mixed pickling spice--or the all the spices that go into pickling spice mix--and finally found it at a Jon's market in Glendale. (LA Cooking Tip: If you're looking for an unusual ingredient, try a grocery store that in or near an Armenian neighborhood. This Jon's had three different spice sections: typical American, Middle Eastern and Latino. And the Super King in Glassell Park has all kinds of interesting fruit syrups to use as marinades.) For the fruits and veggies, I woke up early and hit the Pasadena Farmer's Market. That place is great, although they didn't have any "dill heads," so I had to go with baby dill.

canning supplies

Once all the supplies were assembled, my friend Merete and I began the pickling process. This is when I learned that prep work is the most time consuming and labor intensive part of canning. We chose three things to pickle: beets, peaches and peppers. All the recipies--and canning guidelines--came from my Ball Complete Book of Home Preserving. The beets needed to be pre-cooked and skins removed, the peppers needed to be chopped, and the peaches needed to be peeled, sliced and soaked in a solution of water and lemon juice to preserve their color.

Merete peels & slices

Luckily, I had a friend to help me. Canning is definitely more fun--and less exhausting--with two people. I don't think I would have been able to pickle beets, peppers and peaches in the same day without Merete's help.

bowl of peppers

By the way, I recommend keeping that lemon water you soak your fruit in. It lives a second life as a refreshing and delicious beverage. This was Merete's idea. Not only is she an excellent kitchen companion, but she comes up with brilliant new beverage concepts like peach water.

sliced peaches and peach water

Once the prep work was complete, we started canning. First up were the pickled beats, and we learned a valuable lesson after we ran out of pickling juice half-way through filling the jars. We followed the recipie to the letter, so at first we were confused. Then we realized that we hadn't cut our beets small enough. If we'd sliced them smaller, they would have taken up more space in the jar and needed less pickling juice. Oh well, we still got four jars out of it. And for our very first canning project, I think that was a fairly minor error.

jar of beets

Next came the Dilly Peach Pickles. I cannot wait to try these when they're ready. Some people may turn up their noses at pickled fruit, but I think it sounds amazing. Plus, the peaches and dill look so pretty in their big jars. Merete and I sliced the peaches into sixths to avoid the pickling juice issue we had with the beets.

peaches in jars

I'm skipping over the details of actual canning, because I think that's best explained by an expert, or the authors of Ball Home Preserving. I found the directions in that book very clear and helpful, and the recipies were interesting without being overly complicated.

I can comment on the tools I think are most necessary, though. They include: a jar grabber, a lid lifter (a plastic stick with a magnet on the end so you don't touch the sterilized lid), a funnel, a good ladel, a slotted metal spoon, a metal rack to set your jars on while they boil and a giant canning pot. These all appear to be essential to the canning process, in my admittedly limited experience.

After following all the canning and boiling water processing directions, we ended up with seven jars of pickled peppers, three jars of pickled peaches and four jars of pickled beats. It took us all day to can everything, but this was our first time. Happily, after the required 24-hour cooling off period, I checked the the lids and each and every one seems to have sealed properly. I really like the way they look in my new pantry.

jars stored in pantry

Overall, I found home canning to be interesting, fun and satisfying. It's kind of like doing a science project that you can eat. Having a friend with me definitely made it more enjoyable. Hopefully I can have more friends over for canning parties in the future. For my birthday this year, I received The Joy of Pickling!


Read More 1 Comment | Posted by Audrey |

Weird White Bug Things

weird white bug thingies

These odd white insect pods are attached to the vine that grows on my chicken run. I noticed them a couple of weeks ago, but haven't had any luck identifying them with Internet searches. Yesterday, I decided to take a picture with the hope that someone reading this blog might know what they are.

The long, bumpy blobs are quite small, maybe 5mm, and they're brittle to touch. Most of them are clustered around one stem, but there is one sitting alone on a leaf. The pods do not seem to have harmed the plant in any way--at least not yet. The plant they are attached to is a vanilla trumpet vine.

what are these?

So, any insect experts out there who can identify these weird little white things? I am so curious to know what insect emerges from this particular incubation chamber, if that is indeed what these are.
Read More 3 comments | Posted by Audrey |

Potato Failure, Worm Surprise

Back in June, I tried growing potatoes in specially-made grow bags. Unfortunately, after a promising start, the stalks started flopping over. Eventually, all my potato plants died. I'm not sure exactly what went wrong.

I suspect I may have over-watered. It was very difficult to tell how wet the soil was deep inside the bags. On closer examination, I think they hold water really well and don't need to be watered that often. I also think I should have planted the seed potatoes sooner. Next time, I will buy seed potatoes from a Southern California source. I have a feeling they'll be available earlier around here than they are from Seed Savers in Iowa. (Does anyone know where I can buy seed potatoes in Los Angeles, preferably somewhere east of Vermont?)

So, this year was a complete potato-growing failure. On the bright side, when I dug into two of the bags I found this:


The bag was chock full of healthy, wiggly worms--and their highly-prized poop! While failing to grow a single potato, I managed to create a surprise worm farm. There were a few in the compost I added to the potato bags in June, and in the warm, wet, composty environment of the bag, those worms multiplied.

I took this rich mix of soil, worms and their poop and spread it on one of my garden beds. Hopefully the worms will be happy there, and continue to poop and procreate for years to come.
Read More 1 Comment | Posted by Audrey |

LA County Fair: Chickens, Churros and Cool Stuff

Last Sunday, I had the pleasure of checking out the Los Angeles County Fair with some friends. (The nice people at the fair actually offered me some complimentary tickets because I am such an big-time blogger. Since I was planning on going already, I happily accepted.) I had never been to the Los Angeles County Fair before, but I had some pretty high expectations--particularly regarding their chicken attractions. It did not disappoint.

When we arrived at the fair, we went straight to the farm exhibits (somewhat weirdly sponsored by McDonald's) and almost immediately encountered some chickens. They had several open pens with a variety of chicken breeds on display. Pictured below is a nice-sized enclosure of young chickens, including some Barred Rocks resting on a log. I love those stripes. I definitely plan to get a Barred Rock when it's time for new chicks. They were in with a few fluffy silkies and some fancy Polish.

pullets on a log

In the barn across the way, I noticed this handsome hen peeking through the bars. I really like the mottled black and gold of her feathers. Silkies sure are cute. I hear they're not the greatest layers, though, and tend to go broody. So I don't think I want one for my small flock.

hello Silkie

Near the silkie were these big girls. Does anyone know what breed they might be? The chicken breeds weren't posted on their pens, unfortunately. My guess is Buff Orphington. I don't think I've ever seen an Orphington in real life, and I had no idea they were such big girls. They're definitely on the list of breeds I'd like to own, but I feel like we might have to make the coop door bigger if we ever got one.

big hens

Despite the somewhat disappointing lack of breed signage, there were some informative plaques about chickens scattered around. This one was very pro-backyard chicken, which I appreciated.

informative chicken sign

After all the chicken admiring was complete, we turned our attention to the wide variety of goats and sheep at the fair. This caused Dakota and I to briefly indulge our goat-ownership fantasy. How cool would it be to drink milk fresh from our own backyard? (Answer: very cool.) But, even excluding the legal and neighbor obstacles, I don't think we can squeeze a goat on our property. I doubt we have enough space for the goat, much less a nice-sized enclosure and room for all its feed. That said... Look at the cute angora goats! They're so fluffy, and I could knit with their wool.

angora goats

And while I'm going on about the cuteness of barnyard animals, check out this little pig. I could not get enough of him as he marched around his pen and indulged in several vigorous scratching sessions. I have a friend at work who owned a pig, and I think he found it to be a wonderful pet. Hmmm...


Another great thing about pigs: they race! Our group was very excited about the pig races, and after rushing across the fairgrounds for the 1:30 show, we got our chance to see some. There's kind of a cuteness theme happening in this post, and I apologize for going on, but, seriously, pig races are so cute. If you go to the fair, definitely check them out. I had no idea pigs could run so fast. I think the milk and cookies they got at the finish line were highly motivating.

pigs racing

Just so you don't think we spent all our time in the farm animal section of the fair (although I certainly could have), we did roam the grounds and take in the sites. Predictably, there are lots of carnival rides, silly photo booths and places to buy knick-knacks. Some of the better attractions included a sky ride over the fair, several giant, inflatable slides and an event called "Splash Dogs," where you could watch extremely excited dogs try to jump as far as they could into an above-ground swimming pool. Highly recommend for any dog lovers.

And, of course, there was weird fair food. This years hot item appears to be chocolate-covered bacon. I was more intrigued by the sign below. What, exactly, is "Meat Lover's Ice Cream"? There was no additional information posted, and no one was willing to order some.

meat lover's ice cream

Towards the end of our visit, we made it over to the Going Green exhibition--basically a mini-trade show of green vendors. We said hello to the Solatube guy, who informed us that we could write off a percentage of the cost of a Solatube on our taxes. We're considering getting the kind with a light and a fan for our bathroom. There was also a display for a portable graywater system called Enviro Water Boy, which seems like a convenient way to reuse your bath water to water your plants. It would definitely be faster than scooping it up with an empty milk jug, which is what my mom does.

Below is a picture of another Going Green display, which I am calling The Fanciest Rainwater Collection System Ever. I didn't catch the name of this particular product, but essentially it collects rainwater, filters it, stores it in an underground cistern and then pumps it into a very attractive waterfall. There's also a little spigot so you can use the collected rainwater to water your plants. I didn't get a brochure for this since it's obviously hugely out of our price range. But, it looked really cool.

the fanciest rainwater recycling system ever

One company at the Going Green exhibition did catch my eye: an organic fruit and vegetable delivery service called Farm Fresh to You. They had a promotion for $10 off a sample box, so Dakota and I are going to try it. I'll post more about the produce and the company once we have a chance to eat the fruit and do a bit of research.

All-in-all, I had a fun day at the Los Angeles County Fair. There was a good balance of animal and plant exhibits alongside bizarro fair culture. The fair runs though next weekend if you want to check it out.

rooster photo
Read More 2 comments | Posted by Audrey |
Newer Posts Older Posts Home

GREEN FRIEDA

  • About
      This blog is about a variety of things I'm interested in, including gardening, backyard chickens, crafts, DIY home improvement and resource efficiency. My hope is that it's both informative and fun to read. I hope you like it. If you want to email me, click here.
  • Labels

    • animals (8)
    • baby (7)
    • bathroom (4)
    • cactus (1)
    • canning (1)
    • charities (3)
    • chickens (79)
    • compost (1)
    • crafts (9)
    • energy (8)
    • environment (24)
    • food (61)
    • gardening (137)
    • gifts (7)
    • good girls (10)
    • holiday (6)
    • home improvement (27)
    • insects (2)
    • kids (4)
    • kitchen (16)
    • native plants (16)
    • orchard (6)
    • pests (14)
    • politics (6)
    • reuse (16)
    • tips (10)
    • tree (1)
    • waste (2)
    • water (9)
    • wedding (2)

    Blog Archive

    • ►  2014 (5)
      • ►  June (2)
      • ►  May (1)
      • ►  April (2)
    • ►  2013 (20)
      • ►  November (3)
      • ►  June (6)
      • ►  March (5)
      • ►  February (3)
      • ►  January (3)
    • ►  2012 (13)
      • ►  September (1)
      • ►  August (2)
      • ►  July (2)
      • ►  May (1)
      • ►  April (2)
      • ►  February (1)
      • ►  January (4)
    • ►  2011 (33)
      • ►  December (3)
      • ►  November (5)
      • ►  September (1)
      • ►  August (3)
      • ►  June (7)
      • ►  May (2)
      • ►  April (4)
      • ►  March (1)
      • ►  February (4)
      • ►  January (3)
    • ►  2010 (34)
      • ►  November (3)
      • ►  October (2)
      • ►  September (4)
      • ►  August (5)
      • ►  July (3)
      • ►  June (3)
      • ►  May (1)
      • ►  April (6)
      • ►  March (5)
      • ►  January (2)
    • ▼  2009 (94)
      • ▼  December (6)
        • Winter Planting for Spring Wildflowers
        • Happy Holidays
        • Hopes for Artichokes
        • Seed Bombs
        • Christmas Crafting
        • In Bloom
      • ►  November (8)
        • Winter Garden Progress
        • Vintage Sink Bargain
        • Delicious Vegetarian Enchiladas
        • Terror in the Coop
        • Bulb Forcing Fun
        • Peppers Prefer Fall
        • Homemade Granola
        • Farm Fresh Delivery
      • ►  October (6)
        • House Plant Sitter
        • Sewing Stash Score
        • Fall Planting
        • First Time Pickling: Peaches, Peppers & Beets
        • Weird White Bug Things
        • Potato Failure, Worm Surprise
      • ►  September (6)
        • LA County Fair: Chickens, Churros and Cool Stuff
      • ►  August (9)
      • ►  July (13)
      • ►  June (12)
      • ►  May (12)
      • ►  April (3)
      • ►  March (8)
      • ►  February (6)
      • ►  January (5)
    • ►  2008 (54)
      • ►  December (4)
      • ►  November (3)
      • ►  October (3)
      • ►  September (3)
      • ►  August (7)
      • ►  July (6)
      • ►  June (9)
      • ►  May (2)
      • ►  April (2)
      • ►  March (4)
      • ►  February (7)
      • ►  January (4)
    • ►  2007 (16)
      • ►  December (3)
      • ►  November (1)
      • ►  October (3)
      • ►  August (3)
      • ►  May (2)
      • ►  April (2)
      • ►  February (1)
      • ►  January (1)
    • ►  2006 (28)
      • ►  November (1)
      • ►  October (3)
      • ►  August (3)
      • ►  July (1)
      • ►  June (4)
      • ►  May (5)
      • ►  April (1)
      • ►  March (5)
      • ►  February (2)
      • ►  January (3)
    • ►  2005 (10)
      • ►  December (1)
      • ►  November (1)
      • ►  October (2)
      • ►  September (1)
      • ►  July (1)
      • ►  June (4)

    Related Blogs

    • Homegrown Evolution
      Framed
      3 years ago
    • DigginFood
      How to gain popularity through buying Twitter followers
      8 years ago
    • The Tangled Nest
      The First Egg: Light, Life, and Gratitude
      9 years ago
    • Monkey Lobster
      Summer Slide Show
      10 years ago
    • Rambling LA
      LOSING YOUR LAWN
      11 years ago
    • Rancho Garbanzo
      3 1/2 years later - Our Wedding Photobook
      11 years ago
    • Urban Chickens
      Infographic time: the chicken coop checklist
      12 years ago
    • Ramshackle Solid
      Hoop and Pole
      12 years ago
    • Our Yellow House
      Still Knitting
      12 years ago
    Show 5 Show All
    Follow GreenFrieda on Twitter

    Links

    • Backyard Chickens
    • Tree People
    • Seed Savers Exchange
    • L.A. Works
    • to do something
    • Mohair Gravy

    Followers

  • Search


    • Home
    • Posts RSS
    • Comments RSS
    • Edit

    © Copyright Green Frieda. All rights reserved.
    Designed by FTL Wordpress Themes | Bloggerized by FalconHive.com
    brought to you by Smashing Magazine

    Back to Top