• Home
  • Posts RSS
  • Comments RSS
  • Edit
Blue Orange Green Pink Purple

featured post

Homemade Granola

Recently I tried making my own granola. It ended up being quite simple, and I recommend trying it yourself. Dakota and I both find most store-bought granolas way too sweet and full of "extra" flavors. So, my goal was to make granola that was simple, healthy and tasty.

Read More
Showing posts with label reuse. Show all posts

Cloth Diaper Washing

I've been cloth diapering my son for a little over a year now, so I thought this might be a good time to share  my diaper-washing method, in case other prospective parents stumble across this blog. First, let me say that, despite what you might have heard, cloth diapering is not difficult or expensive. Whenever I tell people my son wears cloth, they say, "Wow." Honestly, they shouldn't be impressed. Now, if I was doing EC, then they should say, "Wow," because that takes some serious commitment. But cloth diapering is no big deal.

Anyway, enough proselytizing. As I mentioned in a previous post, my son wears cloth pre-folds with waterproof covers. It seems like everyone has their own washing method, but here's what's kept my son's diapers clean and sturdy for the past year:

Note: I have a front-loading, high-efficiency washer.

Regular wash
1) Put dirty diapers, flannel wipes, covers and diaper pail liner into washer and run a "rinse/spin" cycle on COLD, no detergent. This is basically just to rinse off the, ahem, debris and keep stains from setting.
2) Add roughly 2 Tbl Sp of Planet 2x Ultra Laundry Detergent* and 1/2 cup of vinegar to the fabric softener section. Run the "heavy duty" cycle on HOT.
3) OPTIONAL: If the diapers are particularly dirty or stinky, I sometimes run an additional "quick wash" cycle on HOT with just Borax
4) Remove from washer. Hang cloth pre-folds and wipes on the clothesline, preferably in the bright sun. Hang the covers and diaper pail liner on an indoor line or drying rack, because the sun can degrade the plastic.
5) OPTIONAL: After the pre-folds are dry, put them in the drier for 10 mins just to soften them up a bit.

Stink removal
- For stinky pre-folds, I usually fill up a big bucket with cold water and about 2 cups of Biokleen Bac-Out, and soak the pre-folds in this mixture overnight.
- For stinky covers, Thirsties recommends that you run a wash with a small amount of chlorine-free bleach powder, like OXO-Brite. This method has worked for me.

And that's it! Honestly, if you use pre-folds, you can purchase enough so you only have to wash diapers every 3 days or so. Dakota and I both have full-time jobs, and don't find diaper-washing to be a major time suck.

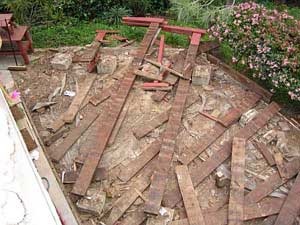
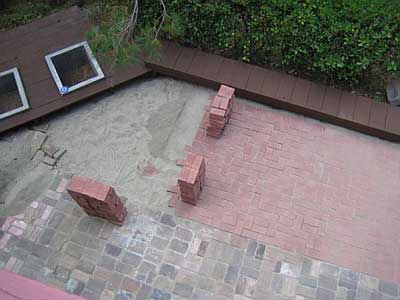
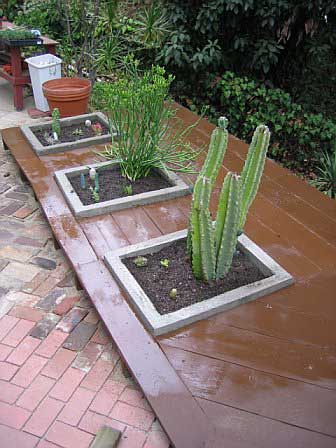
And now for a baby photo, just because. This is my son watching his dad build the deck.

IMG_8706

* Planet is one of the recommended detergents on this cloth diaper detergent chart, and it's both cheap and wildly available.
Read More 2 comments | Posted by Audrey |

Reuseable Lunch

reuseable sandwich bags
One of the many ways Dakota and I attempt to be both frugal and healthy is by packing our own lunches as often as possible. I think Dakota manages it more often than I, although my job involves going out to lunch several times a week, so I have an excuse. Several years ago, I came across some reusable sandwich bags and thought they were a great idea. I purchased some, and we've used them instead of disposable plastic sacks ever since.

The first variety I picked up, which we still have, are called Wrap-n-Mats. They're basically a flat rectangle with the corners cut off. One side is cloth and they other side is plastic. You place your sandwich in the center, fold the mat around it and fasten with a strip of Velcro. They work quite well, and, when you open them up, they make a nice little surface to eat off at your desk.

Recently, I picked up two other varieties of reusable sandwich bags from a website I like called reuseit.com. One was their own store brand of bag, and the other is made by LunchSkins. They're both pouch-style bags, which means they work for sandwiches, but you can also fill them with crackers or cookies or carrots.

I don't have a strong preference for any particular type of reusable sandwich bag, but I do recommend them as a great way to stop using disposables. They're not cheap, but if you use them several times a week for years, then I think they'll cost a lot less than disposable bags. Or, if you're crafty, make them yourself with some oilcloth or other water-resistant material. I've seen some really cute snack bags on various craft sites that I'll probably make for my son when he starts taking his lunch to school. All you need is a little bit of cloth and some Velcro.

Another thing I'd like to do is start taking my own containers to take-out places. We don't get take-out food that often, but when we do I always feel bad about how much plastic and--horrors!--Styrofoam is involved in packaging the food.

In case anyone is wondering, I am not getting paid for talking about these products or the website. I sometimes get those offers, but haven't taken anyone up on them so far. If I ever do get a free product, I will be sure to mention that fact in the text of the post.
Read More 2 comments | Posted by Audrey |

Cloth Prefolds: So Many Choices!

As I've mentioned before, I've been cloth diapering my son since he came home from the hospital. My last post about cloth diapers was two months ago, and I'm happy to say that I still find the process pretty easy, and my son is still comfortable and diaper-rash free.

When I was researching cloth diaper options, I decided on prefolds pretty quicky. But then, I discovered there are many, many different types of prefolds! Some common choices are Chinese prefolds, Indian prefolds, organic cotton, hemp, bleached and unbleached. Then, there are different thicknesses. Typical diaper thicknesses are 4x6x4 or 4x8x4, meaning that each side of the prefold is has four layers and the strip in the middle has six or eight layers, respectively. After discovering all these different types of prefolds, I was a bit overwhelmed. So, I basically just registered for a few different kinds in the "infant" size so I could see which ones I liked best.

Let me just say, to any soon-to-be parent reading this, all of the prefold diapers work--even the much-maligned regular old Gerber diapers. But, I definitely found some diapers I liked better than others, so I though I'd share my thoughts.

Different brands and types of diapers have slightly different shapes, particularly after washing. Pictured below with the purple edge are Diaper Rite Prefolds, size small, and Bummis Organic Prefolds, also size small. As you can see, the Diaper Rite diapers are significantly wider than the Bummis, which are slightly longer. Both look kind of bumpy, which is what they should look like after washing. Diapers come unwashed and will shrink and become more absorbent after a thorough pre-washing in hot water.

cloth prefolds

Next up is a BabyKicks Hemp Prefold in size small. This one has been washed several times, and you can kind of see how tight the knit is. This diaper is about as wide as the Bummis diaper, but much thinner. That's the big plus of hemp: it's very absorbent but thinner, and therefore less bulky when folded. The downside, in my opinion, is that my hemp diapers got quite rough after a couple of wash/dry cycles. Now, I'm reluctant to put these rough diapers directly against my son's tender nether region--although I do still use them when I'm layering two diapers at night.

IMG_6353.JPG

Not pictured are the Kushies Prefold Diapers, which I also own. These diapers are thinner, 2x4x2, and longer than the other cotton diapers we use. To be honest, they're a bit too long for my needs, but I do use them when I'm layering diapers for nighttime, as mentioned above. I guess I might use them more when my son gets older.

Also shown in the photo above are the two types of reusable flannel wipes we've been using. They both work well and are just thin pieces of unbleached cotton flannel that have been hemmed with a serger or zig-zag stitch. If you have the patience and sewing skills, you could make them yourself. Otherwise, go for the cheapest ones--although I guess the ones done with a serger will likely last a little longer than the zig-zag ones, a few of which have started to lose some hem stitches.

Thus far, my favorite diapers are the Diaper Rites, which can be found online at Diaper Junction. I like the extra width, because, at the moment, my son is chubby for his age, but of average height. If you want to Snappi your diapers before you cover them, then the Diaper Rites are a good choice because you can get them all the way around fat baby thighs. If you plan to just close up the diapers inside your diaper covers, then either one will work for you--as will the even cheaper and just as effective Chinese Prefolds. So, if you don't plan to Snappi and are on a budget, go with Chinese Prefolds. At less than $2 a diaper, they're pretty cost-effective. Diaper Rites are slightly more expensive, but quite high-quality, so if you're planning to use diapers for more than one kid, they might be a good bet.

This is by no means a complete review of cloth prefolds, but I wanted to share my experience with the hope that it will help another mother or father out there trying to sift through all the options. Feel free to leave your own thoughts on cloth diapering in the comments.

Coming soon... cloth diaper washing! (Thrilling, I know.)
Read More 2 comments | Posted by Audrey |

Vintage Sink Bargain

Now that we're almost done with the kitchen remodel (a year later), Dakota and I have started planning the next step in our DIY effort to make our home nicer, and, more importantly, more space-efficient. Phase 2 involves remodeling the bathroom.

Our bathroom is in decent shape at the moment, if you ignore the cracked tile floor, mildewed grout, lack of knobs for the bathtub and damp, unventilated shower. We do ignore these things, but we don't particularly like them. Plus, it seems crazy to have a separate bathtub and shower stall in a 945 ft2 house.

The current plan is to take out the shower and turn it into a closet that will open onto the hall. This will provide a much-needed place to store the vacuum, mop, ironing board and other bulky items that are currently propped in various corners. We're also going to replace the floor, make new cabinets, install a new countertop and convert the tub to a tub/shower combo. AND, we're getting a new sink. Well, new to us.

In fact, we already got the sink. Our design plan is to go with the vintage/modern look that worked so well in the kitchen. So, we have been on the lookout for a nice vintage sink to go with the tub we've already got. For the last few months, we've been poking around architectural salvage stores, including Pasadena Architectural Salvage and even Hippo Hardware in Portland. Both places had nice old sinks, priced between $125 and $175. That's an okay price, but not great.

A couple of weeks ago, we decided to stop by the Habitat for Humanity Re-Store in Pasadena, just to see what they had available. When we pulled up, I was delighted to find a huge selection of vintage sinks stacked in the parking lot. They had about 20 or 30 different models of various ages and conditions. After poking around for a while, we picked our favorite: a white, porcelain sink that kind of matches our tub. The price tag for this lovely vintage sink? $15!

vintage sink, $15!

Not only do we get the environmental benefit of buying a salvaged product instead of new, but the sink was a crazy bargain. And, the money we did pay goes to Habitat for Humanity, a great organization. It's a win-win-win. I am thrilled.

Hopefully, our luck will hold out, and we'll find some other bargains for the rest of the bathroom project. Right now, we're thinking of using cork for the floor and Dakota's going to make concrete countertops. We're still contemplating the material for the tub/shower walls, although we might go with Corian, because Dakota is becoming a certified fabricator. Plus, no tile means no scrubbing grout.

The bathroom remodel won't begin until the kitchen is completely done, which will probably be another month or so. But, hopefully, it'll go relatively quickly. It's a smaller room and the plan is less ambitious than a floor to ceiling kitchen remodel. I'll let you know when the work begins.
Read More 1 Comment | Posted by Audrey |

Sewing Stash Score

When I was visiting my family in Texas a couple of weeks ago, I had the opportunity to sort through trunks and bins filled with fabric and sewing notions that belonged to my grandmother. She died in 2000, but her stash was so massive--and awesome--that we're still finding new treasures 9 years later.

My grandmother was a wonderful seamstress and needleworker. I have a wall hanging of embroidered sandpipers she made sitting over the fireplace in our living room and a personalized quilt with squares hand-embroidered by my grandmother and her mother tucked safely in my linen closet. Not only was she skilled, but my grandmother had good taste, in a 1960s & 70s way. Jonthan Adler would salivate over her needlepoint pillows. I just wish I had learned more from her when I had the chance. Instead, I am frequently inspired by her craftmanship. I still have baby bags she made for me 32 years ago, with not a single loose stitch!

Always the bargain-hunter, my grandmother collected a massive stash of fabric, embroidered linens, thread and sewing notions over her lifetime. My mother, my sister and I have been giving it away, selling it and using it ourselves for the last 9 years, and we've still got so much left. This time, I brought home rolls and rolls of decorative ribbons, elastic and seam binding. Plus, my sister helped me find some pre-embroidered panels, some made by my grandmother and some she purchased at antique and vintage stores, ready to be made into pillows or bags. My sister also threw in some vintage fabric she found at various thrift stores.

I arrived back in LA with a bag stuffed full of cool fabrics and inspiring supplies. Now I just have to figure out how to use it all.
Read More 2 comments | Posted by Audrey |

Cow Pot Verdict

tomato in poop pot, ready to be planted

Back in March, I wrote about a new product I was trying out, Cow Pots. These seed-starting pots are made with cow manure from dairy farms and are marketed as an environmentally friendly and biodegradable alternative to plastic pots. Now that I've put them to work growing some summer seedlings, I wanted to write a quick review.

Overall, I was happy with my Cow Pot experience. They were easy to use, odor-free and didn't fall apart with frequent watering. As I suspected, the soil in these pots dried out more quickly than the soil in my plastic pots. Once I got used to the Cow Pots, though, I was able to keep the soil evenly moist most of the time.

Seeds seemed to sprout more slowly in my Cow Pots than in the plastic pots. I'm guessing that may have something to do with how hot the soil gets in each pot. Some seeds like very warm soil to germinate, and I suspect that the black plastic pots heat up faster than Cow Pots. Once the seeds sprouted, though, they were quite happy in the poop pots. I'm not sure if they seemed heartier than the plastic pot plants, but they did grow healthy and strong.

Planting the Cow Pots was great, since you just place them directly in the ground. I didn't have to worry about disturbing roots or transplant shock. All the in-ground Cow Pot plants currently seem very happy and healthy.

An unforeseen benefit of the Cow Pots came when skunks staged a late-night raid on some new plantings. When I came out in the morning, there were big holes all over my garden bed, but most of the seedlings were still inside their Cow Pots. The manure pot had protected the new plantings from damage, where an unprotected seedling would have been ripped from its roots and destroyed. After I replanted the seedlings, they grew as if the skunk incident never happened. For someone like me with a serious skunk problem, this is a great bonus feature of Cow Pots.

So, I plan to use Cow Pots in the future, and I'd recommend them to others. They work well and their environmentally-friendly mission is appealing.
Read More 3 comments | Posted by Audrey |

Countertops Sweet Countertops

This month has been a productive and exciting one in our ongoing kitchen project. The most exciting improvement, so far, has been the addition of much-needed countertops.

A couple of weeks ago, Dakota brought home the lovely, hand-made butcher block top pictured below. It's smooth and square and perfectly sealed, and I love it. Plus, the butcher block is a re-use, so the materials cost nothing. Dakota cut and glued together strips from a hard maple tool* left over from a custom table he made for a designer client.

butcher block island top

The butcher block top sits on our kitchen island. It sticks out farther on one side, so that we can pull up a stool and eat, or just hang out in the kitchen while someone else is cooking.

Last weekend, Dakota cut the Richlite counter tops that we're using in the rest of the kitchen. Richlite is a sustainable building material that looks and works in a way similar to slate. Here's the description from the company website:


Richlite® is primarily paper treated with phenolic resin and baked to create a solid sheet. During the production cycle the layers of paper are gradually crossed-linked with each other to create solid, durable sheets... Richlite® paper comes from pulp that is derived from trees, which is produced from paper purchased from FSC-Certified sources and/or recycled paper.


In addition, if you're concerned about such things, Richlite doesn't off-gas and they create no hazardous waste during the production process. It comes in a variety of nice colors, it's scratch and stain resistant, and you can put hot pots on Richlite without damaging it. In the shot below, the countertop hasn't been sealed yet. In it's final form, it will be a bit shinier.

richlite around sink

Dakota took great care in cutting our one sheet of Richlite because, besides being green, it's kind of expensive. Although, I believe it's pretty comparable, price-wise, with many other common countertop materials. My parents actually gave me this particular sheet of black Richlite for my 30th birthday. Great gift, huh?

richlite countertop

Tomorrow, the painted cabinets are getting a layer of sealant. Once that's done, we'll be able to attach the countertops permanently. I am pretty psyched to have them installed. It's been okay working with cutting boards on top of raw plywood cabinet tops, but having the real surfaces will make cooking so much nicer. And, our green kitchen will be that much closer to completion.

* A "tool" in this context is a sort of mold around which a metal table top was spun and bent.
Read More 3 comments | Posted by Audrey |

Insulation Installation

Nothing says "party" on a Saturday night like installing denim insulation, and that's exactly what Dakota and I did last weekend. Jealous? Thought so. Actually, it was kind of fun (in a way) and made us feel like some actual progress was being made on our slow and steady kitchen remodel.

As I mentioned in a previous post, I was able to find a local supplier of UltraTouch Natural Cotton Fiber Insulation in the Los Angeles area. So, last Saturday night, we ripped open the roll of insulation and laid it out on the floor to fluff up. It comes in long strips and basically looks like a long rectangle of dryer lint.

Here's Nigel demonstrating how safe and non-toxic UltraTouch is.

Nigel models the insulation

The UltraTouch website uses babies and small children to make this same point, but I think Nigel should become their new spokesmodel. I mean, look how excited he is to be resting on layers of earth-friendly insulation.

Nigel also decided to help us install the insulation. Here he is weighing down a piece while Dakota cuts it to fit between some studs.

Nigel helps install insulation

I had read that denim insulation can be difficult to cut, but we just used an old saw and a box cutter and did fine. I guess our edges weren't particularly smooth, but since the insulation will be hidden inside the walls, I'm not too worried about it. Overall, installing the UltraTouch was pretty darn easy. It took us about an hour and was so foolproof that I was able to help.

installing

Up to now, the kitchen work has either involved heavy demolition skills or woodworking skills, both of which I lack. But I think we may be heading into a stage in which I might actually be able to do more than lend moral support and research skills. I'm glad, because Dakota has been working exceptionally hard.

Here's one kitchen wall, nicely insulated.

insulation in the walls

Since the kitchen is on a back, unshaded corner of the house, it really gets blasted by the sun in the summer. The addition of the insulation, plus ceiling fans and energy-efficient windows will hopefully make a big difference when the weather gets hot again.
Read More 4 comments | Posted by Audrey |

Oh, it's on!

The kitchen remodel has begun in earnest, starting last weekend when the demolition began.

But first, here are some "before" shots. Technically, they don't give the complete "before" picture, because we stretched out some of the kitchen remodel prep over the past, oh, three years*.

In these shots, you can see we've removed all the cabinet fronts. That's because Dakota will be milling down the oak doors and turning them into hardwood flooring. This was an exceptional flash of genius, in my opinion. Not only does it embrace the all-important green principle of reuse, but it also saves us lots of money.

before shot

Here's the wall we're taking out. Those are temporary shelves and counter tops next to the fridge. A couple of years ago, we removed out the massive, space-wasting floor-to-ceiling cabinets that used to be there. We've been using the current set-up ever since. It's been perfectly functional, but, obviously, not ideal.

before

So, that's the before(ish). On to the after.

Last Saturday, our electrician neighbor came over and moved the wires out of the kitchen walls so Dakota didn't knock out all the power (or, you know, electrocute himself) when he started busting up the place. Dakota and our very nice neighbor usually pay each other in trade, woodworking for electrical. So, it shouldn't cost us too much to rewire the whole kitchen. And, we're finally rid of our old glass fuses. Hurrah.

IMG_2790.JPG

Don't you just love that old wallpaper? To be honest, I do kind of dig it. But, I wasn't sorry to see it go on Sunday when Dakota set to work ripping out the wall. Here he is starting the demolition, and wearing his all-important dust mask. The plaster walls give off a lot of dust, and who knows what else is lurking inside those walls.

IMG_2795.JPG

And here's the wall at the end of the weekend.

IMG_2802.JPG

This is the view from the dining room side of the wall. Once this wall is completely out--by the end of this weekend, hopefully--the dining room and kitchen will become one, big space. No more skinny, annoying kitchen!

If you're interested, I'll have more updates very soon, including some in-depth discussion of our earth-friendly counter tops, paint and wood.

* While it was kind of ridiculous that we spent such a long time discussing, planning and saving for the kitchen remodel before we finally started, it actually ended up being a good thing. Our design is really carefully thought out, Dakota has come up with several excellent ideas for maximizing the space and green materials have become easier to find and less expensive. So, maybe it was a good thing that lived with a partially-demolished kitchen for so long.
Read More 2 comments | Posted by Audrey |

Recycle Your Sneaks

If you:
1) live or work anywhere near Burbank
2) have a lot of old sneakers you can't donate to Goodwill
3) like recycling
I have a tip for you. You can drop off your old sneakers at the Burbank Recycling Center. They collect a big bin of old sneakers and then take them to a Nike Reuse-A-Shoe drop-off point in Santa Monica. Nike takes all the shoes and grinds up parts of them to make sports surfaces like tracks and tennis courts.

I dropped off a bunch of our old sneakers at the Burbank Recycling Center a couple of weeks ago. We actually had a big pile, since Dakota really wears out his sneakers pretty quickly, and, of course, he wears a size 15. So, they'll have a lot of material to recycle of his old shoes.
Read More 0 comments | Posted by Audrey |

The Patio

For a while now, Dakota and I have been working on converting the back yard into a more usable space. Our most recent and biggest project, was demolishing the old, rotting deck and installing a patio. It took several months, and we did it all ourselves. Dakota did the bulk of the work, since he's got the skills and the endurance for these things, but I certainly worked hard as well. We're pretty proud of the final product, completed the first week of October. Here's a short photo time line:

Here's what the old deck looked like on Day 1 of the patio project.


Here I am pulling rotting deck boards up with a crowbar. It's hard. I give Dakota credit for ripping the majority of the boards out on his own. But hey, I did my best.


This is the completely demolished deck/pile of rubble. Dakota cut down some of the bigger, unrotted boards that were supporting the deck for reuse.


After it was all ripped up, we hauled all the old wood that wasn't reusable up to the front of the house and loaded into a truck. Then, it was off to the landfill.

I actually had no idea there was a landfill so close to our house. This was my first landfill experience, and it wasn't nearly as smelly as I expected it to be. I definitely saw a lot of toxic-looking construction material and plastic being dumped all around us, but, overall, they seemed to be doing a decent job of replanting over the piles of trash with native plants and separating out yard waste materials and old appliances from other trash.


This nice pretty pile made up of the bricks that we found underneath the deck once we ripped everything out. Apparently, there was a patio in the backyard before. So, it's not so much that we were making a new patio as we were "restoring" the old one. Sort of. Dakota salvaged as many of the bricks as he could by carefully chipping away at the crumbling mortar between them. Then he took a sledgehammer to the cinder block and concrete blocks that were holding up the deck. I decided to let him handle that part on his own. I'm not much of a sledgehammer person.

Here are the molded cement planters Dakota made using the cement mixer he acquired off craigslist. These are for the special cactus section of the patio.

Unfortunately, we didn't end up having enough of the salvaged bricks to cover the entire patio surface area. We laid down all the old bricks we could (they're the gray ones towards the bottom of the photo) and then bought some inexpensive concrete brick from Home Depot to cover the rest of the patio. To fill the spaces between the bricks, we swept sand across the top of the patio and let it sink into the cracks. We'll probably have to add more sand after the first big rain, but, over time, it should get pretty tightly packed and stay put.

The new brown deck was made by Dakota from the boards he salvaged from the old deck. (I painted it.) The new deck is a long, low "bench" on the downhill edge of the patio and a wider section surrounding the planters.


Here are the completed planters and their cacti.


Believe it or not, I don't have one big, pretty beauty shot of the completed patio. We were racing to finish it before a party we had on October 7, and I guess I never managed to document the final product. I'll take one soon and post it.


So, that's the saga of the deck to patio transformation. It was a lot of hard work, but completely worth it. I'm happy we were able to use salvaged materials for the deck and half of the paving--especially since I felt pretty bad dumping all that old, crappy lumber in the landfill.

Read More 0 comments | Posted by Audrey |

From Disposable to Reusable


A few weeks ago, I did something at work that I'm kind of psyched about. It was small, but I like to think that every little bit helps.

I have been bringing my own reusable water bottle to work for a while, and, in a meeting last month, the issue of bottled water came up. I jumped at the opportunity to make a few comments about how I am concerned about all the disposable bottles of water we go through at the studio. Then, I offered to get everyone non-disposable, refillable water bottles. To my delight, almost everyone said they were interested.

A couple of days later, I brought in a variety of hard plastic water bottles, and my coworkers picked the ones they wanted. Now, they all use them and refill them throughout the day. It's been several weeks and it seems like everyone is still using them. A couple of my coworkers have even commented on how much they like their reusable bottles. It made me happy that they were all so open to change.

Now, if I can just get everyone at the animation studio to switch. I am considering putting up a flier.
Read More 4 comments | Posted by Audrey |

Speaking of plastic bags


Dakota had this good idea about how to reuse those inflated plastic bags that are used to fill shipping boxes these days. We use them as poop bags to pick up after Nigel the dog. Basically, you can just cut off one end of the bag to deflate it, and then it's a nice, small bag for picking up poop. I guess this wouldn't work if you have a large dog, but they are the perfect size for our needs.

I went on the website for the inflatable shipping bag manufacturer, and they claim you can recycle the bags as #4 plastic, but I have some doubts about that.

When we're not recycling shipping bags or vegetable bags to pick up Nigel's "business," I use this brand called Oops I Pooped. They are biodegradeable dog poop bags. They work well and come in a nice compact pack of 80 or so bags. I'm not a big fan of the name, but what can I do?
Read More 1 Comment | Posted by Audrey |

Knitting plus recycling

Lately, I have been completely obsessed with knitting, in part because of this really great message board site called craftster. Today, I saw this really exciting post. Someone posted a bag that she had knitted using plastic bags. I did a little poking around and found a tutorial on how to turn plastic bags into "yarn" and now I'm really excited. This seems like such a great way to reuse the plastic bags that inevitably pile up in our house. Now, I can make a bag to take to the store or beach or something. I can't wait to try it out. I will definitely post an update on this once I start trying.

I also found some info about knitting with old t-shirts, and I think I will do that too. Someone said t-shirt yarn is good for potholders, so maybe I'll try that first.

More to come on this...
Read More 0 comments | Posted by Audrey |

Packing Up Gifts

I've been mailing off a bunch of gifts this week, so I thought I'd re-post this section from my EAPP newsletter from last December about wrapping and packing...

A great way to recycle and save money around the holidays is to make your own wrapping paper and packing materials. Paper grocery bags turned inside out and decorated can make a nice wrapping, and so can newspaper, comics, magazine pages, old maps and fabrics. You can also turn your old Christmas cards into gift tags by cutting off the back flap with the message.

When wrapping up boxes of gifts to mail, there’s no need to buy bubble wrap or (god forbid) Styrofoam peanuts. Instead, protect your gifts with crumpled newspaper, plastic shopping bags, old socks (washed, of course) or anything else soft and squishy that you’d got lying around the house. Be sure to reuse your cardboard boxes, too. Just pull off or scratch out the old mailing labels and they’re good as new.

If you receive a gift that’s been packed with those annoying plastic peanuts that get all over the place, take note that you can RECYCLE these items. Don’t put them in your bin. Instead, pack them into a plastic bag and take them by your local packing/shipping/moving store. They will usually take your peanuts and use them again, although you might want to give them a call before you stop by. If the peanuts are kind of fluffy and look like cheese puffs, then they are probably the new kind that are made of vegetable starch (you can test by seeing if they dissolve in water). These peanuts can be put in your compost bin or regular trash.
Read More 0 comments | Posted by Audrey |

Green and Fashionable


This cool bag I ordered arrived in the mail this week. It's really modern and colorful, and it's made from recycled products. I think I am going to order another to give to a friend for her birthday. I got it from Ecoist Bags, and I heard about it on one of Dakota's favorite blogs Treehugger. Ecoist bags are made from recycled chip bags, candy wrappers and soft drink labels. The one I purchased seems to be very well-made, and, as I mentioned, it looks really cool. Of course, because they are hand made, they aren't the cheapest. A large clutch is $95. But, I think that it's important to support green businesses, and Ecoist Bags are certainly way cheaper than the designer handbags many people in LA carry. Plus, each one is unique. Ecoist's smaller bags are more affordable, in the $30-40 range. I think my friend will really dig one.
Read More 2 comments | Posted by Audrey |
Older Posts Home

GREEN FRIEDA

  • About
      This blog is about a variety of things I'm interested in, including gardening, backyard chickens, crafts, DIY home improvement and resource efficiency. My hope is that it's both informative and fun to read. I hope you like it. If you want to email me, click here.
  • Labels

    • animals (8)
    • baby (7)
    • bathroom (4)
    • cactus (1)
    • canning (1)
    • charities (3)
    • chickens (79)
    • compost (1)
    • crafts (9)
    • energy (8)
    • environment (24)
    • food (61)
    • gardening (137)
    • gifts (7)
    • good girls (10)
    • holiday (6)
    • home improvement (27)
    • insects (2)
    • kids (4)
    • kitchen (16)
    • native plants (16)
    • orchard (6)
    • pests (14)
    • politics (6)
    • reuse (16)
    • tips (10)
    • tree (1)
    • waste (2)
    • water (9)
    • wedding (2)

    Blog Archive

    • ▼  2014 (5)
      • ▼  June (2)
        • Chicken Landscaping
        • Poor Baldy
      • ►  May (1)
      • ►  April (2)
    • ►  2013 (20)
      • ►  November (3)
      • ►  June (6)
      • ►  March (5)
      • ►  February (3)
      • ►  January (3)
    • ►  2012 (13)
      • ►  September (1)
      • ►  August (2)
      • ►  July (2)
      • ►  May (1)
      • ►  April (2)
      • ►  February (1)
      • ►  January (4)
    • ►  2011 (33)
      • ►  December (3)
      • ►  November (5)
      • ►  September (1)
      • ►  August (3)
      • ►  June (7)
      • ►  May (2)
      • ►  April (4)
      • ►  March (1)
      • ►  February (4)
      • ►  January (3)
    • ►  2010 (34)
      • ►  November (3)
      • ►  October (2)
      • ►  September (4)
      • ►  August (5)
      • ►  July (3)
      • ►  June (3)
      • ►  May (1)
      • ►  April (6)
      • ►  March (5)
      • ►  January (2)
    • ►  2009 (94)
      • ►  December (6)
      • ►  November (8)
      • ►  October (6)
      • ►  September (6)
      • ►  August (9)
      • ►  July (13)
      • ►  June (12)
      • ►  May (12)
      • ►  April (3)
      • ►  March (8)
      • ►  February (6)
      • ►  January (5)
    • ►  2008 (54)
      • ►  December (4)
      • ►  November (3)
      • ►  October (3)
      • ►  September (3)
      • ►  August (7)
      • ►  July (6)
      • ►  June (9)
      • ►  May (2)
      • ►  April (2)
      • ►  March (4)
      • ►  February (7)
      • ►  January (4)
    • ►  2007 (16)
      • ►  December (3)
      • ►  November (1)
      • ►  October (3)
      • ►  August (3)
      • ►  May (2)
      • ►  April (2)
      • ►  February (1)
      • ►  January (1)
    • ►  2006 (28)
      • ►  November (1)
      • ►  October (3)
      • ►  August (3)
      • ►  July (1)
      • ►  June (4)
      • ►  May (5)
      • ►  April (1)
      • ►  March (5)
      • ►  February (2)
      • ►  January (3)
    • ►  2005 (10)
      • ►  December (1)
      • ►  November (1)
      • ►  October (2)
      • ►  September (1)
      • ►  July (1)
      • ►  June (4)

    Related Blogs

    • Homegrown Evolution
      Framed
      4 years ago
    • DigginFood
      How to gain popularity through buying Twitter followers
      9 years ago
    • The Tangled Nest
      The First Egg: Light, Life, and Gratitude
      10 years ago
    • Monkey Lobster
      Summer Slide Show
      11 years ago
    • Rambling LA
      LOSING YOUR LAWN
      12 years ago
    • Rancho Garbanzo
      3 1/2 years later - Our Wedding Photobook
      12 years ago
    • Urban Chickens
      Infographic time: the chicken coop checklist
      13 years ago
    • Ramshackle Solid
      Hoop and Pole
      13 years ago
    • Our Yellow House
      Still Knitting
      13 years ago
    Show 5 Show All
    Follow GreenFrieda on Twitter

    Links

    • Backyard Chickens
    • Tree People
    • Seed Savers Exchange
    • L.A. Works
    • to do something
    • Mohair Gravy

    Followers

  • Search


    • Home
    • Posts RSS
    • Comments RSS
    • Edit

    © Copyright Green Frieda. All rights reserved.
    Designed by FTL Wordpress Themes | Bloggerized by FalconHive.com
    brought to you by Smashing Magazine

    Back to Top